This document provides comprehensive instructions for the Makita XRU13 Cordless Grass Trimmer, covering its function, usage, and maintenance.
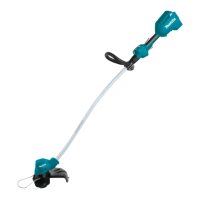
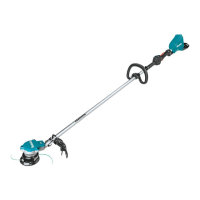
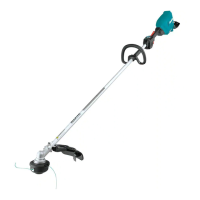
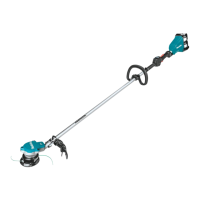
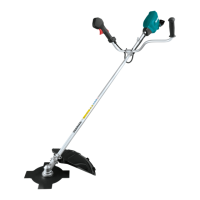
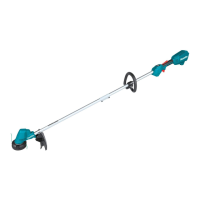
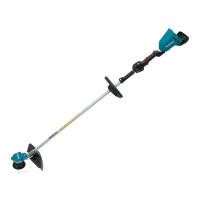
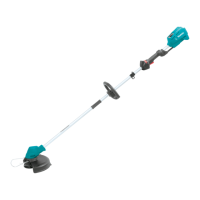
The Makita XRU13 is a cordless string trimmer designed specifically for cutting grass and light weeds. It is not intended for other purposes such as edging or hedge cutting, as this may cause injury. The tool is powered by a D.C. 18V battery cartridge and features a nylon cutting head with a bump & feed mechanism.
Function Description:
The XRU13 operates by rotating a nylon cutting head at high speed to cut grass and light weeds. It offers multiple speed settings, including Auto, High, Medium, and Low, allowing the user to adjust the cutting speed based on the task. The tool is equipped with a lock-off lever and a switch trigger for safe operation. A main power button controls the tool's on/off state and allows for speed adjustment.
A key feature of the XRU13 is its reverse rotation function, which is designed to remove entangled weeds or debris from the cutting head. This is activated by tapping the reverse button when the tool's head is stopped and then pulling the trigger. The tool will operate in reverse for a short period before automatically stopping and returning to regular rotation when restarted.
The tool incorporates a tool/battery protection system that automatically cuts off power to the motor under certain conditions to extend tool and battery life. These conditions include overload, overheating (of either the tool or battery), and overdischarge of the battery. Indicator lamps on the tool provide visual feedback on the battery's remaining capacity and alert the user to protection system activations.
Usage Features:
Before operating the XRU13, users must ensure they are in good physical condition and have read the instruction manual. Personal protective equipment, including work overalls, thick leather gloves, sturdy shoes with non-slip soles, a helmet, safety glasses (or a visor), and adequate noise protection (ear muffs, ear plugs), must be worn to prevent injuries from flying debris, electric shock, and noise.
The tool should always be held with both hands during operation, ensuring a safe footing. A working range of 15 meters (50 ft) should be maintained around the operator, and children or other people/animals should be kept out of this area. The nylon cutting head must be equipped with a guard and should never be operated with damaged or missing guards.
To start the tool, the lock-off lever must be released by grasping the handle, and then the switch trigger pulled. The tool's speed can be adjusted by tapping the main power button, cycling through the available speed levels. The shaft length is adjustable by turning the lock sleeve, allowing users to customize the tool's length for comfortable operation. The handle position can also be adjusted and secured with a bolt and knob.
The XRU13 includes a wire guard that can be inserted into holes on the protector to control the cutting range and reduce the risk of damaging objects in front of the cutting head. When not in use, the wire guard can be lifted to an idle position. The shoulder harness, if supplied, must be used and adjusted according to the user's size to prevent fatigue.
Maintenance Features:
Regular maintenance is crucial for ensuring the safety and longevity of the XRU13. Before performing any adjustments, changing accessories, or cleaning the tool, the battery cartridge must always be removed to prevent accidental start-up.
Key maintenance tasks include:
- Checking the nylon cutting head and protective devices: These should be inspected before each use for damage or wear.
- Cleaning: The tool should be cleaned regularly, ensuring that ventilation openings are kept clear of debris. Gasoline, benzine, thinner, alcohol, or similar substances should never be used for cleaning as they can cause discoloration, deformation, or cracks.
- Replacing the nylon cord: The manual provides detailed instructions for replacing the nylon cord, including the specified diameter (2.0-2.3 mm) and winding direction. Only genuine Makita nylon cord should be used.
- Storing the hex wrench: The hex wrench, used for installing and removing the nylon cutting head, should be stored in its designated slot on the tool to prevent loss.
- Battery care: The battery cartridge should be charged before it is completely discharged and never overcharged. It should be charged at room temperature (10 °C - 40 °C / 50 °F - 104 °F). If not used for a long period, the battery cartridge should be charged every six months.
- Storage: When not in use, the equipment should be stored indoors in a dry location, locked up and out of reach of children.
In case of abnormal operation or damage, users are advised to stop using the tool immediately, remove the battery, and consult a Makita Authorized or Factory Service Center for repairs, using only genuine Makita replacement parts. Troubleshooting guidance is provided in the manual for common issues such as the motor not running, stopping after a short use, not reaching maximum RPM, the cutting tool not rotating, abnormal vibration, or the cutting tool/motor not stopping.