Model: 95P10AR
Two Stage Hydraulic Aviation Floating Auto-Retract Axle Jack
S/N 263 and Up
12/2018 | Rev. 01 Page | 10
7.3 OVERHAUL INSTRUCTIONS (continued)
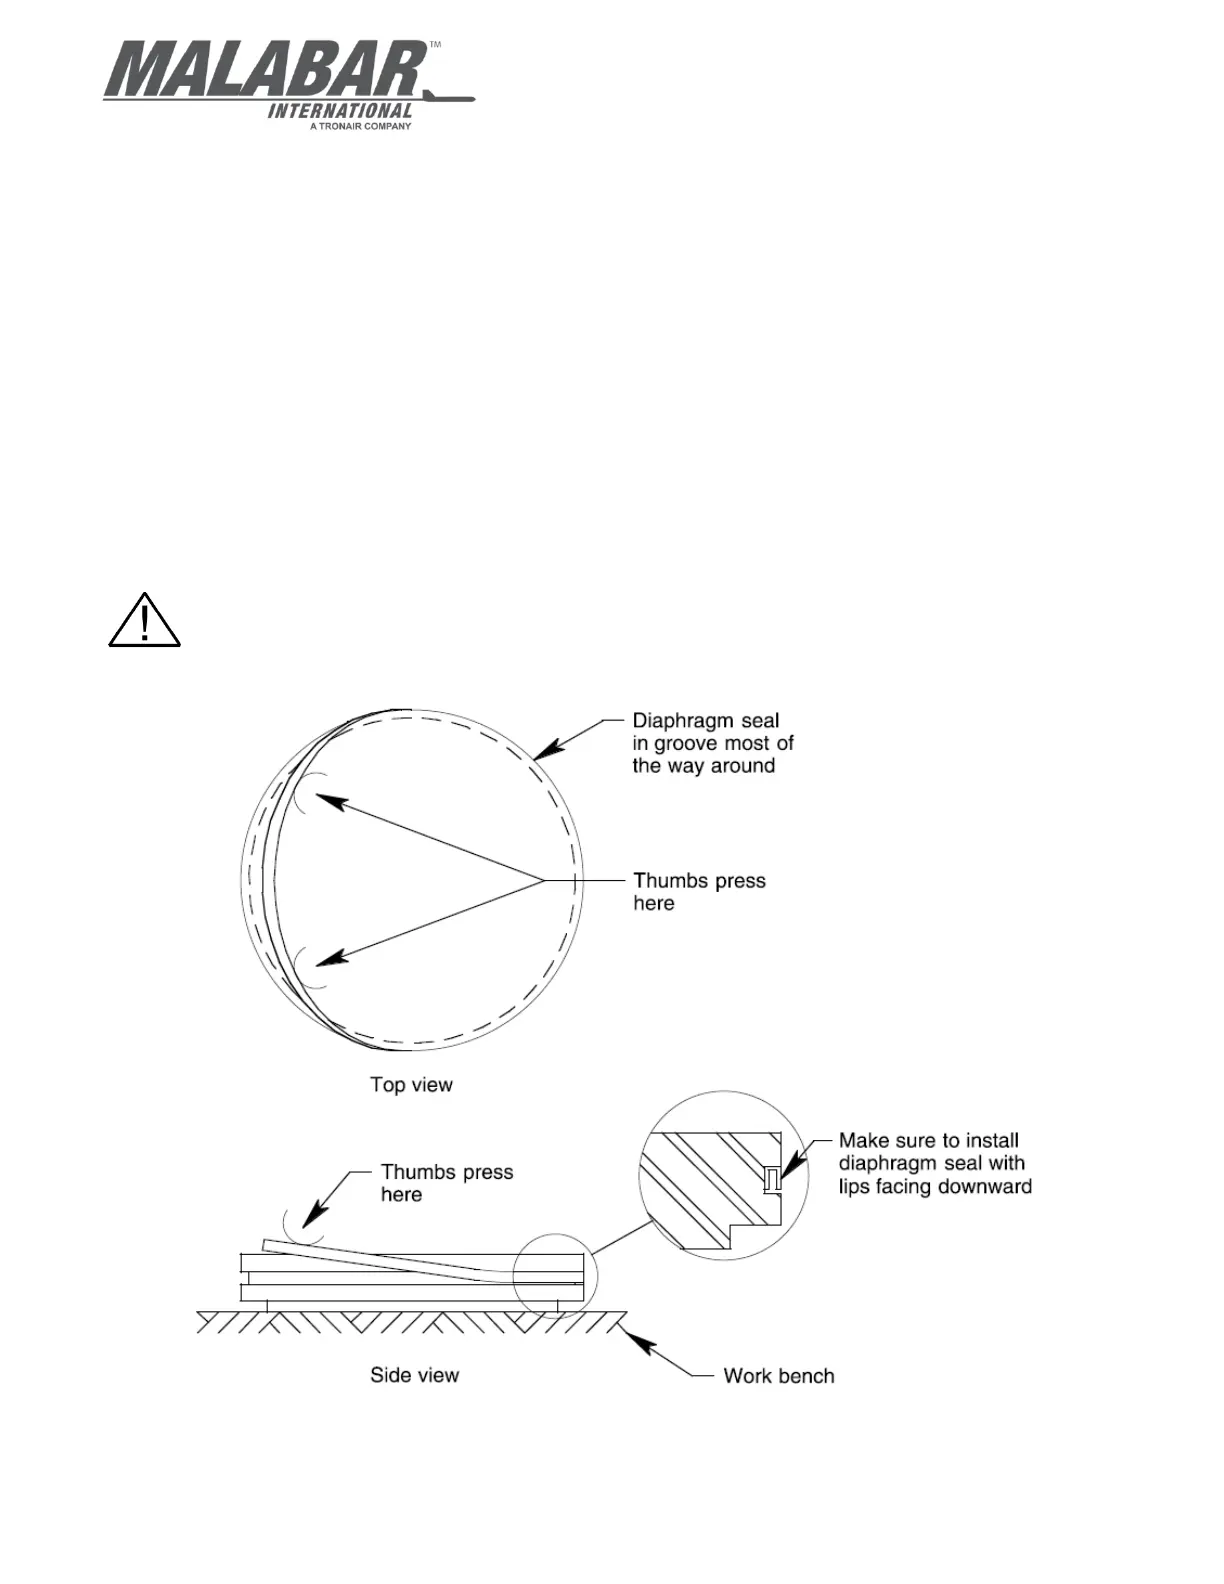
3. Replace all worn or damaged seals. No special tools are required. If replacement of diaphragm seal (P/N 880417) is
necessary, follow the installation diagram. Lubricate all seals and cylinder walls with hydraulic fluid MIL-PRF-5606 or
approved equivalent.
4. When necessary to disassemble the jack:
a. Replace all defective parts.
b. Clean all metal parts with clean solvent and dry with compressed air.
c. Lubricate all threads. Use teflon tape carefully on all pipe threads. Remove excess tape because it can clog valves
and passages.
d. If ball valves, located in valve block, do not seat properly, they may be reseated by tapping the ball into the valve seat
with a brass rod cupped at one end.
e. Should any malfunction occur in the velocity fuse, return to factory for repair or replacement.
7.4 SPECIAL INSTALLATIONS
Procedure to install new diaphragm seal:
1. Clean diaphragm with clean solvent and dry with compressed air. All parts and your hands should be clean for the next
operation.
2. The diaphragm seal is to be installed firmly and quickly as explained in the installation diagram. Oily parts or hands will
make the job more difficult.
CAUTION!
This is a Teflon jacketed seal with a thin stainless steel energizer spring. Handle carefully so you do not
damage the seal lips, jacket and/or spring. The seal must be installed as shown below. Remember that the
lips of the seal are towards the pressure. Recheck before proceeding
Installation diagram for diaphragm seal (P/N 880417)