M&R Companies 440 Medinah Rd. Roselle, IL 60172 USA 15
Tel: +630-858-6101 Fax: +630-858-6134 www.mrprint.com | store.mrprint.com
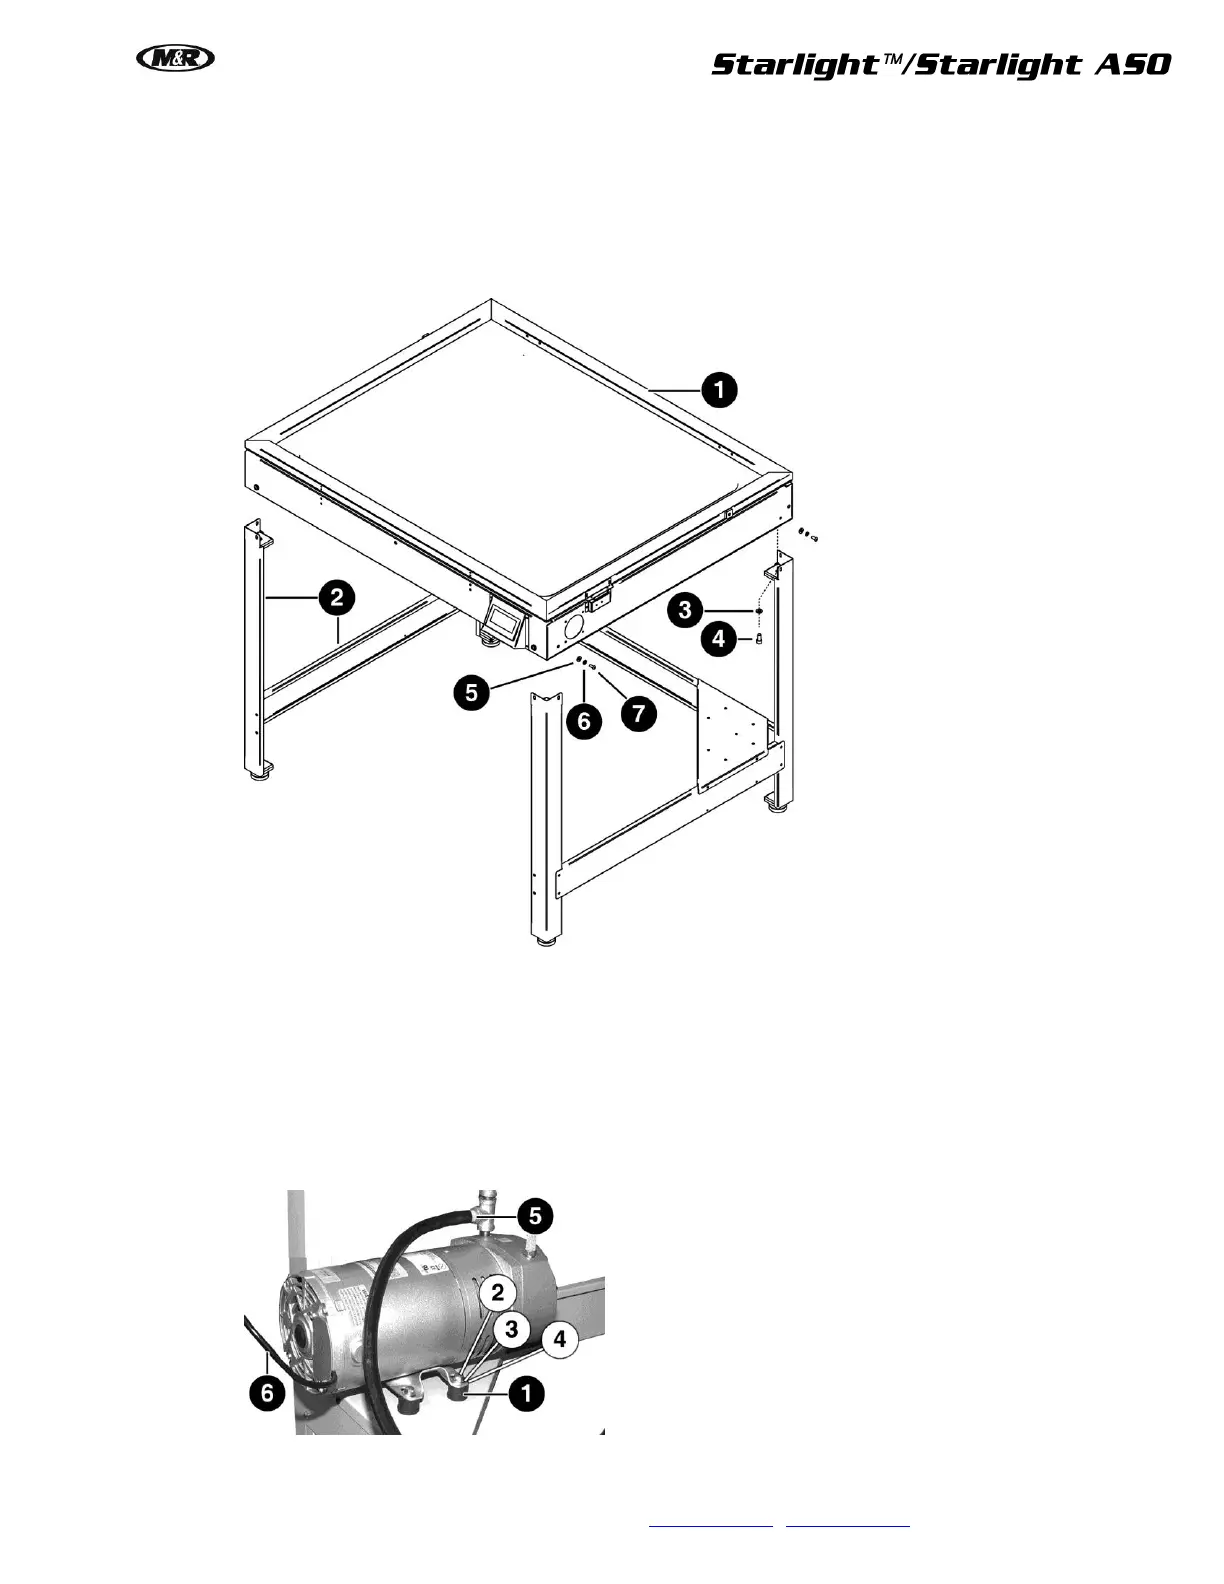
Attach Unit to Base
1. Position base close to where it will be used. Using two persons lift unit (1) and put it on the base (2).
2. Attach unit to base with 3/8" lock washer (3) and 3/8 x 5/8" socket cap screw (4).
3. Attach legs to unit using 1/4" washer (5), 1/4" lock washer (6) and 1/4 x 5/8" button socket cap screw (7).
4. Place a level on unit’s glass surface. Adjust leveling pads to level unit front to back and side to side.
Attach Vacuum Pump to Shelf
1. The hardware to attach the pump to the shelf is found in the small hardware bag.
2. Attach pump to the vibration mounts (1) with 1/4 x 1/2" hex head bolt (2),1/4" lock washer (3) and 1/4"
washer (4). Put the pump vibration mounts (1) through the holes in the shelf and secure to shelf with
1/4" lock nuts provided in the small bag.
3. Connect the vacuum tube to the barbed hose fitting (5) on the vacuum pump. Connect the electric power
cord (6) from the vacuum pump to the receptacle at the rear of the vacuum frame base and connect the
cord from the pressure sensor to the receptacle at the rear of the vacuum frame.
 Loading...