76
Getting Started
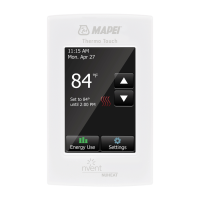
When you power up the Mapeheat Thermo Basic for the first time, you will
be asked to follow a set-up wizard with 4 simple questions.
1. Select Language 2. Confirm Time
3. Confirm Date 4. Select Sensor
Remark: This wizard will only be requested when installing the thermostat for the first time or
when you choose to reset to the factory settings (see Factory reset)
In select Sensor you have the choice between:
•
Factory = sensor delivered in the box of the Mapeheat Thermo Basic
•
Other = in case of retrofitting of a thermostat with a different type of
If you have the sensor reference value table, please use this to set the
correct reference values at +15°C, +20°C, +25°C and +30°C. Otherwise use
the standard table settings by confirming the values with the OK button.
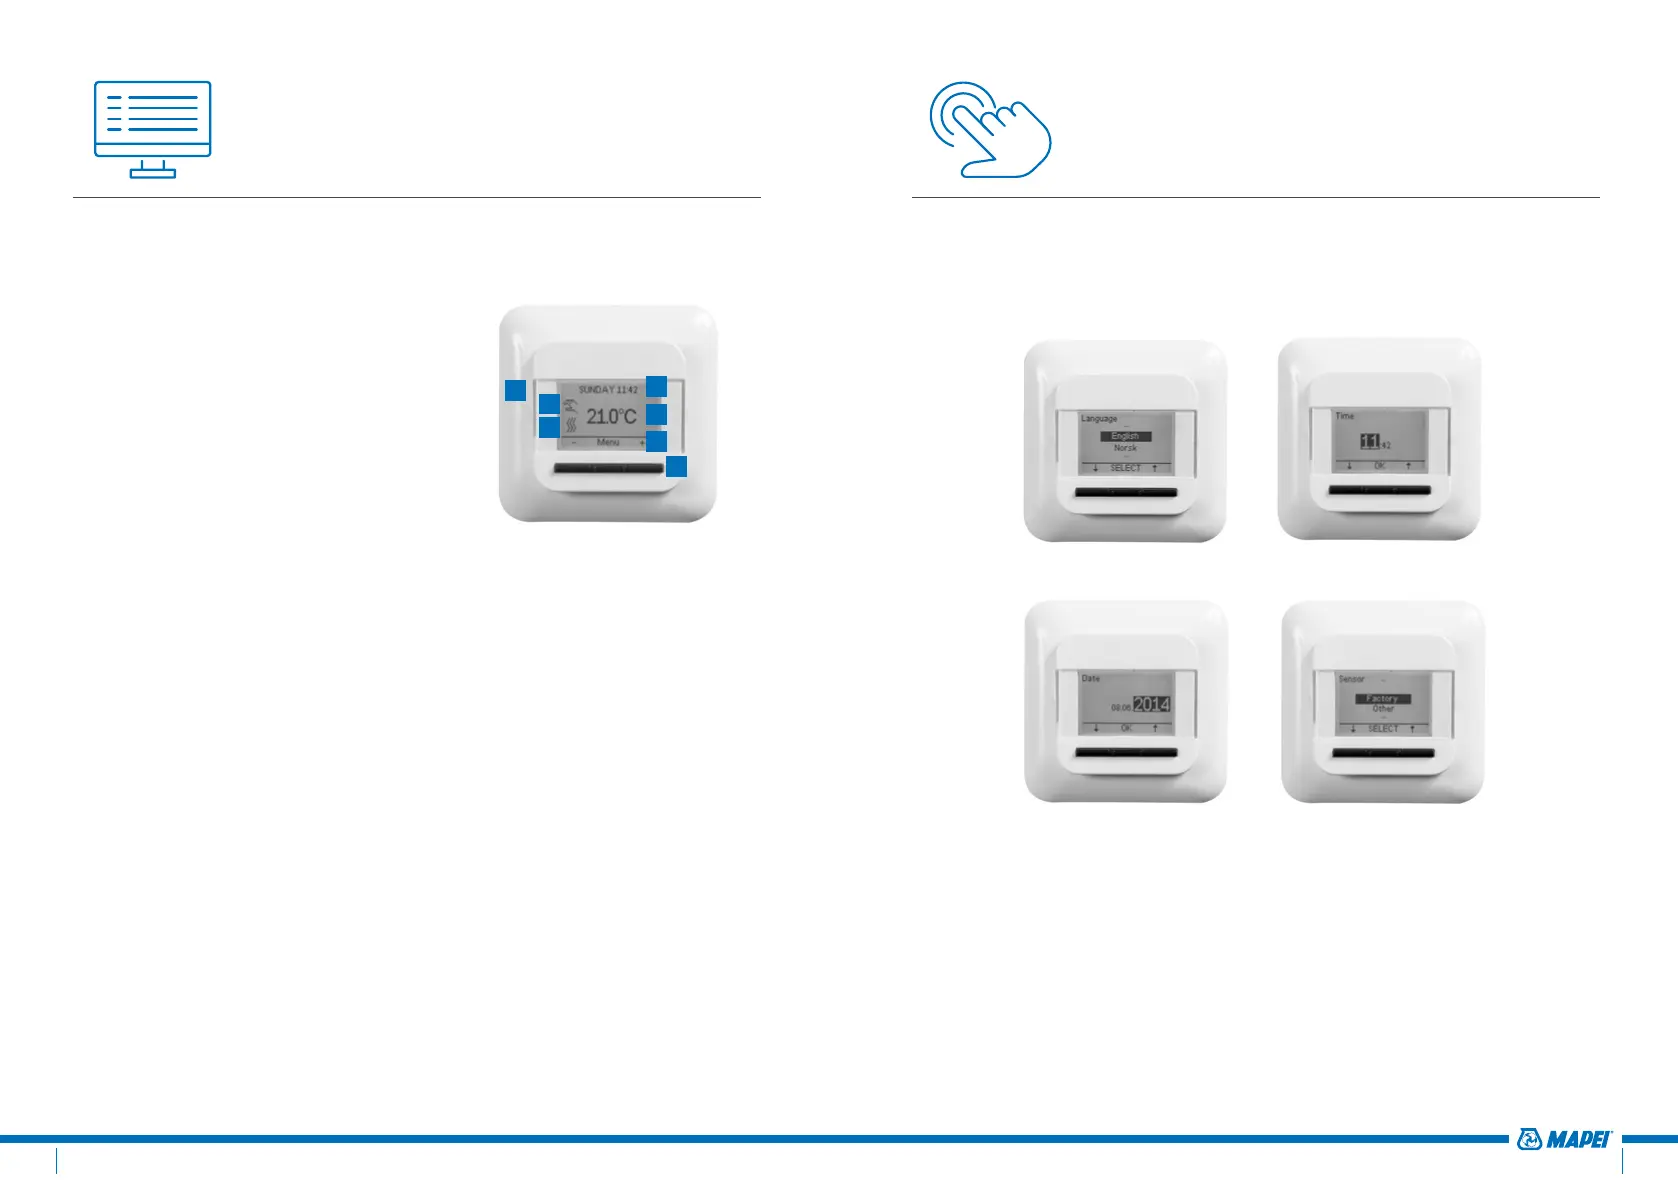
Navigation Principal
The Mapeheat Thermo Basic is a thermostat with a big and clear display of
1.8’’.
1. On/OFF switch
2. Day and time
3. Working mode
4. Heating symbol
5. Display temperature
6. 3 Commands
7. 3 Buttons
Use the button (7) in order to execute the command (6).
In the example on figure 3:
•
The Left and Right buttons show “-“ & “+”, this means
that you can change the set temperature with 0.5°C by
using these buttons
•
The Middle button shows “Menu”, this means that you
can enter the Menu by using this button
1
3
4
2
5
6
7
figure 3