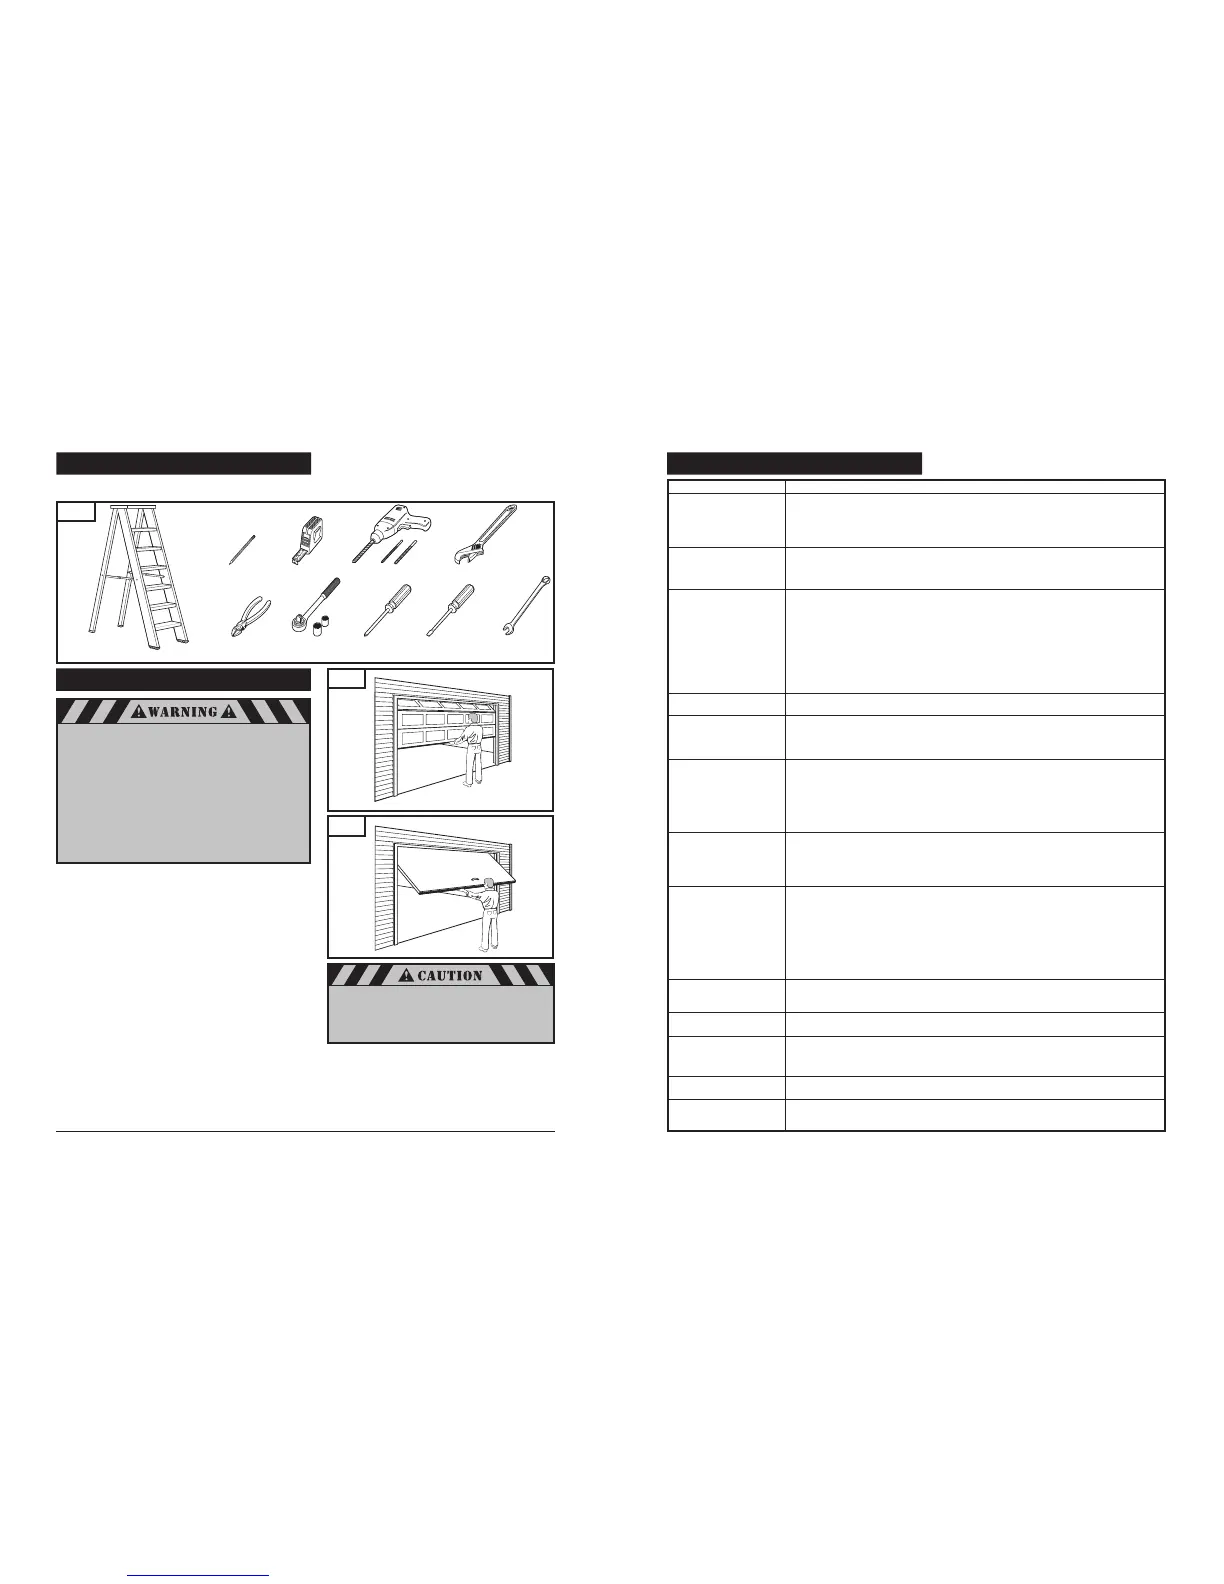
4. TOOLS
Fig. 1
The instructions will refer to the tools shown below for proper installation, adjustment, and maintenance of the garage door
operator. Additional tools may be required depending on your particular installation.
Fig. 3
Fig. 2
5. GARAGE
A garage door is a heavy moving object and can cause
serious injury or death. An unbalanced door might not
reverse when required, and can increase the risk of
injury. If your garage door is out of
balance, or if it binds or sticks, call for professional
garage door service. Garage doors, springs,
pulleys, cables, and hardware are under extreme tension
and can cause serious injury or death.
Do not try to adjust them yourself. Ropes left
on a garage door could cause someone to become
entangled and could kill them. Remove all ropes
connected to the door before installing your operator.
To prevent damage to steel, aluminum, fiberglass
or glass panel doors, always reinforce the inside of
the door both vertically and horizontally with steel
or angle iron bracing.
Take a moment to survey your garage and garage door.
Is there an access door besides the garage door? If not, you
should install an emergency key release kit.
With the garage door closed, check alignment of door and
garage floor. The gap, if any, should be no more than 1/4". If
the gap is larger than this, repair floor or door before installing
operator.
The operator is intended for installation on a properly balanced
and adjusted garage door. DO NOT INSTALL IF DOOR IS
UNBALANCED OR BROKEN.
Check balance of door in mid travel and during full range of
opening and closing. Lift the door about half way, as shown in
Fig. 2 & 3. Release the door. It should remain in place,
supported by its springs. Raise and lower the door fully to
check for binding or sticking.
If door is out of balance or needs repair, DO NOT ADJUST IT
YOURSELF. CALL A QUALIFIED GARAGE DOOR SERVICE
PROFESSIONAL to adjust your door.
If your door is over 7 ft. high, you will need a longer rail. See
section 6 “Rail Assembly” on p. 6 of this manual for
availability of longer rails.
The best solution is to follow the instructions for your
particular garage door or contact the garage door
manufacturer for proper reinforcement instructions.
4
33
Pencil
Tape Measure
Drill and Drill Bits
Adjustable Wrench
Wire Cutters
Ratchet and Sockets
(1/2", 7/16")
Phillips Screwdriver
Flat-Tip Screwdriver
7/16" Wrench
Stepladder
Sectional Door
One-Piece Door
20. HAVING A PROBLEM?
Operator does not operate
from either wall control
or transmitter:
Operator operates from
transmitter but not from
wall control:
Operator operates from
wall control but not
transmitter:
Operator does not work from
HomeLink
®
Door does not open
completely:
Door does not close
completely:
Door opens but will not
close at all:
Door reverses for no
apparent reason:
Operator light does not
turn on
Operator light does not
turn off
Operator strains or
maximum force is needed
to operate door
Operator does not move
door at all:
Operator won’t work due
to power failure
SITUATION LIKELY CAUSE AND SOLUTION
Does operator have electric power? Plug a lamp into the electric outlet to see if lamp turns on. If not, check fuse box
or circuit breaker (some outlets are controlled by wall switch).
Have you disengaged all locks on door? If not, do so.
The garage door spring may be broken. Have it replaced by a professional garage door technician.
Has snow or ice built up under door? Door may be frozen to ground. Remove any restrictions.
Are wiring connections correct? Check wall control wiring on page 15.
Is wall control door’s Pushbutton lit? If not, disconnect low voltage wires to wall control and momentarily touch them
together. If operator runs, replace wall control. If operator does not run, check wiring connections at operator, and
check wire for shorts or breaks under staples.
Is the wall control button light flashing? If so, your opener is in the vacation / lock mode. Turn off vacation/lock mode.
Refer to “Wall Control Panel” on page 27.
Does the transmitter indicator light glow when the transmitter button is pressed? If not, replace battery. Refer to
“Battery Replacement” on page 26.
Has the operator learned the code of the transmitter? Repeat transmitter programming steps. Refer to “Transmitter
Coding” on page 19.
Have all transmitters been set with the same code? Repeat code learning procedure for all remote devices. Refer to
“Multiple Transmitters” on page 26.
Is the photo eye system obstructed? If so, door will only close while wall control door Pushbutton is pressed and held.
Refer to “Align and Test Photo Eye Sensors” on page 24.
Has the HomeLink
®
Transceiver learned the code of the transmitter? Repeat programming steps (refer to
HomeLink
®
Manual)
Is something obstructing the door? Remove obstructions only after ensuring door area is free
of persons, pets, and any other objects.
If door has been working properly but now doesn’t open all the way, reset the open travel limit or/and increase the
up force (page 22 ). REPEAT “TEST SAFETY REVERSAL” (page 23) AFTER ADJUSTMENT IS COMPLETE.
LED #1 "ON" Check photo eye sensor wires, connections to the operator terminals. Refer to pages 14 and 15.
LED #1 "Blinks" Check sensor alignment and sensor connections to the operator terminals 1 and 2. Refer to
pages 14, 15 and 24.
Is something obstructing the door or in the path of the photo eye sensors? Remove obstructions only after ensuring
door area is free of persons, pets, and any other objects.
If door has been working properly but now doesn’t close all the way, reset the close travel limit or/and increase the
down force (page 22). REPEAT “TEST SAFETY REVERSAL” (page 23) AFTER ADJUSTMENT IS COMPLETE.
LED #1 "ON" Check photo eye sensor wires, connections to the operator terminals. Refer to pages 14 and 15.
LED #1 "Blinks" Check sensor alignment and sensor connections to the operator terminals 1 and 2. Refer to
pages 14, 15 and 24.
Increase force in down direction. REPEAT “TEST SAFETY REVERSAL” (page 23) AFTER ADJUSTMENT
IS COMPLETE.
LED #1 "ON" Check photo eye sensor wires, connections to the operator terminals. Refer to pages 14 and 15.
LED #1 "Blinks" Check sensor alignment and sensor connections to the operator terminals 1 and 2. Refer to
pages 14, 15 and 24.
Is something obstructing the door? Pull emergency release knob and open door manually. If it is unbalanced or
broken, call for professional garage door service.
Clear ice or snow from garage floor area where garage door closes.
If door reverses from fully closed position, decrease travel limits (page 19 ).
Review and increase force adjustment setting for down travel (page 22).
REPEAT “TEST SAFETY REVERSAL” (page 23) AFTER ADJUSTMENT IS COMPLETE.
Replace the light bulb(s) with a standard incandescent maximum 60 Watts each. If the standard incandescent light
bulb burns out prematurely, replace it with 60 Watts maximum a garage door operator
incandescent
light bulb. Refer to page 16 for replacement instruction.
Is the wall control Light Feature on? Press Light Button to turn off. Refer to page 27.
Door may be out of balance or springs are broken. To check balance, close the door and use emergency release knob
to disconnect trolley. Open and close door manually. A properly balanced door will hold itself halfway open while
being supported entirely by its springs. If it does not or the spring is broken, call for professional garage door service.
DO NOT increase the force to the operator to compensate for unbalanced or damaged door.
Door may be locked with a manual door lock. Remove any manual door locks.
Springs are broken or door is out of balance. (See “Situation” immediately preceding this one).
Use the emergency release knob to disconnect trolley. Door can be opened and closed manually. When power is
restored, reconnect trolley and resume automatic operation of door. Refer to “Check Emergency Release” on page 13.
 Loading...