EasyManua.ls Logo

Marantz PM310 - Service Manual

Marantz PM310
24 pages
Print Icon
To Next Page IconTo Next Page
Loading...
Question and Answer IconNeed help?

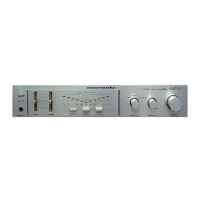
Do you have a question about the Marantz PM310 and is the answer not in the manual?

Summary

1. Introduction

2. Pre-Amplifier

3. Main Amplifier

4. Troubleshooting Analysis

5. Power Amplifier Adjustment

6. Power LED Meter Adjustment

7. Test Equipment Required for Servicing

8. Performance Verification

C. Total Hum and Noise Test

Tests the amplifier's total hum and noise levels at various volume settings.

D. Maximum Power Output

Measures the maximum audio output power the amplifier can deliver at a specified frequency.

E. Harmonic Distortion Test

Evaluates the amplifier's harmonic distortion levels at different frequencies and output levels.

9. Voltage Conversion

10. Schematic Diagram

11. Diagram and Component Locations

11.1 Main Assembly (P700) Schematic Diagram and Component Locations

Provides schematic and component layout for the main amplifier assembly.

11.2 Power TR. Assembly (P701) Schematic Diagram and Component Locations

Details the schematic and component placement for the power transistor assembly.

11.3 Tone Control Assembly (PE00) Schematic Diagram and Component Locations

Illustrates the schematic and component layout for the tone control circuit.

11.4 Switch;VR. Assembly (PS00) Schematic Diagram and Component Locations

Shows the schematic and component layout for switches and volume controls.

11.5 Phone Assembly (PW00) Schematic Diagram and Component Locations

Presents the schematic and component layout for the phono input circuit.

11.6 Led Level Meter Drive Assembly (PX01) Schematic Diagram and Component Locations

Provides schematic and component layout for the LED level meter drive circuit.

11.7 Led Level Meter Assembly (PX02) Schematic Diagram and Component Locations

Details the schematic and component placement for the LED level meter itself.

11.8 Power Switch Assembly (P001) Schematic Diagram and Component Locations

Shows the schematic and component layout for the power switch assembly.

12. Block Diagram

13. Exploded View and Parts List

14. Electrical Parts List

15. Technical Specifications

Marantz PM310 Specifications

General IconGeneral
BrandMarantz
ModelPM310
CategoryAmplifier
LanguageEnglish

Related product manuals