23
FX20 INSTALL GUIDE
VERSION 1.6 | APRIL 26, 2024
INSTALL BUILD CHAMBER BULBS
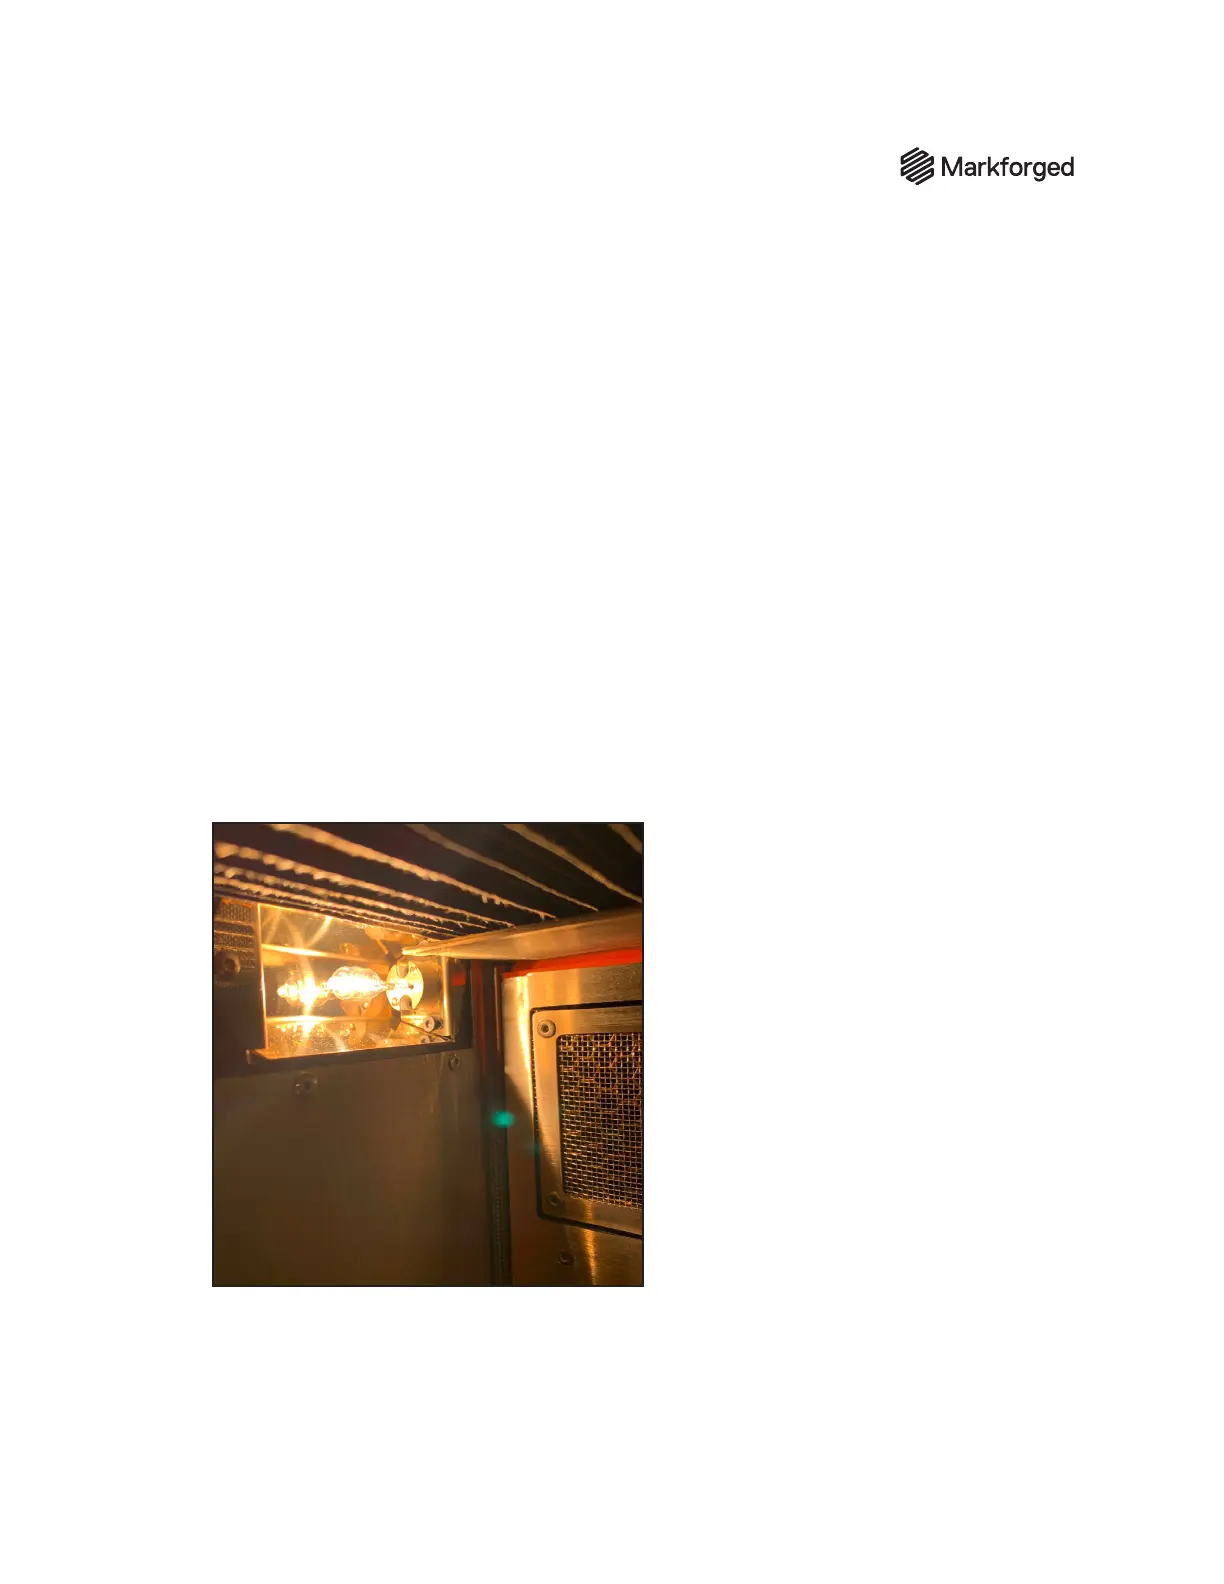
The FX20 build chamber is illuminated by two halogen bulbs. The bulb sockets are located on the inside
front wall of the build chamber, to the left and right of the door. The bulbs are shipped uninstalled and
packed inside the FX20 Accessory Kit. You must wear nitrile gloves during the following steps to prevent
any oils from your hands contaminating the bulbs; failure to do so will result in premature failure of the bulbs.
Note: Seating the bulbs in their sockets may require signicant force. Take care when handling the bulbs to
avoid breaking them.
1. If the print bed is not lowered, do so now. It should be roughly near the bottom of the build chamber
from previous steps to allow you the maximum space to reach in and install the bulbs.
2. Open the build chamber door through the UI, and leave the door open.
3. Turn the printer o using the power switch on the lower rear panel.
4. Put on nitrile gloves.
5. Retrieve the two halogen build chamber bulbs (31257) from the FX20 Accessory Kit.
6. Install one bulb in each socket. Note: The bulbs slide in directly and are not screwed in. Note:
These bulbs are not polarity-sensitive; you only need to ensure that they’re fully seated.
7. Power up the printer. If necessary, turn on the build chamber lights by tapping the bulb icon on
the touchscreen. Conrm that both bulbs are working, as shown below.