27
FX20 INSTALL GUIDE
VERSION 1.6 | APRIL 26, 2024
INSTALL A PRINT SHEET
1. Locate print sheet shipping tube from accessory kit and remove print sheet from tube.
Note: New print sheets pick up debris easily due to static electricity; ensure that the print sheet
touches nothing but the print bed before installing it.
2. Select Menu > Utilities > Vacuum Seal and follow the on-screen instructions.
3. Ensure that the print bed is clear of debris. Note: A brush and dustpan set is included in the FX20
Accessory Box if needed.
4. Apply the purple print bed adhesive (S25048) to the print sheet, evenly covering the entire print
surface: a 10" square at the center of the bed.
Note: Material loading is incorporated into the Gantry Skew Utility below; do not load material until
prompted by the utility.
GANTRY SKEW ADJUSTMENT
The utility is designed to tune the gantry alignment and improve dimensional accuracy.
Note: If your FX20 printer's Gantry Skew values are unable to be automatically compensated for, reference
the Mechanical Gantry Squaring Procedure section.
1. Launch the Gantry Skew Utility, and select Coarse Gantry Alignment. Follow directions to load
material if necessary. A test print consisting of two rectangular bars will be produced. Note: Do
NOT select Fine Tuning Alignment.
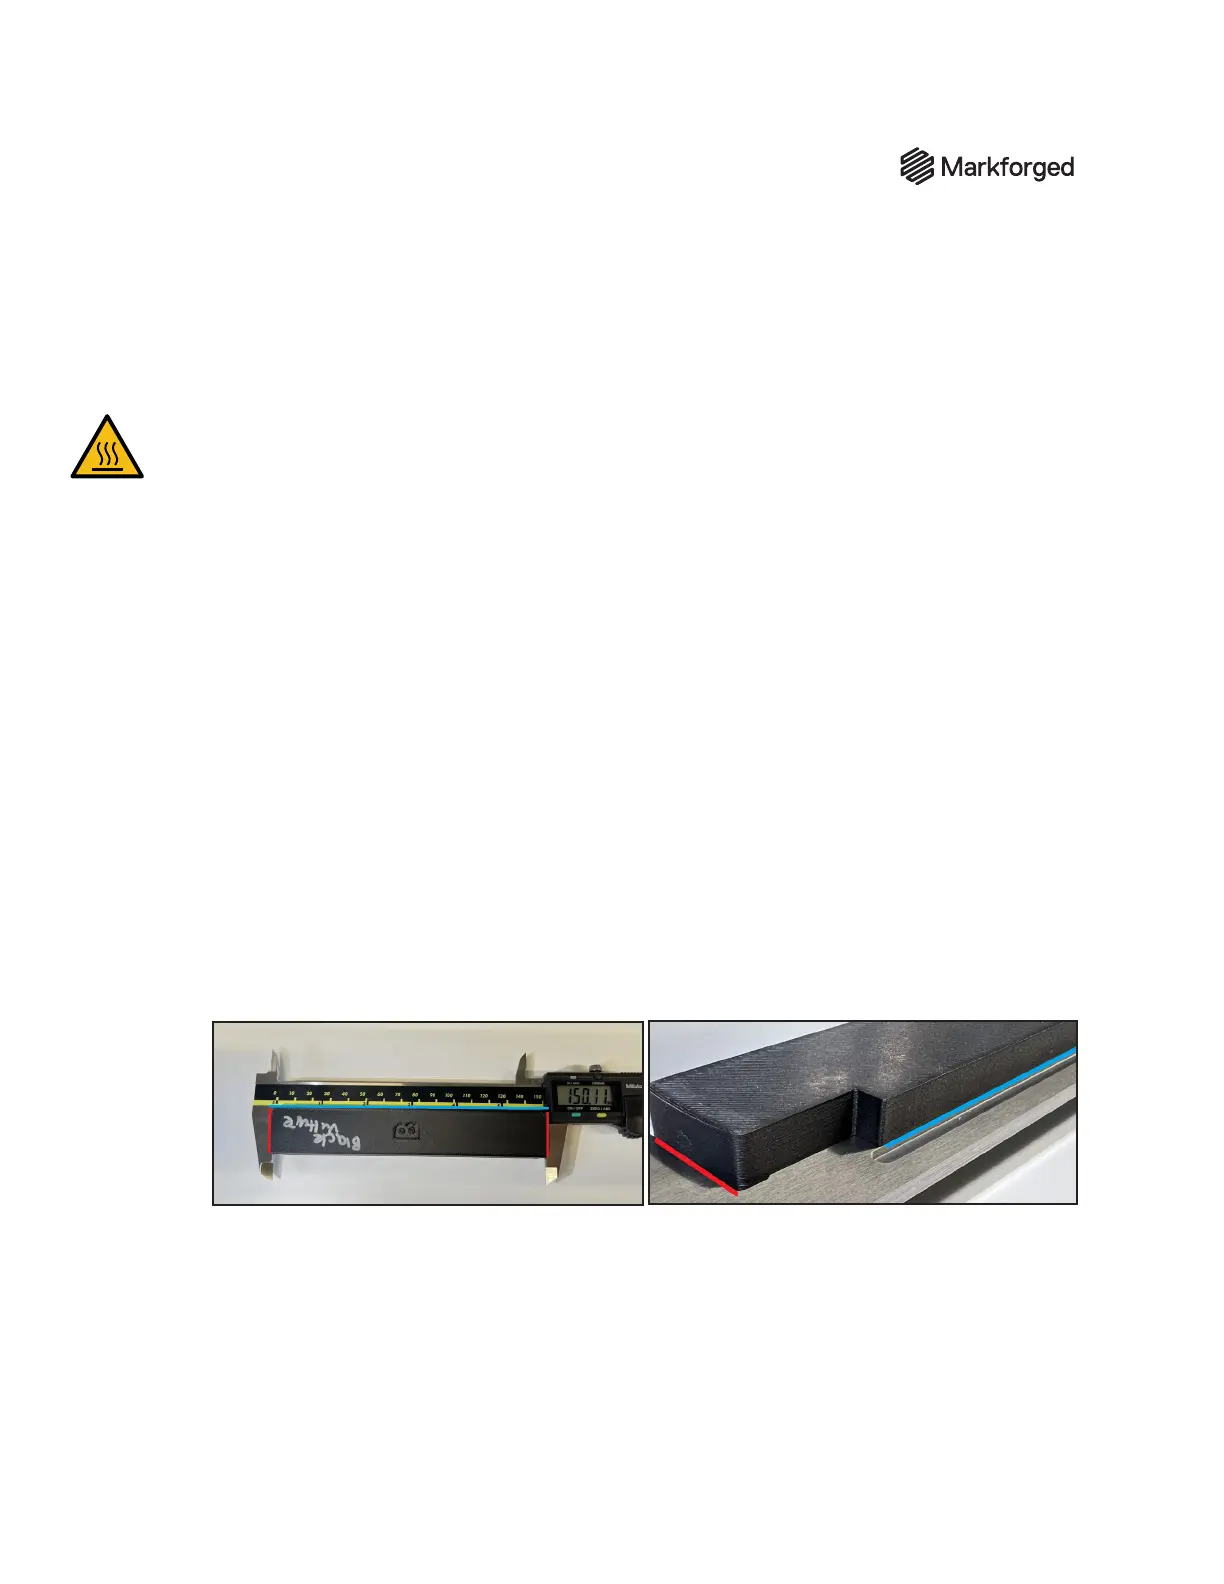
2. Remove the alignment parts from the chamber. Note that they are labeled A and B. Use calipers to
measure the length of the parts as shown. Measure in millimeters, and report value to the second
decimal place (e.g. 255.86 mm). Repeat the measurement to ensure accuracy and consistency.
Note: Ensure that the print is seated squarely on the jaws of the caliper, marked in red in the
images below. The top of the print can seat on the measuring section of the caliper (marked in blue
in the photos below) to ensure proper squareness. There is a small ledge on each print where the
bar of the caliper will rest, to ensure that the calipers are parallel with the part itself.
3. Enter the measurements when prompted, and conrm that the values are correct.
4. Complete the procedure; for out-of-spec measurements you will be prompted to repeat the process
and/or contact Markforged Support.
5. Record and submit measurements for parts A and B on the included sign-o sheet.
 Loading...