15
14
16 2
10
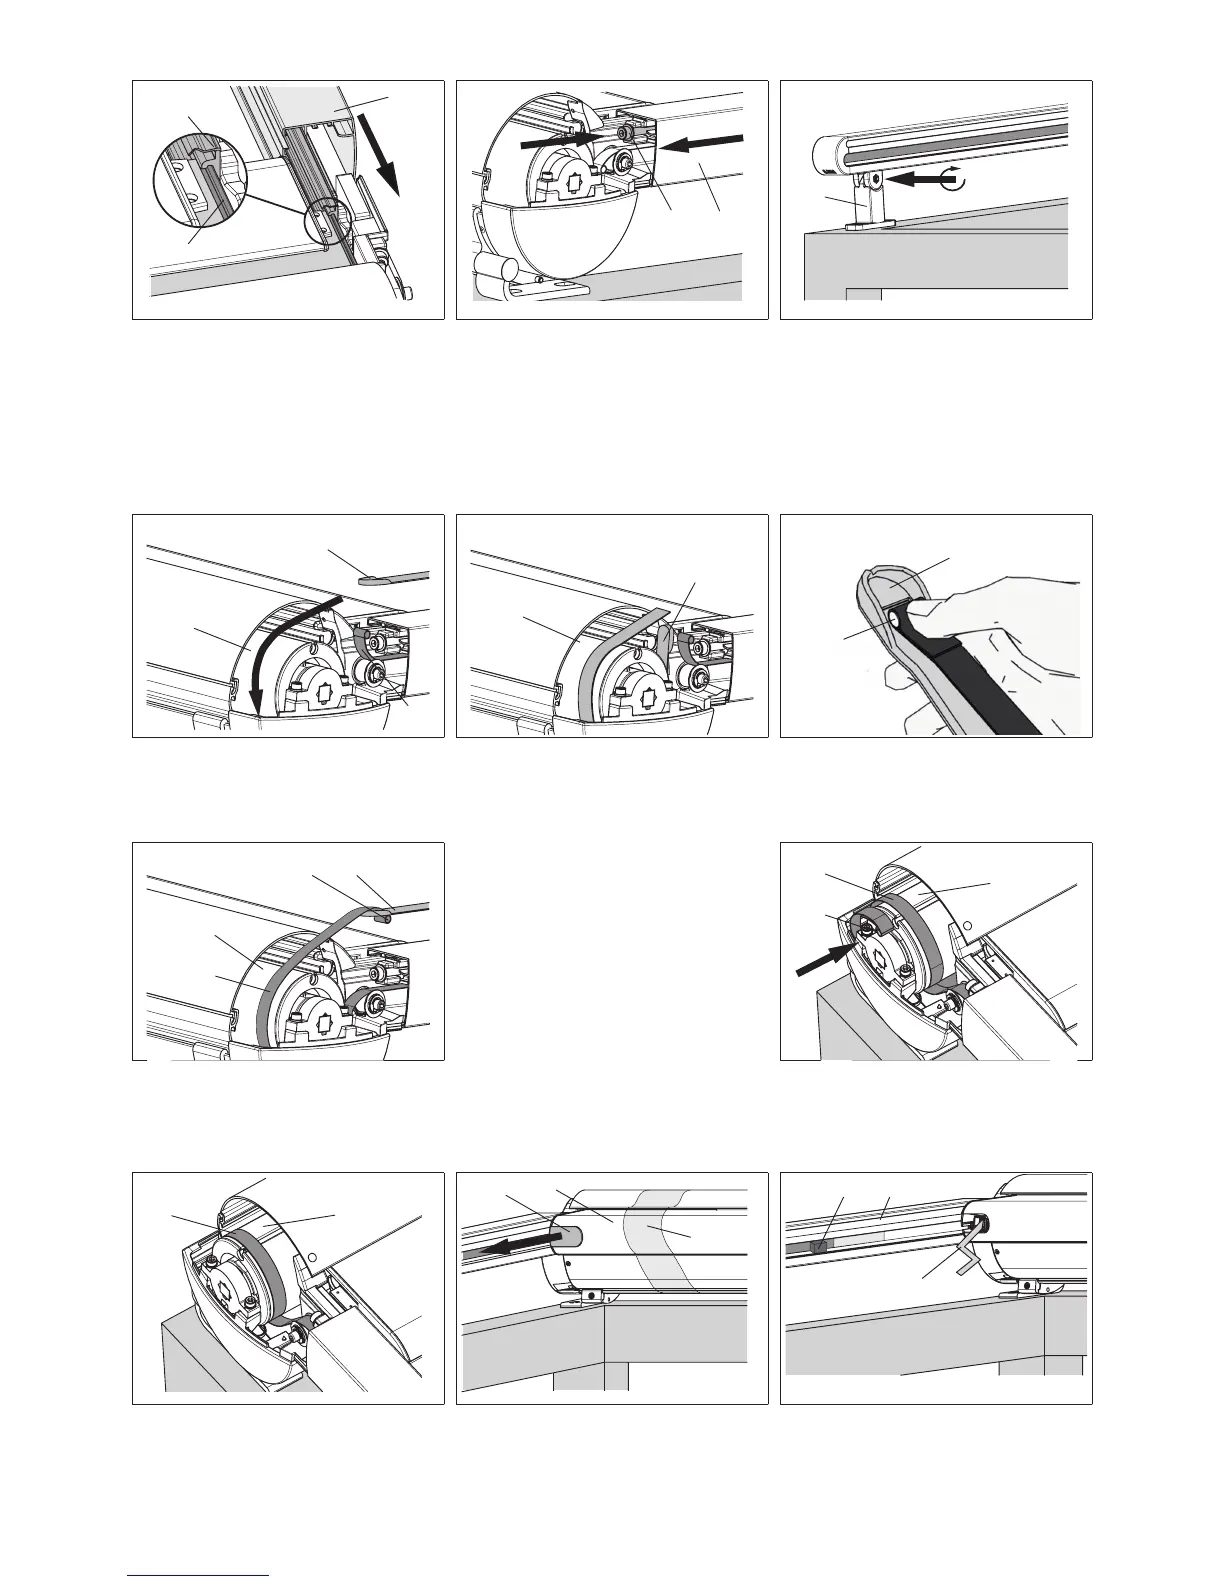
6a. Attention! For awnings with
tracx system, the cover has to be
threaded in the plastic track (15) with the
"zip" (14) for the function of the tracx
system, before the guide track (2) of the
awning is slid onto to end cap, as
described under point 6.
7. Push the guide track prole (2) up to
the stop and secure with a SW 6 Allen
key cheese-head screw (16). If the guide
track prole has to be loosened or
removed: Unscrew the cylindrical head
screw SW 6 (15) about 15 mm and
loosen the connection by means of
beating lightly on the screw head!
8. Tighten the jaws of the track bracket
(10) SW 6 Allen key.
18
17
18
17
12
17
9. Lift the lug-end of the drive belt (12)
up. Guide the assembly aid (17)
between the fabric roller (18) and the
rear of the cassette with the thicker part
facing up.
10. Push assembly aid (17) through
and guide around the fabric roller (18).
11. Push the lug-end of the drive belt
(12) through the slot in the assembly aid
(17). Attention! Do not twist transport
bands!
19
17
12
18
19
12
18
12. Pull the assembly aid back out (17).
In so doing the drive belt (19) is guided
around the underside of the fabric roller
(18). Detach the lug-end of the drive belt
(12) from the assembly aid.
13. Attention! The drive belt has to
be passed around the fabric roller a
second time, so push the assembly aid
through again and repeat paragraphs 9.
to 12.
14. Slip the lug-end of the drive belt (12)
underneath the rst wrap of drive belt
(19) and insert it into the keyway in the
fabric roller (18).
18
19
1
21
22
15. Attention! Ensure that the belt
rolls up cleanly on itself on the fabric
roller (18). Do not twist the drive belt
(19)! Repeat points 3. to 15. at the right
side.
16. Remove protective foil (1) from the
front prole (20). Pull off sealing cap (21)
from the projection prole (right and left).
17. Remove the remaining poystyrene
blocks holding the drive belt in place (4)
from the guide track prole (2) (on both
the right and left).