1 2 3 4 5 6 7 8 9 10 11
12
13 14
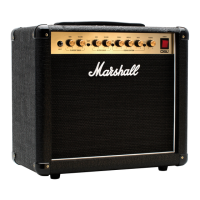
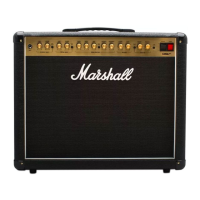
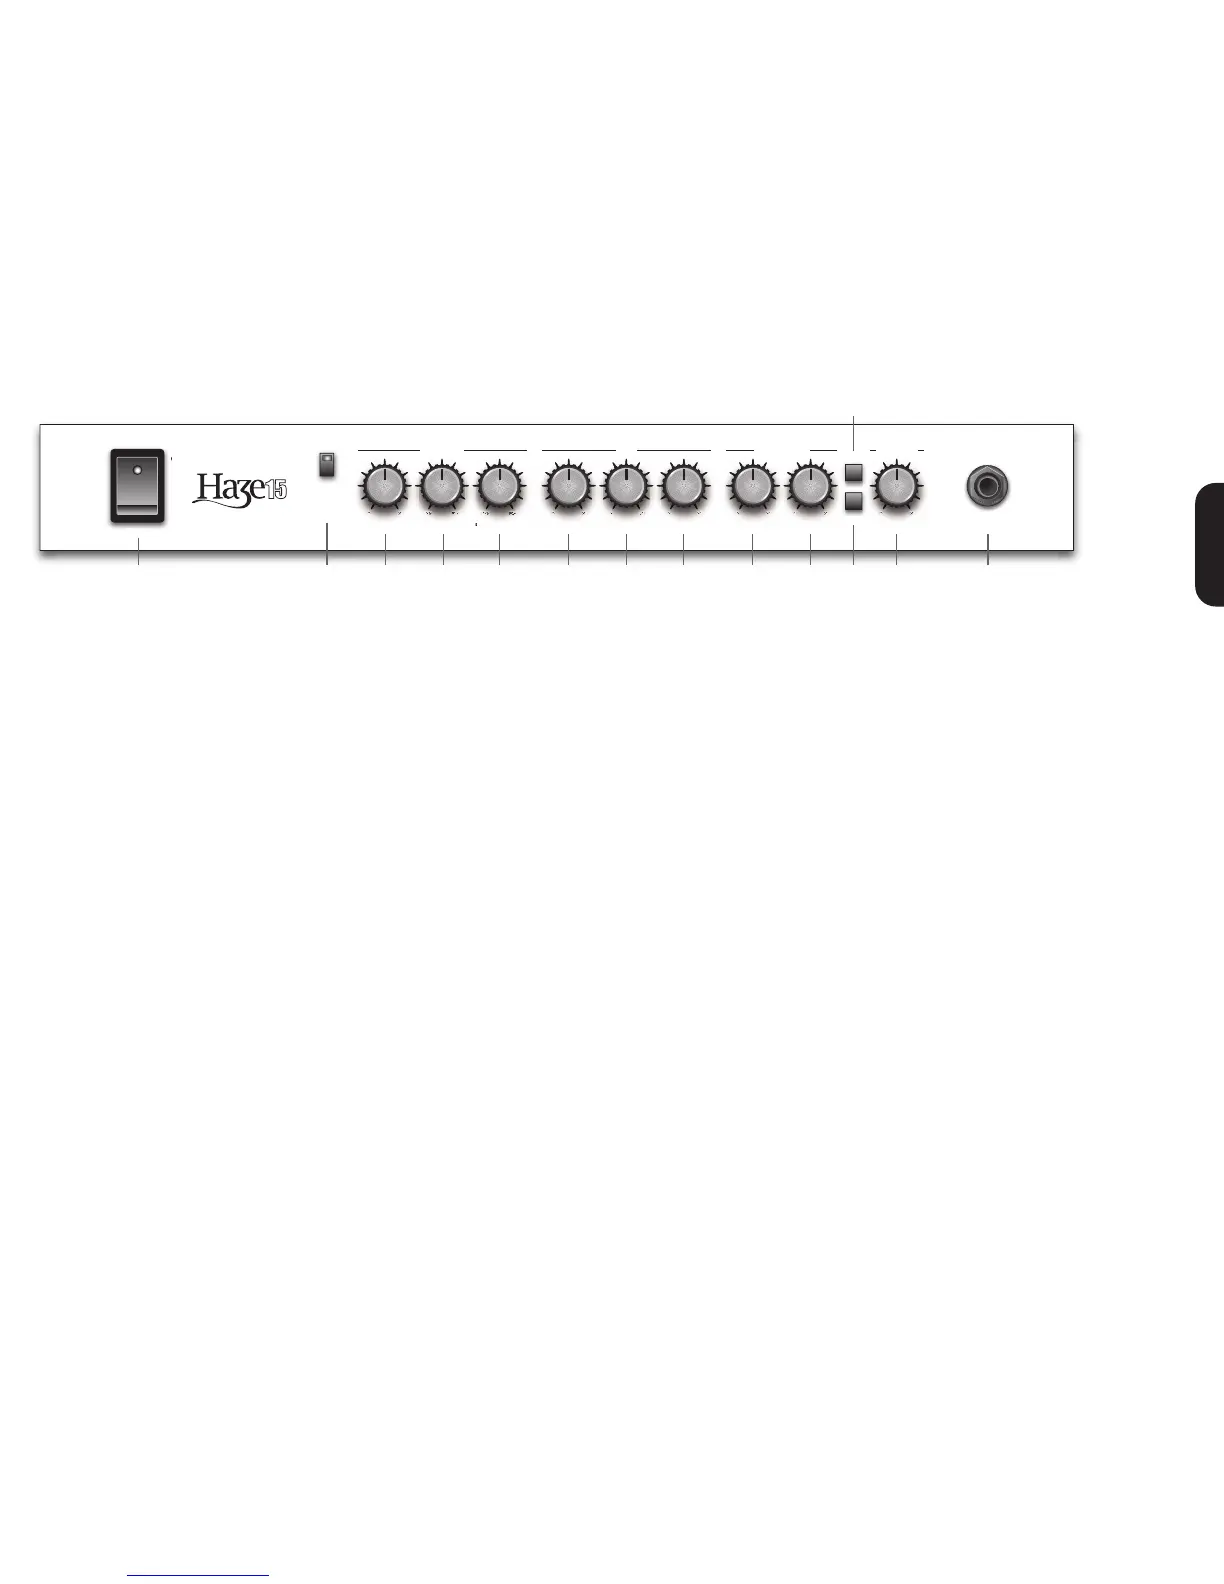
Haze 15 Watt head front panel
1. Power Switch
This is the On/Off switch for the mains electric power to the
amplifier. The LED will light up when your amplifier is turned
on and will not be lit when the amplifier is switched off.
Note: Please ensure the amplifier is switched off and
unplugged from the mains electricity supply whenever it is
moved!
Effects Section
All effect and reverb settings are automatically stored in
Normal and Overdrive allowing you to set different effects
and/or reverb levels in each of these channels. Set a clean
Normal sound with a lush chorus and a huge reverb, change
to Overdrive and set a sparse reverb and a slap back echo
and these sounds will be remembered each time you change
channel.
For this reason, the position of the effects controls will not
always show the effects settings in use. If one of the controls
is changed, the value will ‘jump’ to the control’s new position.
The Reverb Level and Effects Depth controls use special
controls that include relays allowing the effect section to be
globally disabled.
Turn both the Reverb and Effect Depth to minimum, past the
click, and a click will be heard from within the amplifier as the
effect section is true bypassed mechanically removing the
circuit from the amplifier – leaving an all-valve amplifier signal
path.
2. Effects
Pressing this switch cycles between the 3 effects, Echo
(green), Vibe (orange) Chorus (red) and Off (no light). When
the effects are muted via the 2-way footswitch the light will
slowly flash when the selected effect is muted.
3. Effects Adjust Control
This control allows you to adjust the modulation speed of the
Chorus and Vibe effects or the delay time of the Echo. As the
delay time is decreased so are the number of repeats –
creating long trailing echoes that reduce to short slap backs
and further down to double tracking.
When changing from a channel with Echo to one without, the
effect will naturally spill between channels. When changing
from a channel with Echo to a channel with Echo set to a
different delay time, the delay effect will not spill between
channels. The maximum delay time is 1 second.
4. Effect Depth
This control sets the depth of the chorus and vibe or the level
of the echo.
5. Reverb Level
This control sets the amount of signal sent to the reverb
allowing it to naturally spill between channels.
Turning the control down to minimum ‘before the click’ turns
the reverb off for the current channel only.
EQ Section
The bass, middle and treble controls form a traditional
Marshall interactive EQ section – adjusting one control will
affect how the others work.
6. Bass
Turning the Bass control will affect the amount of low
frequencies or bottom end in your guitar tone. Rotating this
clockwise will increase the amount of lower tones, generally
making your bass sound deeper and is especially useful at
lower volumes. Turning this control anti-clockwise will reduce
the bass frequencies in your tone producing a more cutting
tone – especially useful at higher volumes.
7. Middle
Adjusts the middle frequencies. Turning the control
anticlockwise will yield a more hollow sound with the bass and
treble frequencies appearing to be more accentuated. Turning
it back clockwise increases the middle adding body to the
sound.
8. Treble
By adjusting the Treble control you can add or take away the
higher frequencies in your guitar tone. By increasing the
amount of treble you will make your tone brighter, ideal for
more percussive playing styles.
Overdrive Channel
9. Volume Control
This control adjusts the volume of the Overdrive Channel.
From minimum to about half way, this control increases the
volume of the overdriven sound. From halfway onwards, the
power amp will start to overdrive adding extra power and
complexity to the tone.
10. Gain Control
Controls the level of signal entering the pre-amp. At lower
settings the sound will be cleaner and the amount of distortion
is more controllable from your guitar or your playing style. At
higher settings, more distortion is available.
11. Bright Switch
Pushing this switch ‘in’ enables the Bright function. This
control works on both the Normal and Overdrive controls.
On the Normal channel the Bright works in the traditional way,
interacting with the Normal Volume control. At lower settings
the Bright has an increased effect which lessens as the
Normal Volume is increased.
On the Overdrive channel it adds extra bite to the sound and
works at all volumes.
12. Channel Switch
Selects between Normal (out) and Overdrive (in) channels.
Note: When using the 2-way footswitch this front panel switch
is disabled.
Normal Channel
13. Volume Control
This control adjusts the volume of the Normal Channel. At low
levels the sound will be clean. As the volume control is
increased, in true Marshall style, the power amplifier will start
to overdrive giving a classic, controllable distortion which
cleans up beautifully from the guitar’s volume control.
14. Input Jack Socket
Jack input for your guitar. You must always use a screened
(shielded) guitar cable and never use an unscreened
(unshielded) speaker cable. Also, this cable should be one of
good quality. If you are in any doubt regarding this, your
Marshall dealer will be more than happy to help and advise
you.
ENGLISH
 Loading...