6
Assembly Instructions
1
DO NOT RETURN PRODUCT TO STORE.
For assistance call 1-866-814-0585 toll free. Please have your owner’s manual and model number available for
reference.
For Easiest Assembly:
• To avoid losing any small components or hardware, assemble your product on a hard level surface that
does not have cracks or openings.
• Clear an area large enough to layout all components and hardware.
• When applicable, tighten all hardware connections by hand first. Once the step is completed go back and
fully tighten all hardware.
• Follow all steps in order to properly assemble your product.
To complete assembly you will need:
• (1) Leak Detection Solution (Instructions on how to make solution are included in “Operating Instructions”
section)
• (1) 14.1 oz or (1) 16.4 oz LP gas tank.
Typical assembly: approximately 30 minutes.
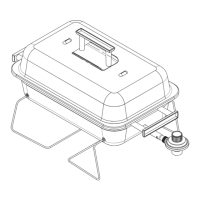
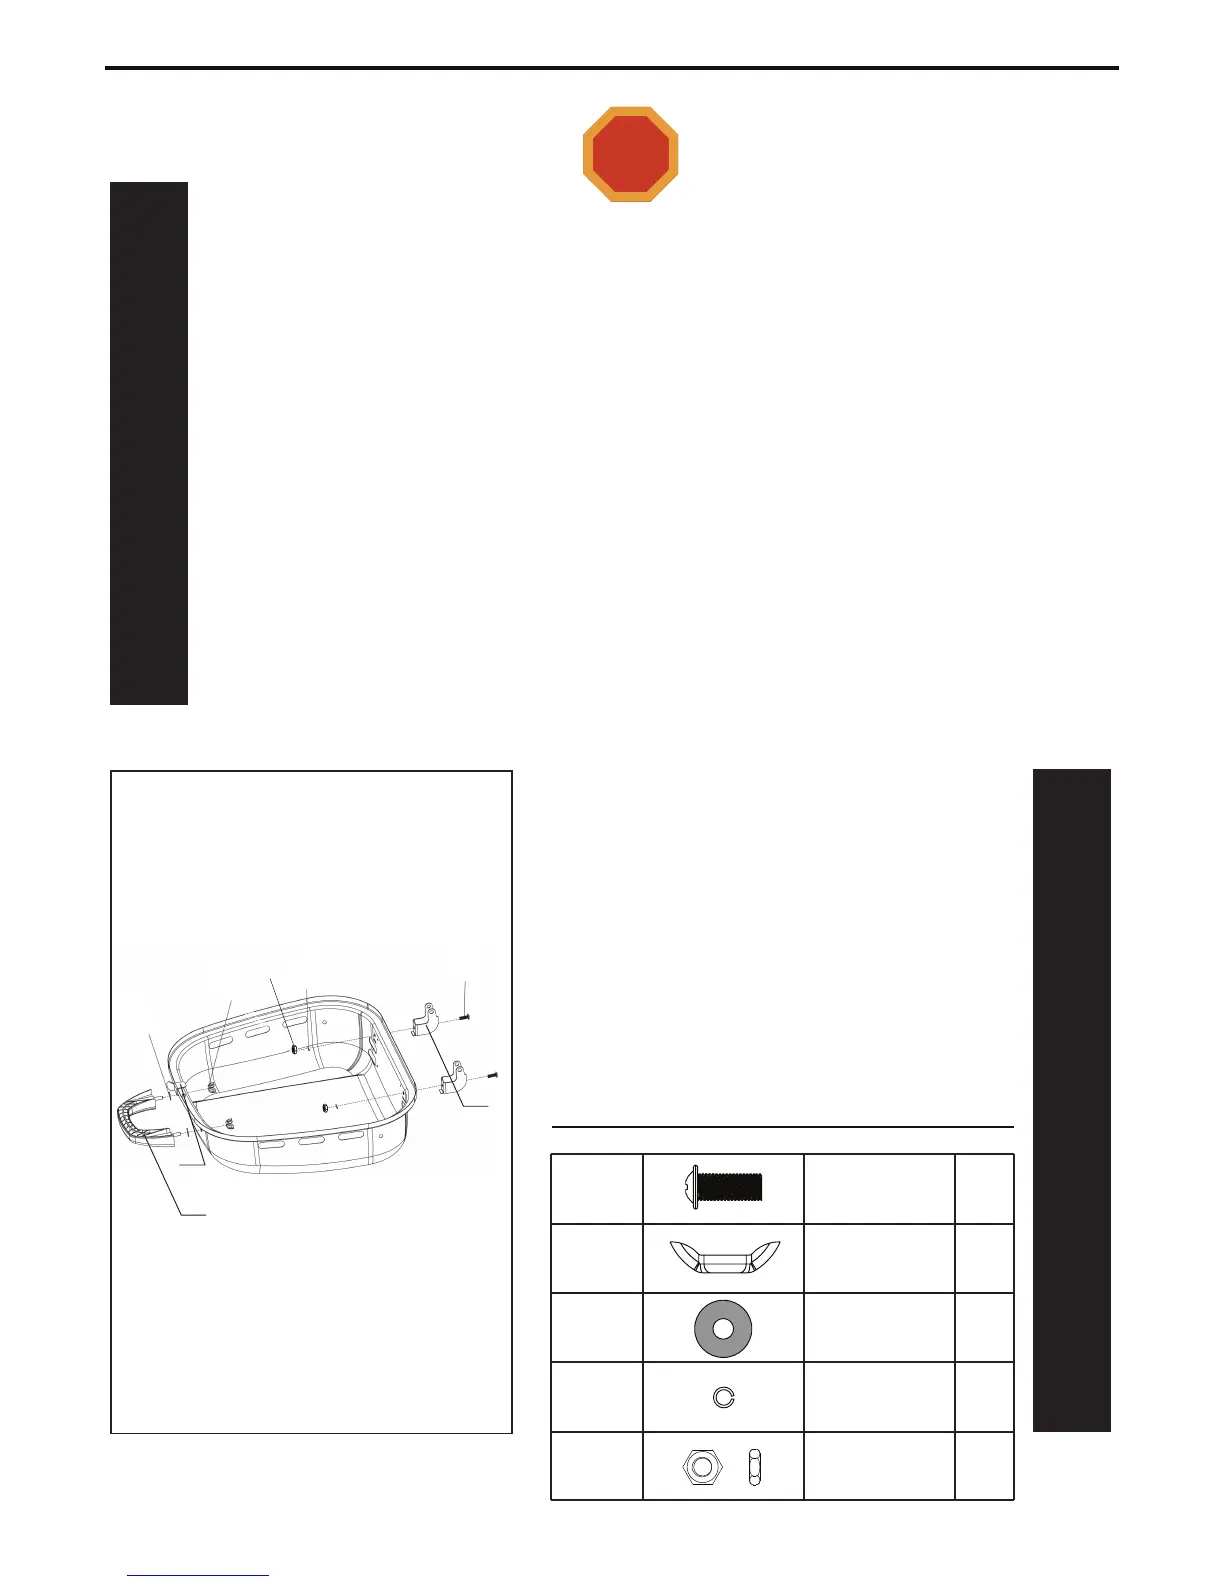
2
Attach lid handle(A) to lid(B) with 2pcs M5 steel wing
nuts (CC) and 2pcs Ø6.4 heat resistant washers (EE).
Attached top hinge (E) to lid (B) with 2pcs M5x12
screws (AA), 2pcs Ø5.3 steel small lock washers (FF)
and 2pcs M5 nuts(JJ).
Hardware Used
AA
CC
EE
FF
Screw
Wing Nut
Washer
Lock
M5 Nut
Washer
2pcs
2pcs
2pcs
2pcs
2pcs
AA
FF
E
CC
EE
B
A
JJ
JJ
STOP
 Loading...