12
TEST À L’EAU SAVONNEUSE
POUR LE RÉGULATEUR AJUSTABLE
AVERTISSEMENTS
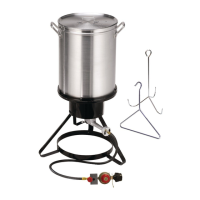
• Un test d’étanchéité à l’eau savonneuse DOIT être eff ectué chaque fois que la bouteille de gaz est raccordée
au brûleur ou au tuyau, ou à chaque utilisation.
• Le test d’étanchéité à l’eau savonneuse DOIT être eff ectué à l’extérieur, à un endroit bien ventilé.
• Pendant le test d’étanchéité, gardez l’appareil loin de toute fl amme nue, étincelle ou cigarette allumée.
• N’utilisez en aucun cas une fl amme nue pour détecter une fuite de gaz.
PRÉPARATION :
• Enlevez les articles de cuisine et les accessoires de l’appareil.
• Assurez-vous que le robinet de la bouteille de gaz et le bouton de réglage sont FERMÉS.
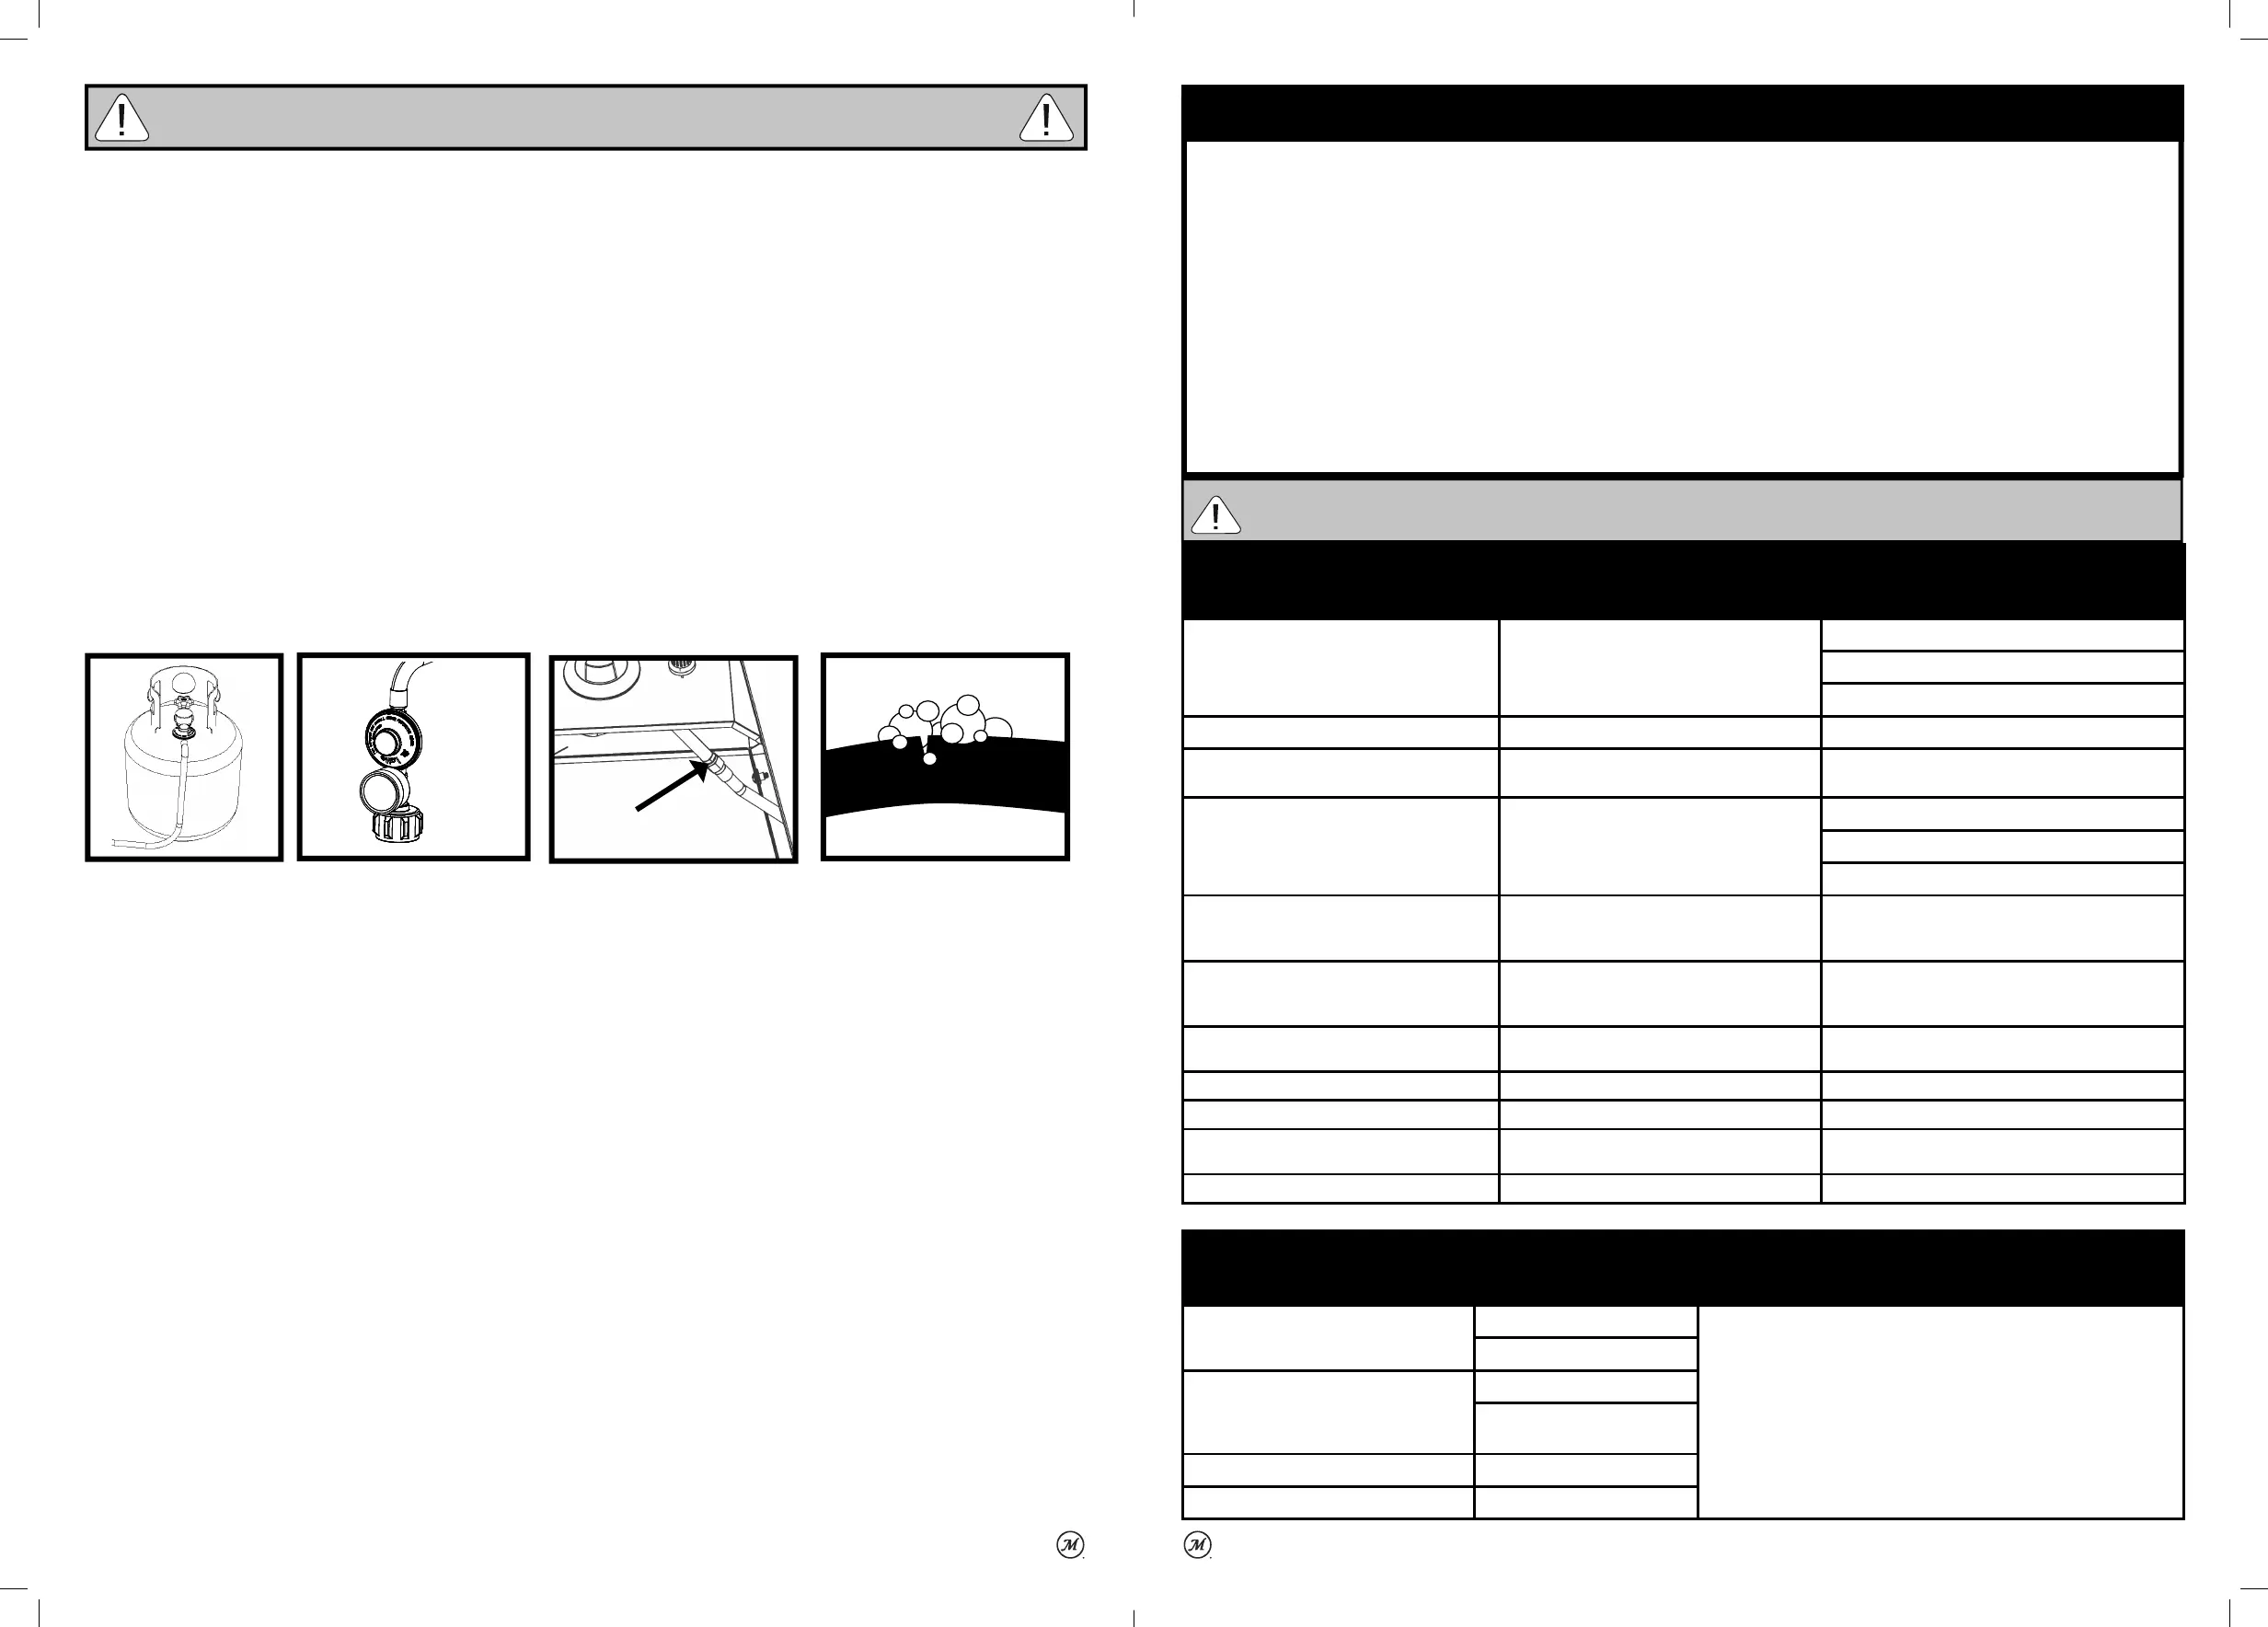
Préparez la solution d’eau savonneuse : une mesure de détergent à vaisselle (ou plus si vous le désirez) pour
trois mesures d’eau.
• Appliquez la solution d’eau savonneuse sur le robinet de la bouteille de gaz, le régulateur, ainsi que sur toute la
longueur du tuyau entre la bouteille et le robinet de contrôle du brûleur.
Appliquez la solution
sur le robinet de la
bouteille de gaz.
Appliquez la solution sur
le régulateur et sur toute
la longueur du tuyau.
Appliquez la solution sous
l’appareil, là où le tuyau et le
bouton de réglage du brûleur
sont raccordés.
Si des bulles apparaissent,
le test a échoué, comme
illustré ci-dessous.
TEST DU ROBINET DE LA BOUTEILLE DE GAZ :
• Ouvrez le robinet du réservoir, puis vérifi ez si des bulles apparaissent. NE LAISSEZ PAS LE ROBINET DE
GAZ OUVERT PENDANT PLUS DE 12 SECONDES. Si des bulles apparaissent, fermez le robinet de la
bouteille de gaz et serrez les raccords. Recommencez le test.
TEST DU RÉGULATEUR ET DU TUYAU :
• UNE FOIS que le robinet de la bouteille gaz a réussi le test d'étanchéité à l'eau savonneuse, ouvrez le robinet
de la bouteille de gaz, puis vérifi ez la formation éventuelle de bulles au niveau du régulateur, tout le long du
tuyau et au robinet de contrôle du brûleur. NE LAISSEZ PAS LE ROBINET DE GAZ OUVERT PENDANT
PLUS DE 12 SECONDES. Si des bulles apparaissent, FERMEZ le robinet de la bouteille de gaz et serrez le
raccord qui fuit. Si la fuite est présente le long du tuyau, ARRÊTEZ TOUT : n'utilisez pas l'appareil. Le tuyau
doit être remplacé.
• LORSQUE LE TEST EST TERMINÉ ET VOUS N'AVEZ REPÉRÉ AUCUNE FUITE, ATTENDEZ AU
MOINS 5 MINUTES POUR PERMETTRE LA DISSIPATION D'ÉMANATIONS DE GAZ AVANT DE
RALLUMER LE FUMOIR.
SI DES BULLES CONTINUENT À APPARAÎTRE PENDANT UNE PARTIE DU TEST D'ÉTANCHÉITÉ À
L'EAU SAVONNEUSE, ARRÊTEZ TOUT ET N'UTILISEZ PAS L'APPAREIL. PRENEZ CONTACT AVEC LE
FOURNISSEUR DE PROPANE LOCAL OU AVEC LE SERVICE À LA CLIENTÈLE DE MASTERBUILT AU
1-800-489-1581.
Remarque : utilisez uniquement une bouteille de gaz de 20 lb (9 kg) munie d'un collet de protection avec cet
appareil. La bouteille N'EST PAS fournie avec l'appareil.
AVERTISSEMENTS ET MISES EN GARDE IMPORTANTES
25
• ALWAYS MAKE SURE UNIT IS COOL TO THE TOUCH BEFORE CLEANING AND STORING.
• Simply wipe down the unit with a damp cloth after each use to keep in proper working condition.
• Do not use a cleaning agent. Make sure to dry thoroughly.
• If any rusting occurs , use steel wool to clean and buff aff ected area.
• The exterior of the unit may be touched up with high temperature-resistant paint.
• Store only when fi re is completely out and all surfaces are cold.
• After cleaning store cooker stand in covered dry area.
When a flame occurs inside the venturi this is caused by a blockage and could cause
damage to the hose assembly.
Cleaning & Storing Propane Fryer
TROUBLESHOOTING GUIDE
Symptom Cause Possible Solution
Gas leaking from cracked, cut or burned hose Damaged hose Turn off gas at LP cylinder.
Replace hose.
Contact Masterbuilt at 1.800.489.1581.
Gas leaking from LP cylinder Failure due to rust or mishandled equipment Replace LP cylinder.
Gas leaking from gas cylinder valve Failure of valve due to rust, mechanical failure or mishandled
equipment
Turn off gas cylinder valve and return cylinder to gas provider/supplier.
Gas leaking between LP cylinder and regulator connection Improper installation, connection not tight enough, damaged
threads or bad rubber seal
Turn off gas cylinder valve, then re-attach regulator to cylinder.
Turn off gas cylinder valve and return cylinder to gas provider/supplier.
Visually inspect rubber seal for damage.
Fire under control panel Fire in tube of burner due to burner blockage Turn off both control knob and gas cylinder valve. Once the fi re is out
and burner has cooled, remove and inspect burner for spiders, nests,
rust or other debris.
Grease fi re or excessive/continuous fl ame Grease build up on or around burner area Turn off both control knob and gas cylinder valve. Allow fl ames to
extinguish and time for unit to cool down. Clean grease/food particles
from/around burner or burner area and surrounding surfaces.
Flame does not remain lit after igniting* Flame sensor wire is loose Turn off gas. Disconnect LP cylinder. Tighten fl ame sensor wire to
valve.
Low fl ame output* Out of fuel Refi ll or replace with full LP cylinder.
Flames blow out* Low on LP gas Refi ll LP cylinder.
Flashback (fi re in burner tube) Burner and/or burner tube has blockage Turn control knob and gas cylinder valve off . Clean burner and/or
burner tube.
Slower than expected cooking times* Valve not properly aligned to burner Check to see if valve is centered in burner tube.
WARNING
In the event of a gas leak that cannot be stopped, or if a
fi re occurs due to a gas leak, contact the fi re department.
TROUBLESHOOTING SOLUTIONS: “CAUSES” LOW OR NO FLOW/VAPOR LOCK/EXCESS FLOW
Symptom Cause Possible Solution
Burner doesn’t light after pressing ignitor button Low/no gas fl ow 1. Turn control knob to “Off ” position.
2. Turn gas cylinder valve knob to OFF.
3. Disconnect regulator from cylinder to relieve vapor lock.
4. Reconnect regulator to cylinder by hand turning until tight.
5. Slightly open the gas cylinder valve slowly and then open further by turning 1 full
turn.
6. You are now ready to light the fryer.
7. Turn the control knob to high and light with ignitor.
Vapor lock at coupling nut to LP cylinder
Low fl ame output Excess fl ow valve tripped
Vapor lock at coupling nut/LP cylinder
connection
Flames blow out Excess fl ow valve tripped
Slower than expected cooking times Vapor lock
*
Also seeTroubleshooting solutions: “Causes” Low or No Flow/Vapor lock/Excess fl ow below.
 Loading...