30
Ready. Set. Cra your Masterpiece.
Hot Wings
• 1 gallon vegetable oil
• 24 chicken wings
• 1 small bottle hot sauce (your choice)
• 1/2 tsp salt
• 1/4 tsp pepper
• 1/4 cup butter or margarine, melted
• 1 tsp white vinegar
• Pinch of garlic salt
• Celery sticks (side dish)
• Blue cheese dressing
1. Thaw wings, if frozen, and place into basket.
2. Pour 1 gallon of oil into a 10-1/2 quart pot and bring temperature to 350°F(177°C).
3. Turn off burner.
4. Wearing protective gloves, slowly place basket of wings into oil and re-light burner.
5. Cook for 8 to 12 minutes.
6. Turn off burner.
7. Remove and drain wings; pour into bowl.
8. Mix hot sauce with remaining ingredients.
9. Pour over wings, mix well, and serve.
Low Country Boil
• 1 lb shrimp
• 1 lb crawfi sh
• 1 lb smoked sausage
• 8 pcs short ear corn
• 2 bags crab boil mix
• 2 lbs whole new potatoes
1. Use a 30 quart pot and bailing basket.
2. Add 2-3 gallons of water and 2 bags of crab boil mix to the pot and bring water to a boil.
3. Allow water to boil for 15 minutes and add sausage (cut sausage in 1/4-inch thick slices).
4. After 3 minutes, add potatoes; 3 minutes later, add corn; 3 minutes later, add shrimp and craw fish together.
5. Boil for 3 minutes longer, remove and serve.
For a Cajun flare, pour on top of newspaper in the middle of your table and enjoy.
7
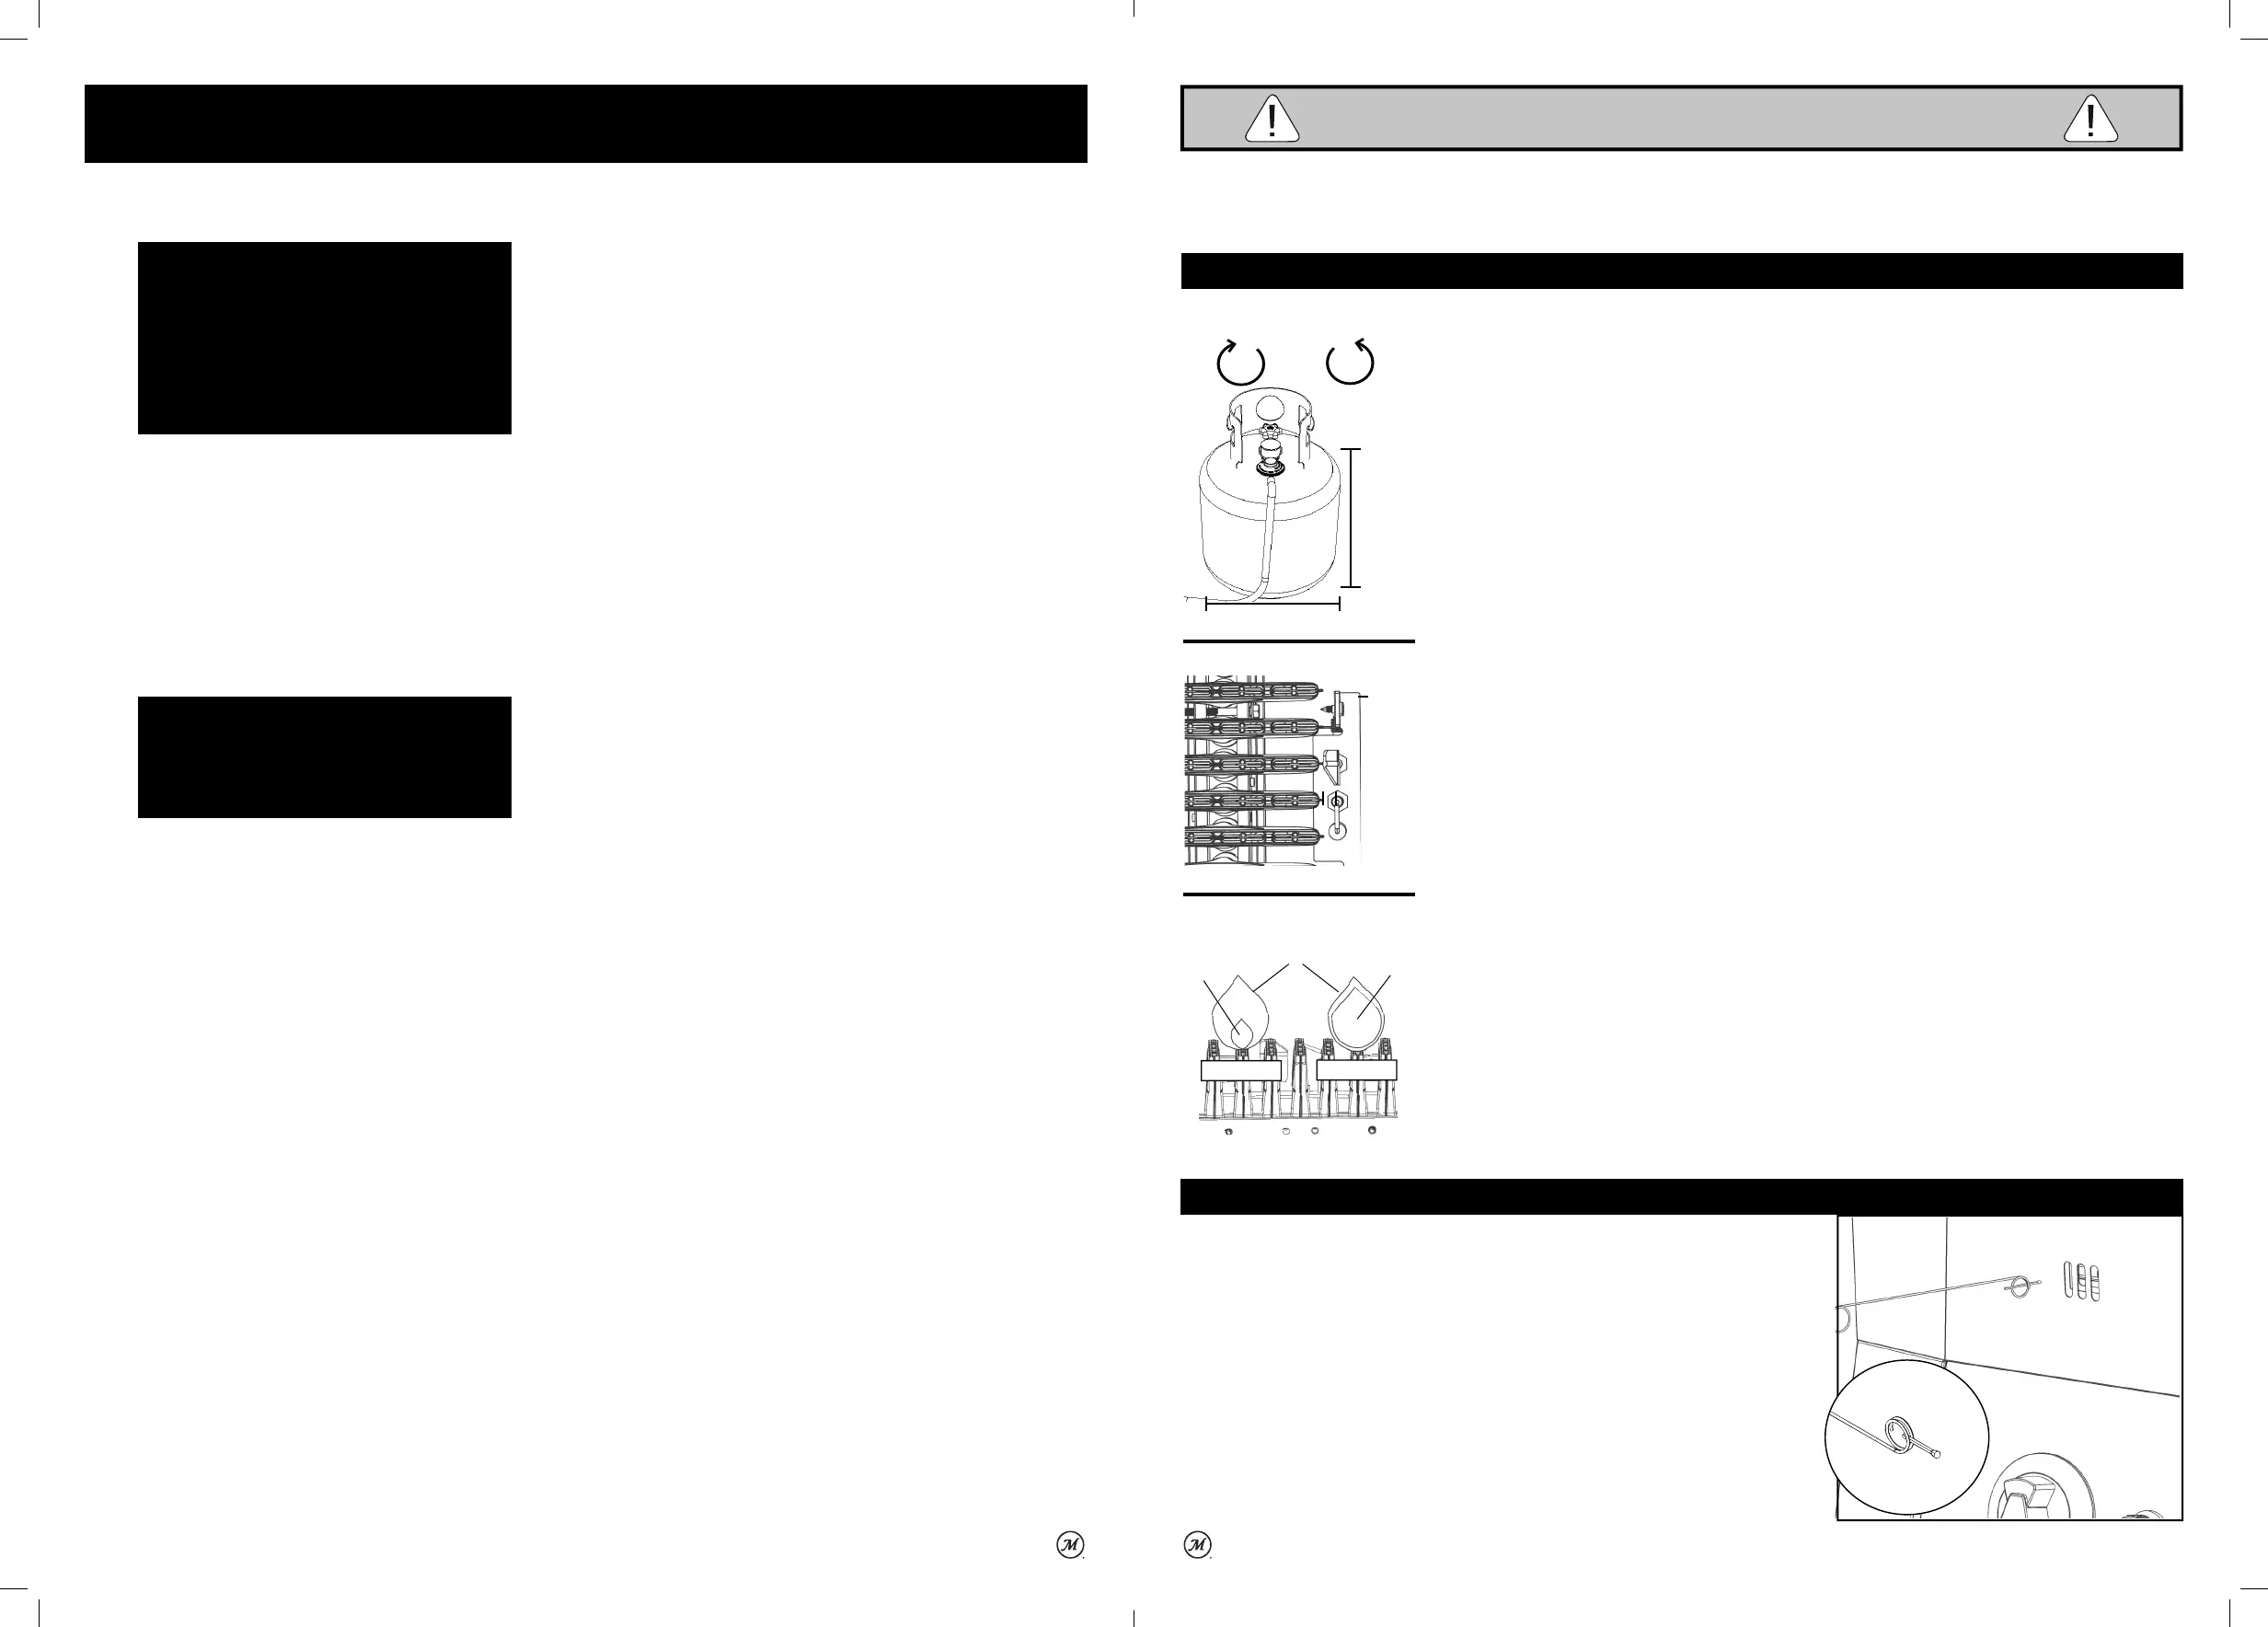
REGULATOR, BURNER AND GAS VALVE CONNECTION & OPERATION
IGNITION INSTRUCTIONS
COUNTER
CLOCKWISE
17.75”
(45cm)
APPROX.
12.25” (45cm)
APPROX.
Fig. 3
Fig. 1
MATCH LIGHT INSTRUCTIONS
1. Read all instructions and warnings before lighting.
2. Check control knob and gas cylinder valve to be certain it is in OFF position before connecting to
gas cylinder.
3. Perform soapy water test before each use.
4. Remove all accessories and cooking vessels from in/or on unit during lighting.
5. Turn gas cylinder valve ON, push control knob in, hold and and turn counter-clockwise to desired
temperature setting, after ignition continue holding control knob in for 5 seconds to activate the
fl ame sensor.
6. Place a long, lit fi replace match stick through front vent and close enough to burner to ignite.
7. If ignition does not take place within fi ve seconds, turn control knob to OFF position and wait fi ve
minutes and repeat match light instructions.
8. After each use, fi rst turn control knob off , then gas cylinder valve off . Always allow unit to cool
completely before touching, moving or storing.
• Inspect hose before each use. If there are signs of abrasion, wear, cuts, or leaks, the hose must be
replaced. DO NOT USE.
• Inspect burner before each use. Check burner and burner venturi tube for insects and insect nests.
A clogged tube can lead to a fi re beneath unit.
• Check to ensure the orifi ce is centered inside the venturi tube. Failure to properly assemble the
valve orifi ce to the venture tube can result in gas leak or potential fi re at connection. See assembly
steps for proper assembly method.
• Check to ensure the igniter pin is properly spaced and aligned to the burner. Igniter pin should be
approximately 1/4” from the burner and aligned to the top of a burner port (Fig. 2). Confi rm spacing
is correct by pressing the igniter button and ensuring spark occurs between igniter pin and burner.
• Connect hose regulator to LP Gas Cylinder
1. Make sure gas cylinder valve is closed. Turn valve clockwise until it stops.
2. Make sure control knob is in the OFF position.
3. Remove protective cap from gas cylinder and coupling nut if applicable.
4. Center and insert regulator nipple into valve outlet on gas cylinder (Fig. 1). Turn regulator
coupling nut clockwise until it stops. DO NOT OVER TIGHTEN.
• Perform Soapy Water Test.
• When lighting burner remove all parts inside or on unit to prevent explosion from gas build up.
• To use, turn gas cylinder valve ON, push control knob in, hold and turn counter-clockwise to desired
temperature setting. Push igniter button to light, after ignition continue holding control knob in for 5
seconds to activate the fl ame sensor.
• If ignition does not take place within fi ve seconds, turn control knob to OFF position and wait fi ve
minutes and repeat lighting procedures. If ignition still does not occur, see match light instructions.
• If fl ame goes out during cooking, turn control knob OFF, turn gas cylinder valve OFF, wait 5 minutes
before repeating ignition instructions above.
• Control knob sets the fryer to a desired temperature. Push control knob in and turn clockwise to
shut fl ame off .
• Burner will self regulate to the approximate control knob setting, use temperature gauge for precise
control.
• Visually check burner fl ame through front vent (Fig. 3). A CORRECT FLAME should be blue with a
small amount of yellow at the tip. An INCORRECT FLAME is excessively yellow and irregular. If an
incorrect fl ame occurs, turn control knob to OFF position, turn OFF gas cylinder valve, allow unit to
cool and then clean burner. Let burner completely dry before re-lighting.
• After use, turn control knob OFF, then turn gas cylinder valve OFF and disconnect tank.
1/4"
Fig. 2
CLOCKWISE
INCORRECT
YELLOW
BLUE
BLUE
CORRECT
WARNINGS AND IMPORTANT SAFEGUARDS
 Loading...