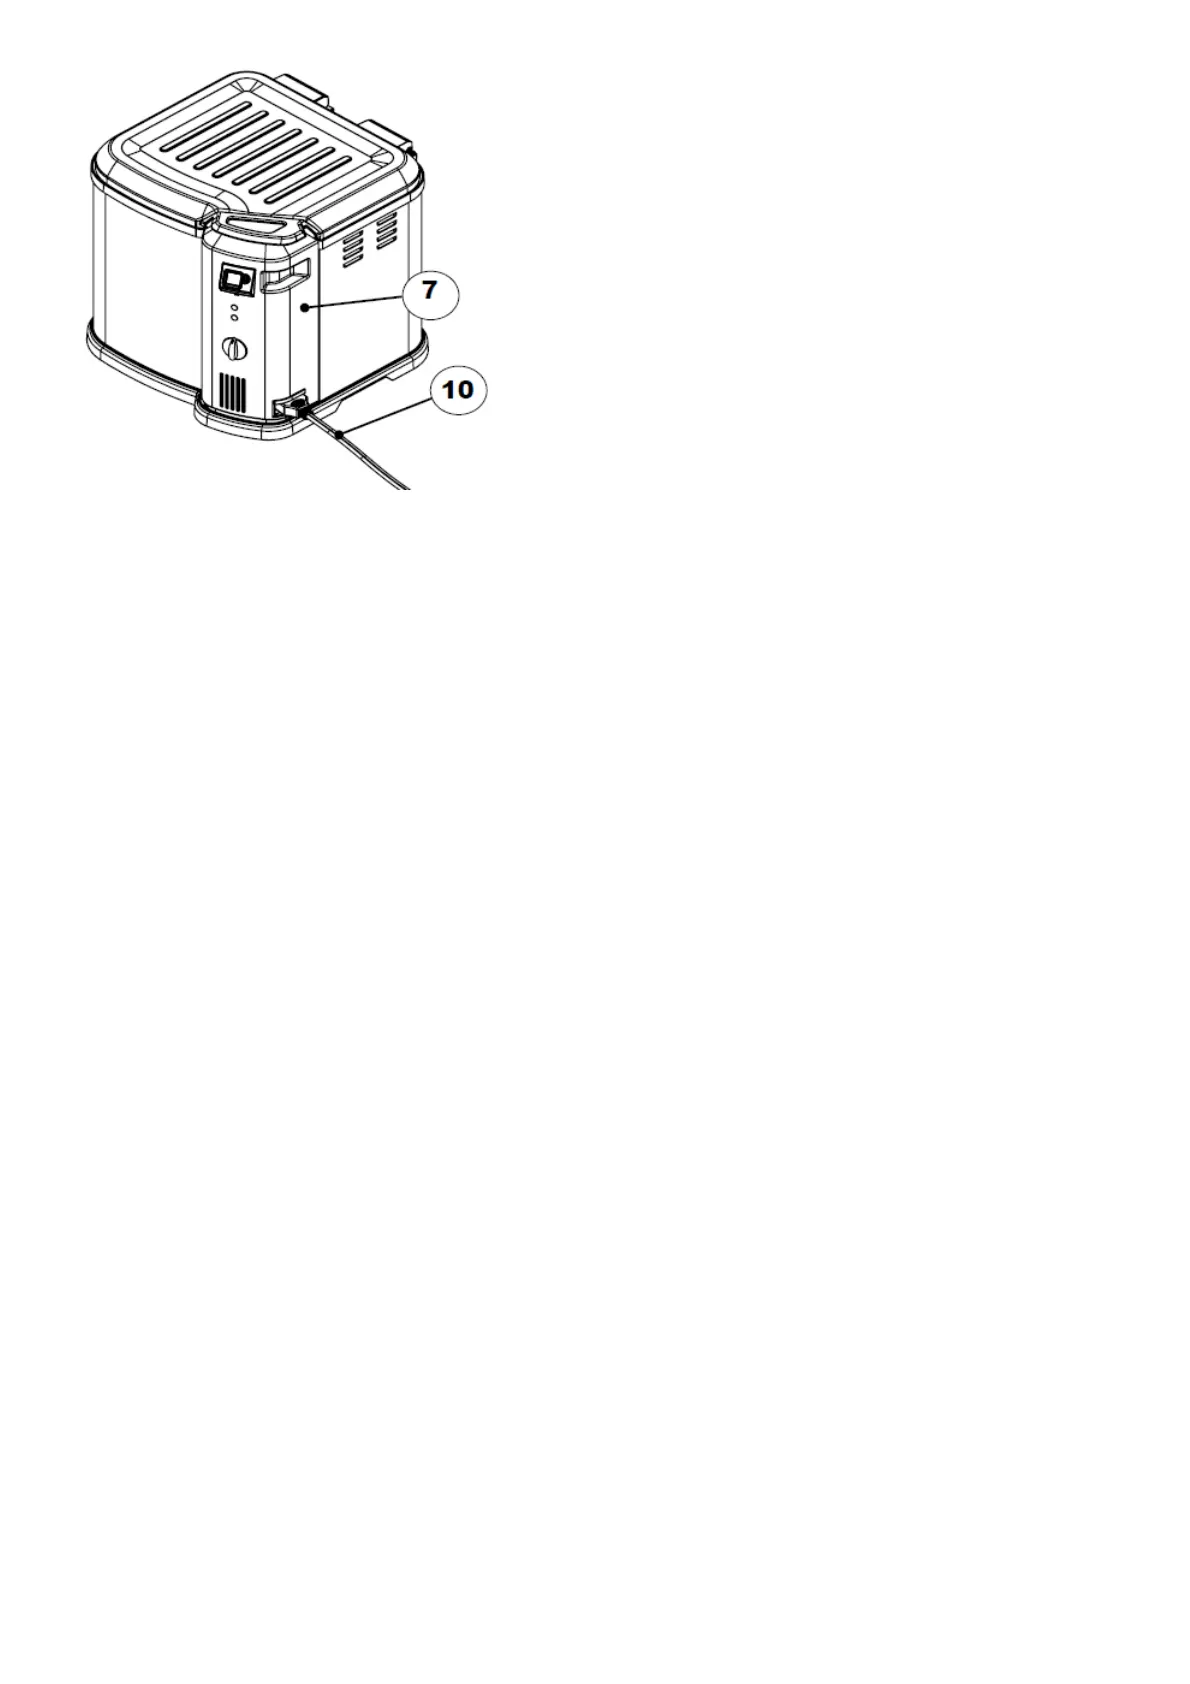
Step 4
Insert breakaway power cord (10) into connection on control panel (7). Make sure “This Side Up” is
shown on top for proper connection.
WARNING
CALIFORNIA PROPOSITION 65
This product contains chemicals known to the State of California to cause cancer, birth defects or other
reproductive harm.
OPERATING INSTRUCTIONS
Step 1
Mount control panel and element onto bracket on outer shell (see Step 2 on pg. 3).
Note: The control panel is correctly attached when the heating element is positioned inside the inner
pot and fully submerged in cooking oil or water during use.
Step 2
Add oil or water to the MIN 1.5 gallons (6 qts.) or MAX 2.75 gallons (11 qts.) fill line (see pg. 7). Note:
Always fill oil to bottom of MAX fill line.
Step 3
Attach breakaway power cord to control panel (see Step 5 on pg. 3). Plug breakaway power cord into
an outlet (refer to “Warnings & Important Safeguards” section of manual). POWER light will illuminate
indicating the unit is plugged in and element is mounted correctly to the mounting bracket.
Step 4
Turn dial to set temperature. READY light will illuminate when unit has reached set temperature and is
ready for use.
Step 5
Push timer button to set to desired time. Once time has been set, release button and the timer will
start. Timer counts down by minutes only until less than 1 minute remaining. Numbers will flash while
counting down. Timer will beep when time has expired. To reset timer to 0, press and hold timer
button while numbers are flashing. Release and press again to reset. Allow excess oil or water to drain
by hooking the drain clip on basket into drain clip mounting hole (see Fig. C on pg. 6).
STARTER TIPS
FOR BEST RESULTS, read the following start up tips before using this product. Remember this is an
ELECTRIC unit and has different characteristics than a gas unit. Note: Watch “Butterball Electric Fryer
(XL): Features and Benefits” on www.masterbuilt.com.