headline bars
continuation tabs
notes
warnings
headline bars
continuation tabs
notes
warnings
headline bars
continuation tabs
notes
warnings
headline bars
continuation tabs
notes
warnings
headline bars
continuation tabs
notes
warnings
headline bars
continuation tabs
notes
warnings
16
model no. 5742 | contact us 1-800-689-9928
OPERATING INSTRUCTIONS
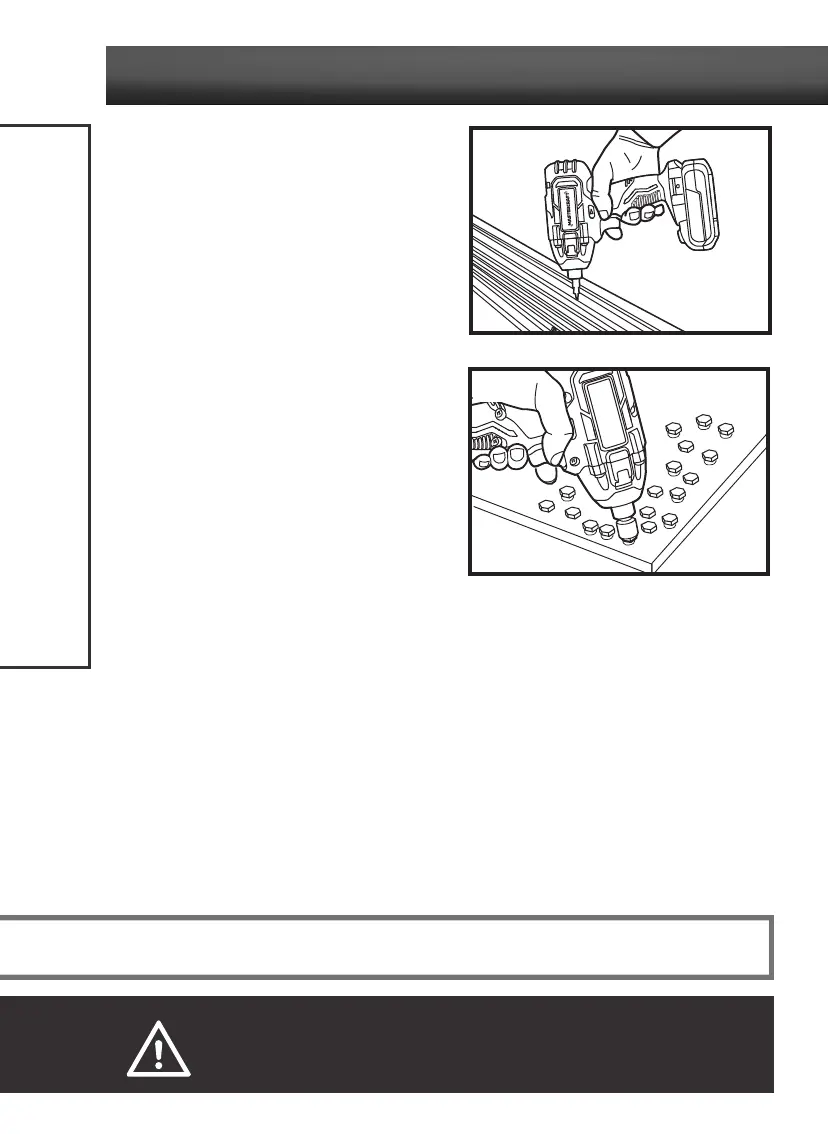
TIGHTENING SCREWS OR NUTS
(fig 9/fig 10)
1. Install the correct bit/socket.
2. Apply just enough pressure to keep the bit/
socket engaged on the screw or nut.
3. Position the direction-of-rotation selector to the
left of the tool for forward rotation.
4. Apply minimal pressure to the variable-speed
trigger switch initially. Increase the speed only
when full control can be maintained.
LOOSENING SCREWS AND NUTS
(fig 9/fig 10)
1. Install the correct bit/socket.
2. Apply just enough pressure to keep the bit/socket
engaged on the screw or nut.
3. Position the direction-of-rotation selector to the
right of the tool for reverse rotation.
4. Apply minimal pressure to the variable-speed
trigger switch initially. Increase the speed only
when full control can be maintained.
TIGHTENING TORQUE
The fastening torque is affected by a wide variety of factors including the those listed below. After
fastening, always check the torque with a torque wrench.
Voltage: Low voltage, due to a nearly discharged battery, will reduce fastening torque.
Socket size: Failure to use the correct socket size will cause a reduction in fastening torque.
Bolt size: Larger bolt diameters generally require higher fastening torque. Fastening torque will also
vary according to length, grade, and torque coefficient.
Bolt: Ensure that all threads are free of rust and other debris to allow proper fastening torque.
Material: The type of material and surface finish of the material will affect fastening torque.
fig 10
fig 9
NOTICE: Before starting your job, always perform a test operation to determine the proper fastening time.
WARNING!
• Do not over-tighten, because the force of the impact driver can break the fastener. Keep the impact driver
pointed straight at the fastener to avoid damaging the fastener head.