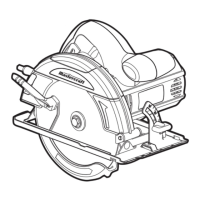
7 1/4" CIRCULAR SAW - 054-8357-67 1/4" CIRCULAR SAW - 054-8357-6
1817
OPERATING INSTRUCTIONS
OPERATING INSTRUCTIONS
DANGER!
If the cord hangs on the workpiece during a cut, release the switch trigger immediately.
Unplug the saw and reposition the cord to prevent it from hanging again.
DANGER!
Using a saw with a damaged cord could result in serious injury or death. If the cord has been
damaged, have it replaced before using the saw again.
Starting/stopping the saw
(g 11)
Tostartthesaw:Depress the lock-off button, and
then depress the switch trigger.
Always allow the blade reach full speed, and then
guide the saw into the work-piece.
WARNING!
If the blade comes into contact with the workpiece before it reaches full speed, this may
cause the saw to “kick back” toward the operator, resulting in serious injury.
To stop the saw: Release the trigger switch.
After releasing the trigger switch, allow the blade to come to a complete stop. Do not remove the saw from
the workpiece while the blade is moving.
fig 11
Making a crosscut or rip cut
(gs 12,13)
When making a crosscut or rip cut, align the
guideline with the kerf indicator on the base, as
shown in g 13. The distance from the saw blade
to the saw base is approximately 4 1/4" (10.8 cm)
on the left side of the saw and 1 1/2" (3.8 cm) on
the right side.
Blade thicknesses vary, so you should always make
a trial cut in scrap material along a guideline to
determine how much the guideline must be offset
from the guide to produce an accurate cut.
NOTE:
The distance from the cutting line to the
guideline is the amount by which the guide should
be offset. Use a guide when making long or wide
rip cuts.
Rip cutting using a straight
edge
(g 13)
1. Secure the workpiece.
2. Clamp a straight edge to the work-piece using C-clamps (available separately).
NOTE:
Position the C-clamps so that they will not interfere with the saw housing during the cut.
3. Rest the front edge of the base on the work piece.
4. Depress the trigger switch to start the saw.
5. Allow the blade to reach full speed, then guide the saw into the workpiece and make the cut.
6. Saw along the straight edge to achieve a straight rip cut.
7. Release the trigger switch and allow the blade to come to a complete stop.
8. Lift the saw from the workpiece.
NOTE:
Do not bind the blade in the cut.
fig 12
Full length kerf
indicator
Guideline
fig 13
C-Clamp
Straight edge
Workpiece
Guideline
 Loading...