16 17
model no. 055-6761-2 | contact us 1-800-689-9928
ASSEMBLY AND ADJUSTMENTS
INTENDED USE
This mitre saw is designed for wood cutting applications.
DO NOT use under wet conditions or in presence of
ammable liquids or gases.
DO NOT let children come into contact with the tool.
Supervision is required when inexperienced operators use
this tool.
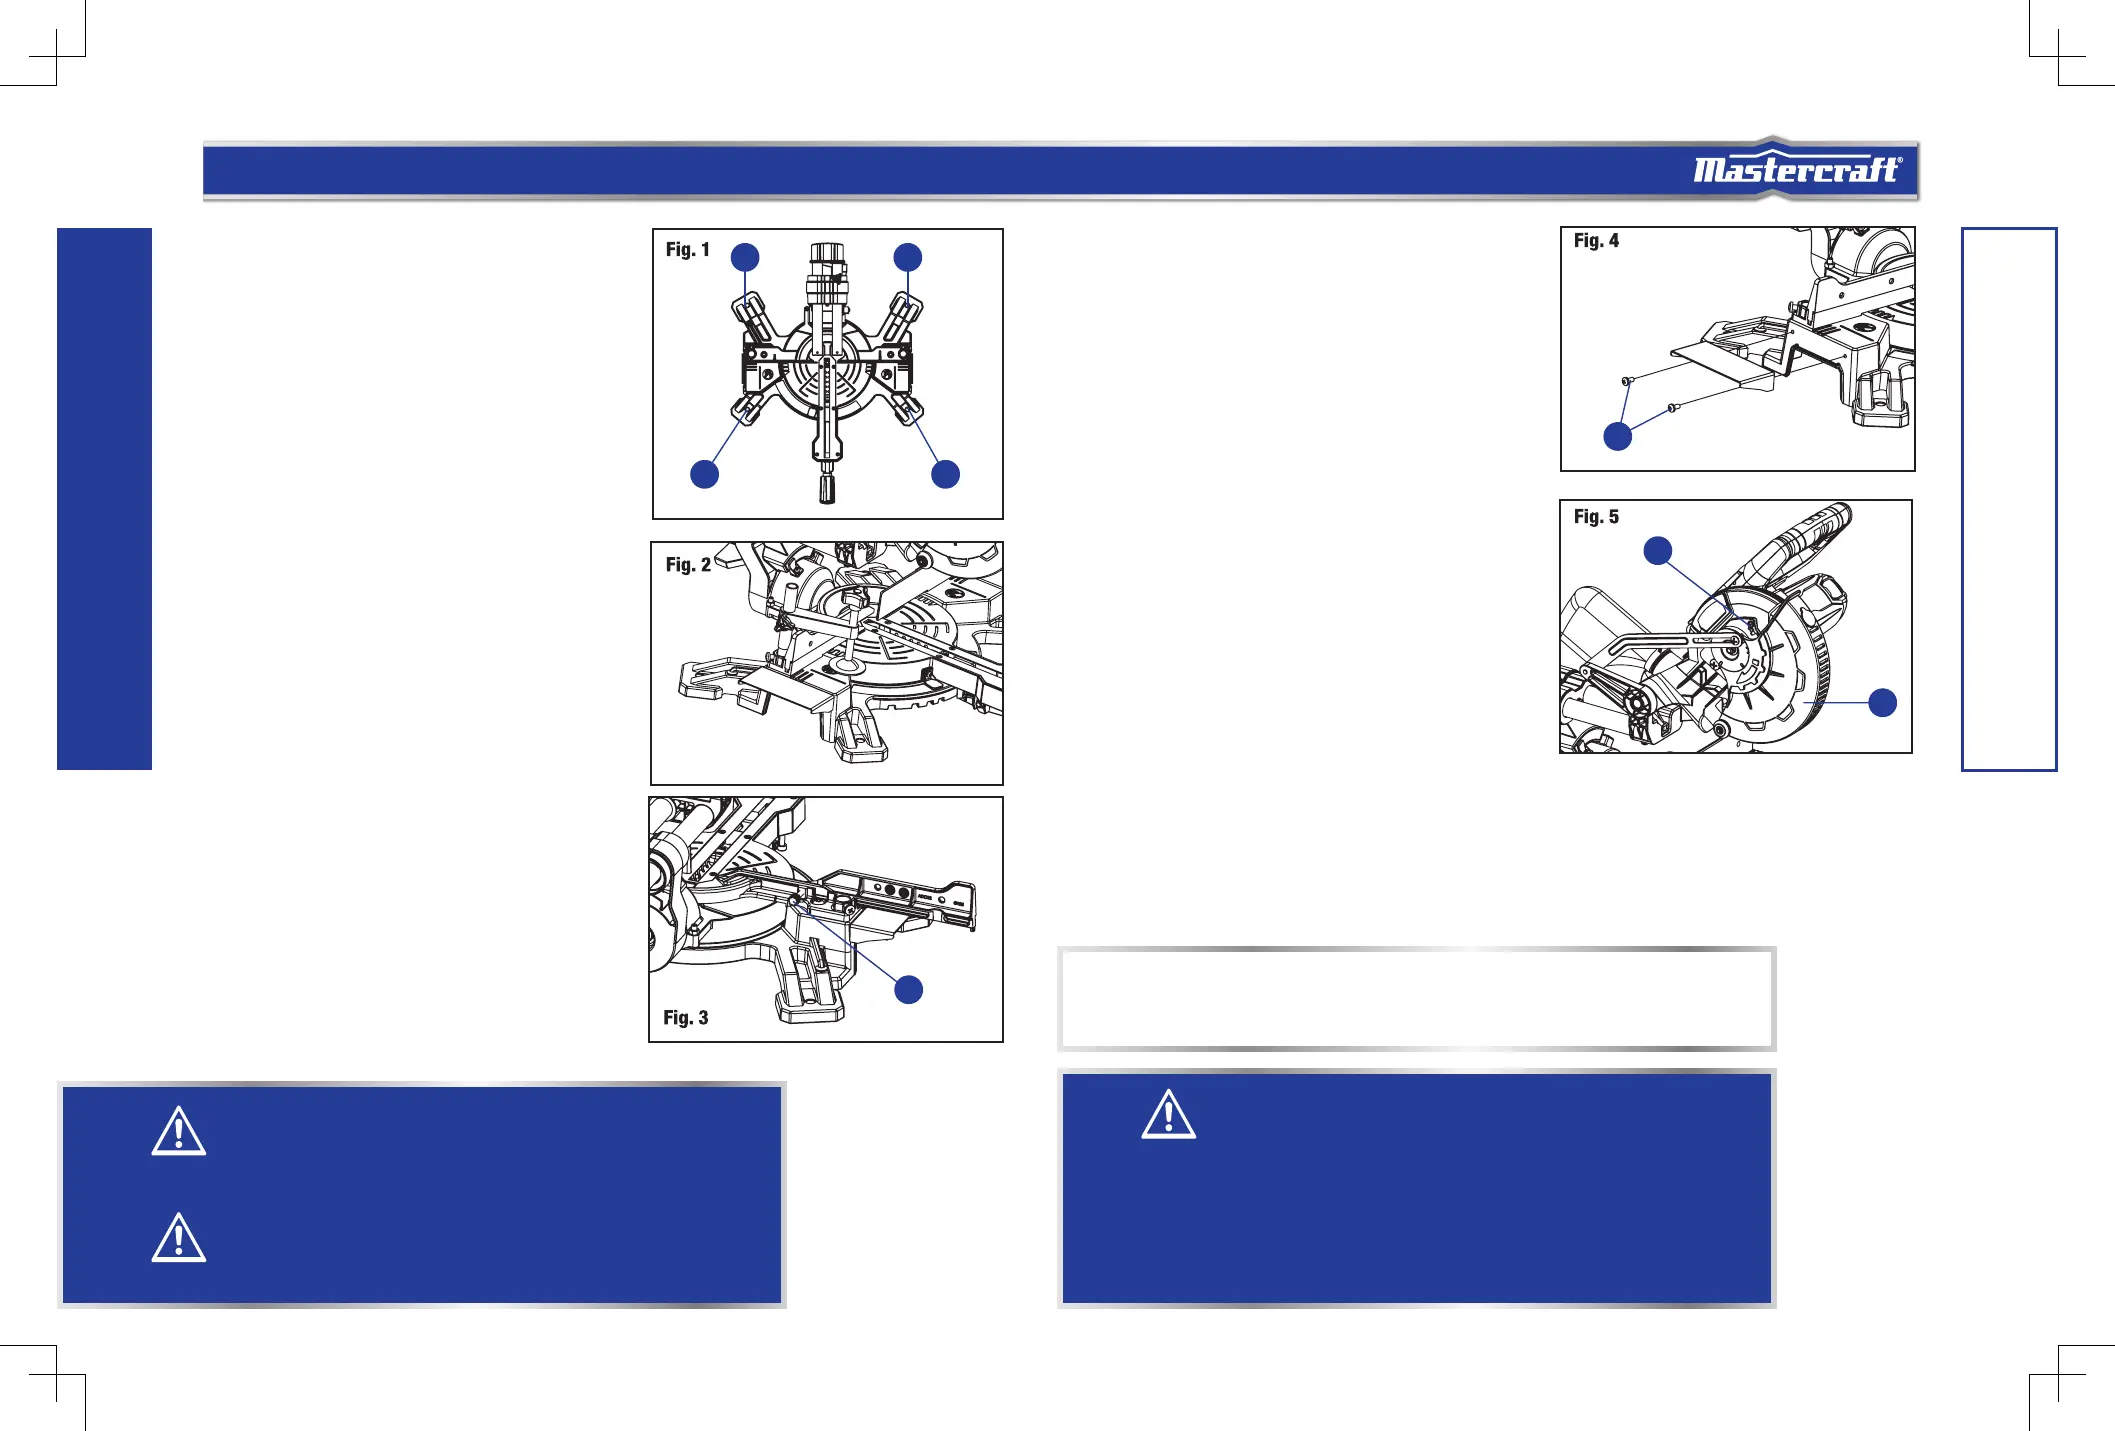
BENCH MOUNTING (Fig. 1)
This tool should be bolted with four bolts to a level and
stable surface using the bolt holes (1) provided in the tool’s
base. This will help prevent tipping and possible injury.
INSTALLING THE WORK CLAMP (Fig. 2)
There are two mounting holes for the work clamp. These
are located just behind the fence on the left and right side
of the base.
• Loosen the locking screw with a cross-head
screwdriver.
• Place the work clamp in the desired mounting hole.
• Tighten the screw to hold the work clamp.
INSTALLING SLIDING FENCE (Fig. 3)
• Loosen the fence lock knob (1), to clear fence slots.
• Install the sliding fence. Lower fence into fence slot
and slide it from the side of fixed fence to inside.
• Tighten fence lock knob securely.
INSTALLING EXTENSION TABLES (Fig. 4)
Extension tables have been provided for both the left and
the right side of the saw.
WARNING!
Always be sure that the tool is switched off and unplugged before adjusting or checking function
on the tool. Failure to switch off and unplug the tool may result in serious personal injury from
accidental start-up.
NOTE:
Pay attention to the pieces being removed, noting their position and the direction they face. Wipe the blade
collar clean of any sawdust before installing a new blade.
1 1
1 1
To install extension tables:
• Remove the screws (1) from the base.
• Install the extension tables and tighten screws to
secure the extension tables in place. Be sure the
extension tables are on the same level as the main
table.
REMOVING AND INSTALLING THE BLADE
Removing blade (Fig. 5 to 8)
• Unplug the tool from the power source.
• Adjust the lock-down pin to raise the cutting head.
• Loosen the cover plate screw (1) about 4 turns with
a cross-head screwdriver. Do not remove this screw
from the tool.
• Lift and hold up the lower blade guard (2) to expose
the threaded blade bolt (3).
• Press and hold the spindle-lock button (4) and rotate
the blade at the same time, until it is locked in
position.
• Continue to hold the spindle lock button to keep it engaged, while using the hex key to turn the
threaded blade bolt clockwise and remove the threaded blade bolt.
• Remove the outer flange (5) and the blade (6). Wipe the flanges and spindle to remove any dust and
debris.
ASSEMBLY AND ADJUSTMENTS
WARNING!
• To avoid injury, never use the saw without the cover plate securely in place. It keeps the
blade bolt from falling out if it accidentally loosens and helps prevent the spinning blade from
coming off the saw.
• Make sure the anges are clean and properly arranged. Lower the blade into the lower table
and check for any contact with the metal base or the mitre table.
• To avoid injury from an accidental start, make sure the switch is in the OFF position and the
plug is not connected to the power source outlet.
• Never cut metals or masonry products with this tool. This mitre saw is designed for use on
wood and wood-like products only.
WARNING!
Ensure that the tool will not move on the supporting surface. Movement of the mitre saw on the
supporting surface while cutting may result in loss of control and serious personal injury.
1
2
1
1