WARNING: DO NOT use tile saw blades rated less
than the no load speed of this tile saw. Failure to heed this
warning could result in personal injury. DO NOT use a tile
saw blade with cracks, gaps, or teeth.
WARNING: A 10 in. tile saw blade is the maximum
blade capacity of the tile saw. NEVER use a tile saw blade
that is too thick to allow blade washer to engage with the
ats on the spindle. Larger blades will come in contact with
the splash guard, while thicker blades will prevent the blade
bolt from securing the blade on the spindle. Either of these
situations could result in serious accidents and can cause
serious personal injury.
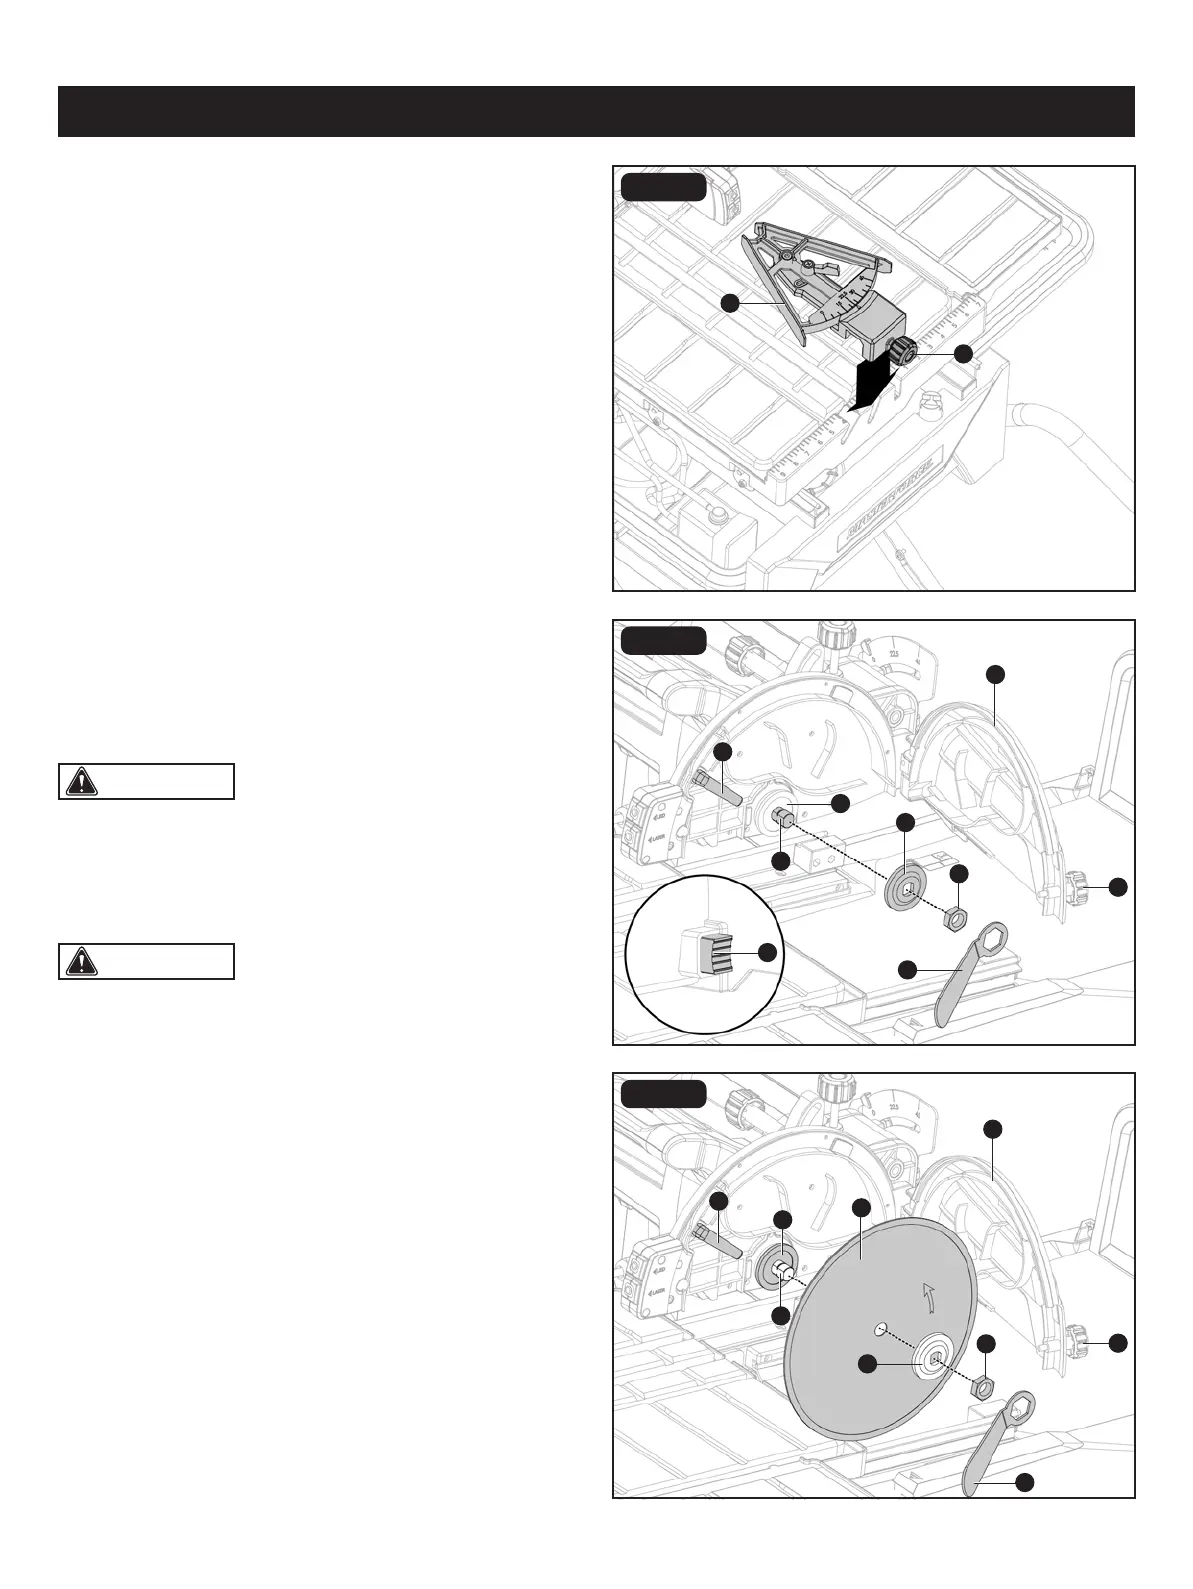
FIG. 9
FIG. 10A
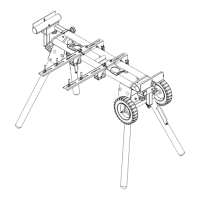
INSTALLING THE MITER GUIDE (Fig. 9)
The miter guide can be used from both the left and right
side of the tile saw blade.
• Place slot on underside of the miter guide (G) on table
fence. Lock the miter guide (G) securely to table by turning
lock knob (VV) clockwise.
THE SAW BLADE (Fig. 10A-10B)
INSTALLING THE SAW BLADE
For maximum performance and safety, it is recommended
that you use the 10 in. tile saw blade provided with your tile saw.
Additional tile saw blades are available at your local retailer.
• Unplug the tile saw.
• Turn the blade guard knob (WW) counterclockwise. Open
the blade guard (XX) to expose the spindle.
• Press and hold the spindle lock (YY) in. Loosen the spindle
nut (ZZ) counterclockwise and remove the nut (ZZ), outer
ange (aa).
• Leave the inner ange (bb) on the spindle (cc), making sure
the cupped side of the ange is facing the tile saw housing.
• Wipe a drop of oil onto the inner ange where it will contact
the blade.
• Slide the tile saw blade (M) onto spindle (cc). Make sure
that the tile saw blade’s rotation arrow points in the same
direction as the rotation arrow on the blade guard.
Page 19
ASSEMBLY
P
G
YY
P
bb
VV
cc
cc
aa
M
XX
XX
dd
dd
ZZ
bb
ZZ
FIG. 10B
WW
WW
aa