Page 26
CAUTION: When storing, place the rear extension
tray at the bottom, side extension tray B on the middle and
rear extension tray A on the top.
FIG. 18A
FIG. 18B
FIG. 18C
OPERATION
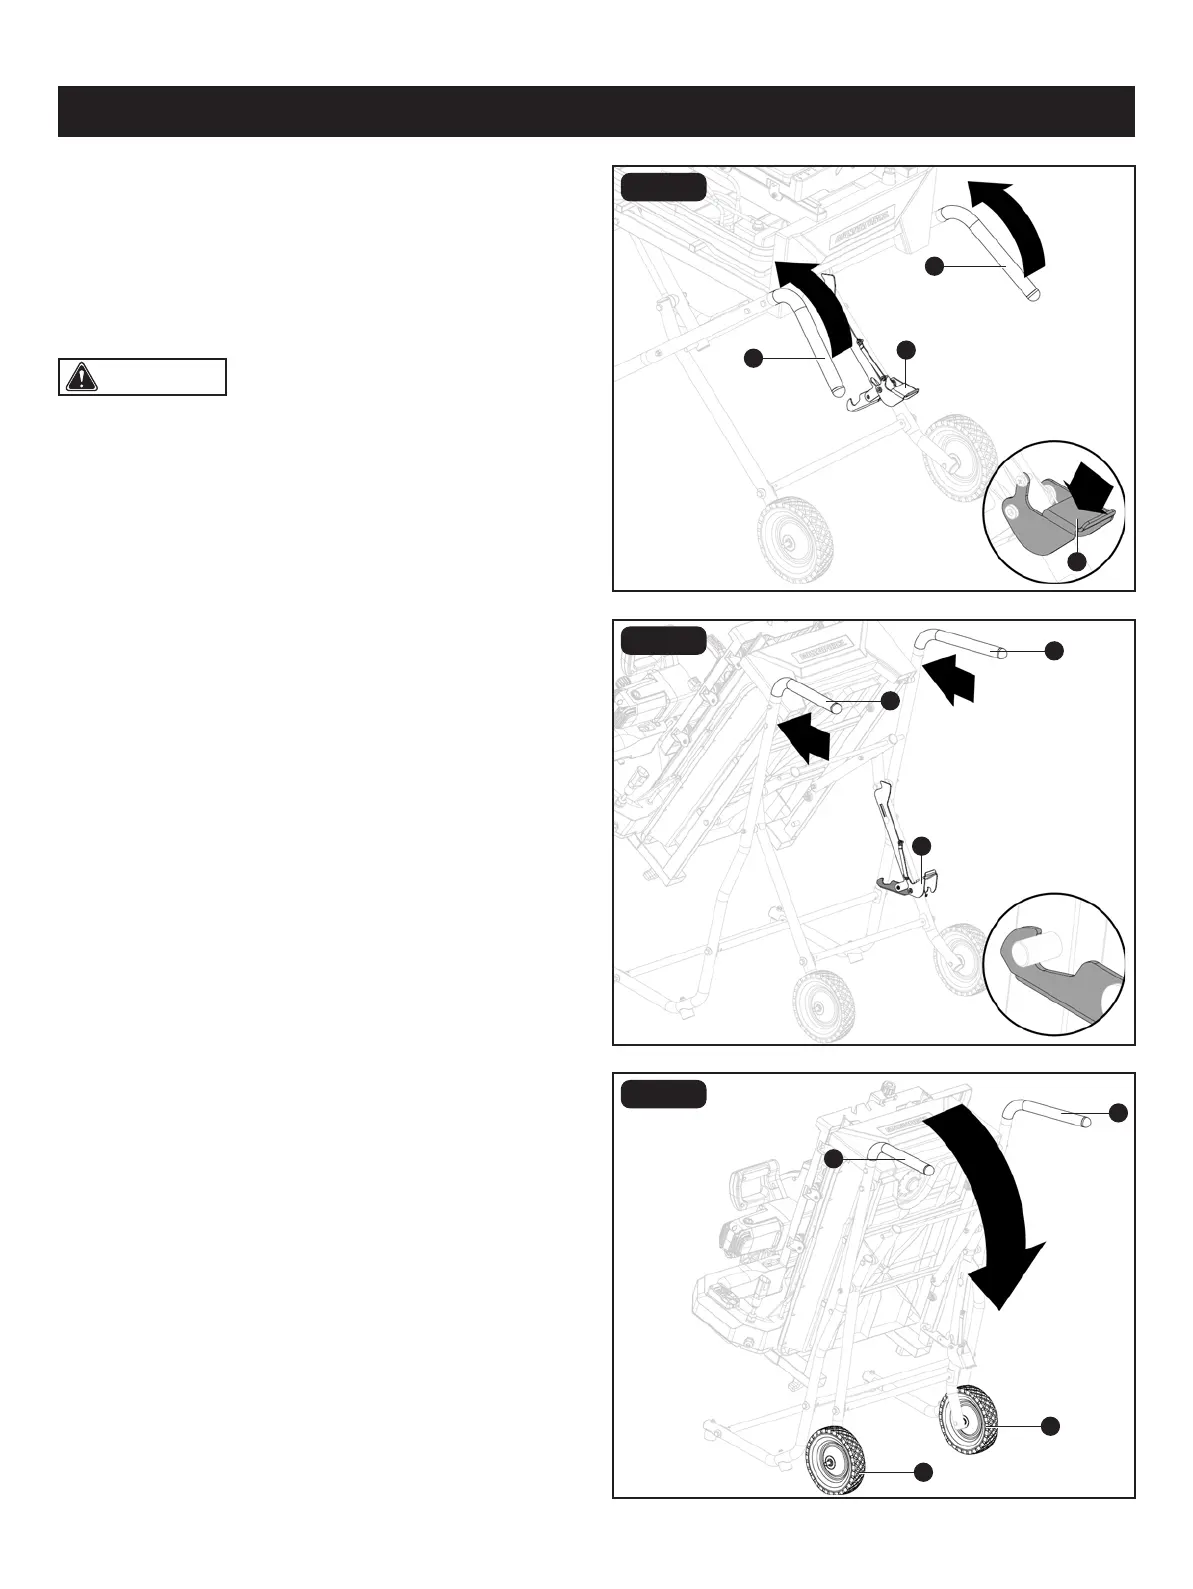
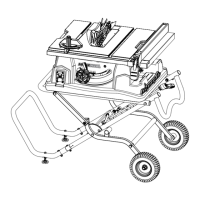
CLOSING OR OPENING STAND
(FIG. 18A-18E)
• Unplug the tile saw and water pump.
• Remove water rear and side extension trays and store
them inside the water tray.
Remove any work pieces from the tile saw.
CLOSING STAND (FIG. 18A-18B)
• At the same time, step on release lever (JJ), grasp handles
(EE) and lift them up and away from the body.
• Push the tile saw until the release lever (JJ) clicks and locks
into place.
MOVING STAND (FIG. 18C)
• Holding the handles (EE) rmly, pull the handles toward you
until the stand and tile saw are balanced on the wheels (FF).
• Push the tile saw to the desired location then either open
the stand for tile saw operation or store the tile saw in a
dry environment.
• Place the table in front of the frame and lock the table in
place.
IMPORTANT: Ensure that the table is locked in place
before closing the stand.
• Lower the wheel and secure by locking the tile saw head
in place using the lock knob.
JJ
JJ
JJ
EE
EE
EE
EE
EE
EE
FF
FF