WARNING: Always disconnect your
angle grinder from the power source when
replacing grinding or cut-off discs, adjusting
the guard, cleaning the tool or when the tool
is not in use. Disconnecting the angle
grinder will prevent accidental starting that
could cause serious personal injury.
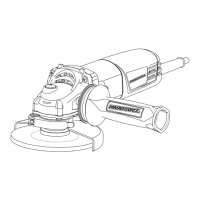
INSTALLING THE AUXILIARY HANDLE
1. Unplug the angle grinder from the power
source.
2. Install the auxiliary handle (1) by screwing
it clockwise into the left side (2) of the gear
housing (3) (Fig. 1).
NOTE: The handle can be installed in two
different positions; left side or right side
(Fig. 3 & 4).
WARNING: The auxiliary handle must
always be used to prevent loss of control and
possible injury.
3. Tighten the auxiliary handle securely.
NOTE: Hand tighten the auxiliary handle. Do not
over tighten.
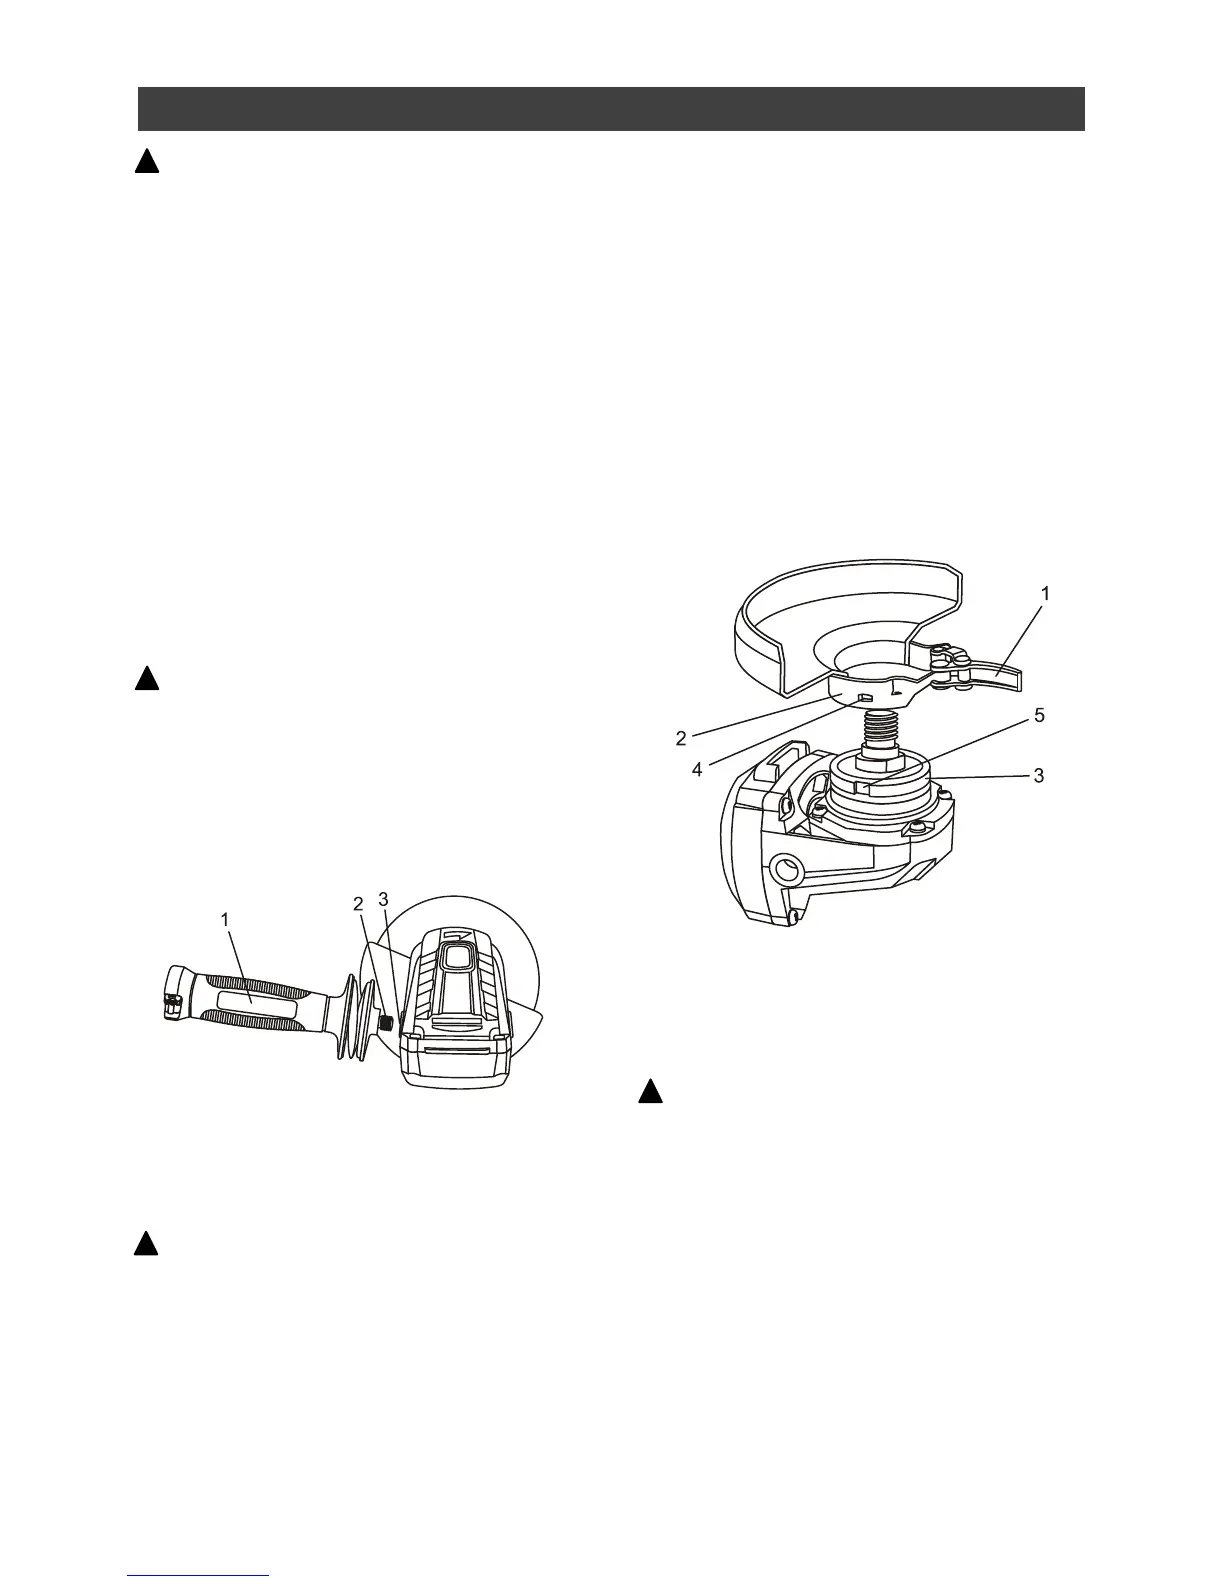
INSTALLING THE GRINDING DISC GUARD
WARNING: The grinding disc guard
must be installed before installing a grinding
disc or using the angle grinder. Failure to do
so could result in serious personal injury.
1. Pull the guard clamp lever (1) outward to
allow the guard clamp to expand for
installation.
2. Slide the guard clamp (2) over the spindle
housing (3) until the blade guard locating
detents (4) mate with the grooves (5) in the
spindle housing (Fig. 2).
3. Press the guard clamp fully onto the
spindle housing.
NOTE: Rotate the guard so it is positioned
correctly depending upon the location of the
side handle in Fig. 3 & 4.
4. Push the guard clamp lever toward the
guard clamp until the guard clamp firmly
locks the guard onto the spindle housing.
INSTALLING THE METAL CUTTING DISC
GUARD
WARNING: The metal cutting disc guard
(Fig. 2A on Page 15) MUST be installed
whenever a metal cutting disc is installed on
the tool.
The metal cutting disc guard included with this
tool is the same as the grinding disc guard with
one exception. It has an additional “web” (1) on
the bottom of the guard to protect the operator
from sparks generated when cutting metal
(Fig. 2A on Page 15).
Install the metal cutting disc guard exactly the
same as outlined in Fig. 2 above.