MasterShunt 500 – User and Installation manual
4 Installation
WARNING
During installation and commissioning of the MasterShunt 500, the Safety Guidelines and Measures are always
applicable. See Chapter 2 ‘Safety guidelines and measures’.
CAUTION!
Wrong connections may cause damage to the MasterShunt 500 and other equipment as well, which is not covered
by warranty!
- For correct measurements the MasterShunt 500 must be placed as close as possible to the batteries.
- Optionally a fuse can be placed inside the MasterShunt 500 to make your installation safer, see Section 4.5.
Otherwise make sure to place fuses on other places in your installation to guarantee its safety.
4.1 Things you need for installation
77020115
(CZone & MasterBus)
77020110
(MasterBus only)
RJ45-M12 Drop cable CZone/MB, 1m
Terminator for MasterBus network
Two translucent end pieces
One translucent mid piece for easy connection to Mastervolt's DC Distribution 500.
Four M8 bolts with washer to fasten the DC wiring.
Tools and materials:
For CZone setup, a tee connector (not included)
A cross-head screw driver
2 mm flat blade screwdriver
Hexagonal socket wrench size 6 mm
Two heavy duty battery cables shortest possible, finished with cable lugs. Cable thickness must be in accordance with the
electrical installation
A complete set of spanners, pliers and wrenches may be helpful during the installation of the MasterShunt 500.
CAUTION!
Use isolated tools!
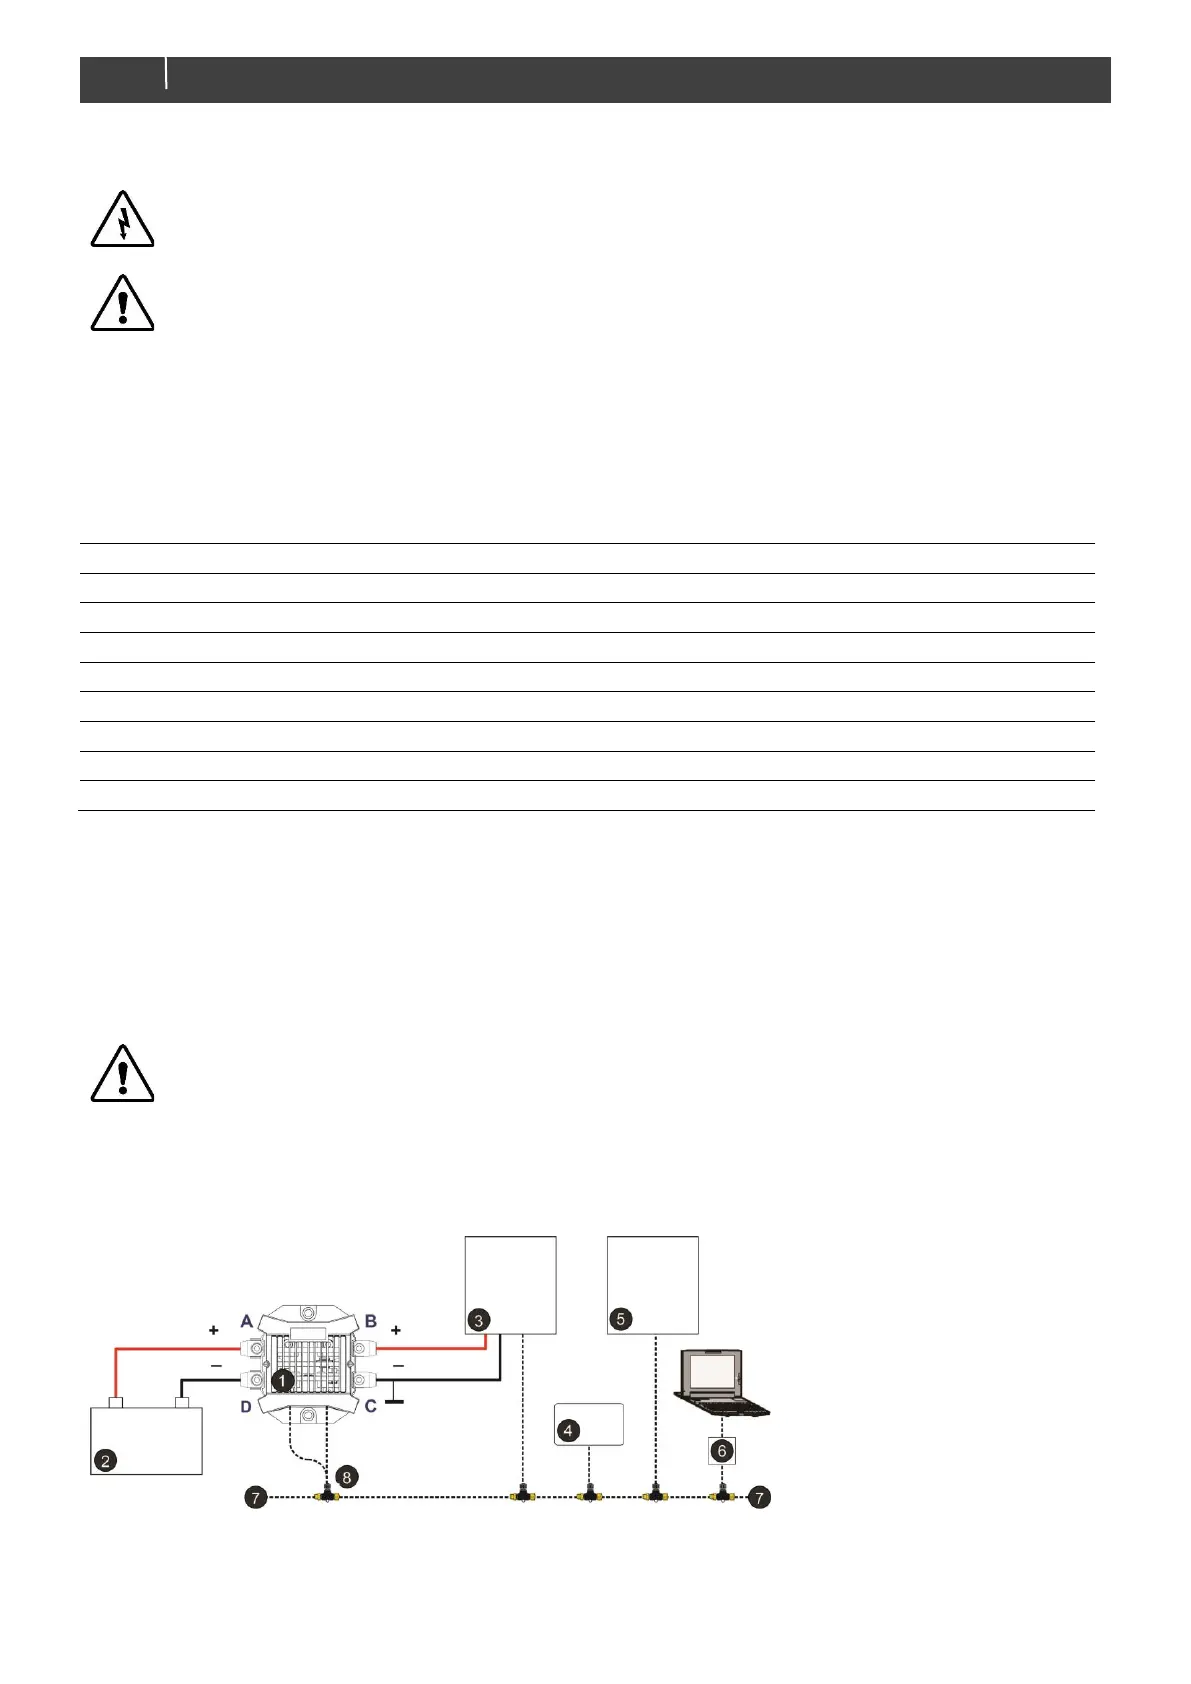
4.2 Connection example
The following schematics illustrate the general placement of the MasterShunt 500 in a network. It is not meant to provide
detailed wiring instructions for any particular electrical installation.
in a CZone network
MasterShunt 500
Battery bank
Charger
Remote panel
General CZone module
CAN to USB converter
CZone Backbone cable with
terminators at both ends
Drop cable CZone/MB
 Loading...