November 2004 / MOBILE WHISPER 6/12-6/8/10/12/16 ULTRA / EN 9
For the alternator cooling system we use an open -non
pressurised- system. Therefore the 12 mm overflow pillar
on the expansion tank should stay open. A piece of hose
can be used to drain redundant liquid that is thrown out
because of the expansion of the liquid in the system.
When open the expansion tank can easily release air that
is ventilated by the different connections.
As the capacity of the alternator cooling system is very
small, also the initial filling can be done via the expansion
tank. It could be necessary to refill the tank a few times.
The pump of the alternator cooling system is self-priming
and this makes the system less sensitive for air traps.
For the engine we use a pressurised system. The 12 mm
connection on the top is closed.
Wherever the radiators are mounted it is necessary to
ventilate the exhaust manifold of the engine. The exhaust
manifold has a 8 mm connection to ventilate the
manifold. There is a 8 mm high temperature resistant
hose in the delivery to connect the hose connection on
the side of the manifold with the expansion tank. This
hose can go down first through a hole one has to drill in
the lower green part of the soundshield canopy and than
up again to the expansion tank. (refer to figure 14).
Initially the engine cooling system can be filled via the
cap on the exhaust manifold of the engine. However
when the radiator is above the engine one can only fill
the system to the level of the manifold. Additional filling
has to be done via the expansion tank.
For large engine cooling systems with long pipes or for
extra reserve there is an extra large expansion tank with
a content of 7 litres and an alarm for low coolant level
that can be supplied as an option. (refer to figure 15).
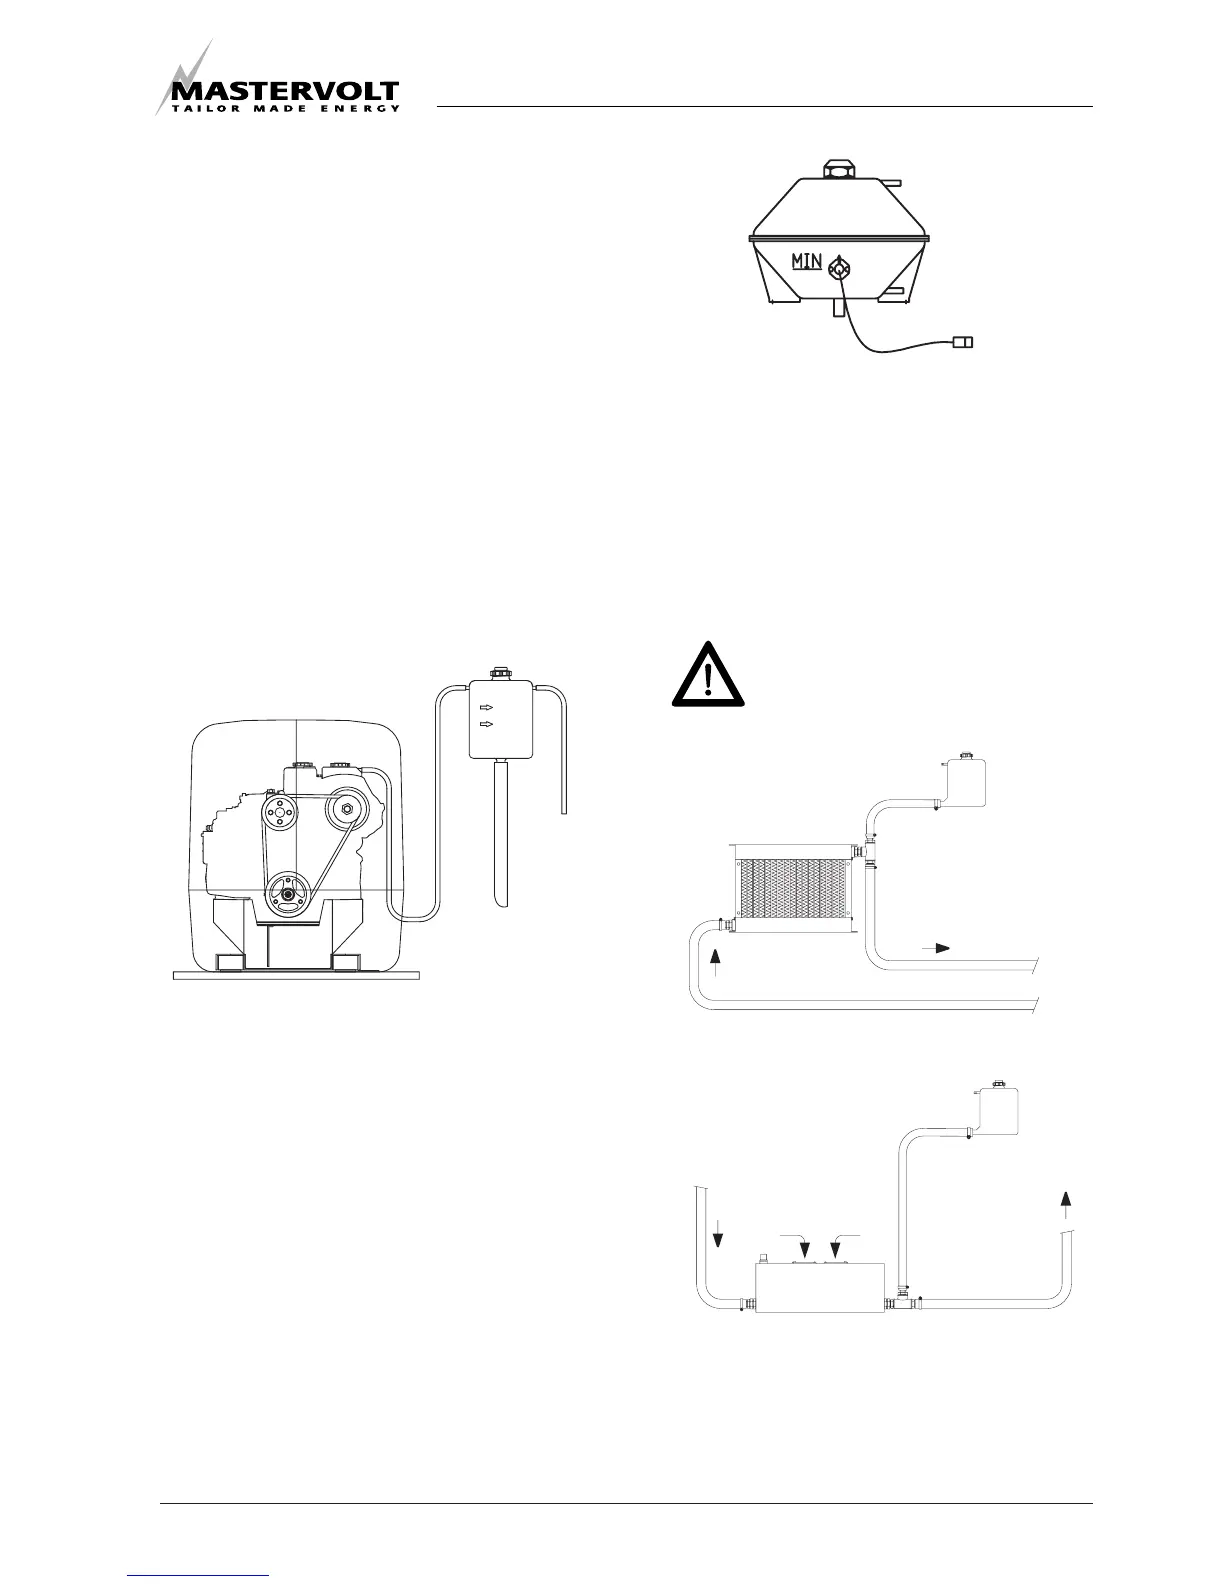
When mounting the radiators it is important to take care
that the outgoing connection, which is the connection to
the engine inlet, is on the top position (refer to figure 16
detail A) and is connected to the expansion tank. Also
when the radiator is mounted flat at the bottom of the
vehicle the outgoing connection is connected to the
expansion tank This is the best way to have the system
release air and to add liquid when necessary.
The expansion tank must be fitted in the
outlet of the radiator = the inlet pipe of the
engine
Fig.16. Outgoing connection connected to the expansion
tank
When both radiators are flat mounted on the roof, the
expansion tanks should be mounted a little higher.
(refer to figure 17 detail B).
INSTALLATION
 Loading...