42
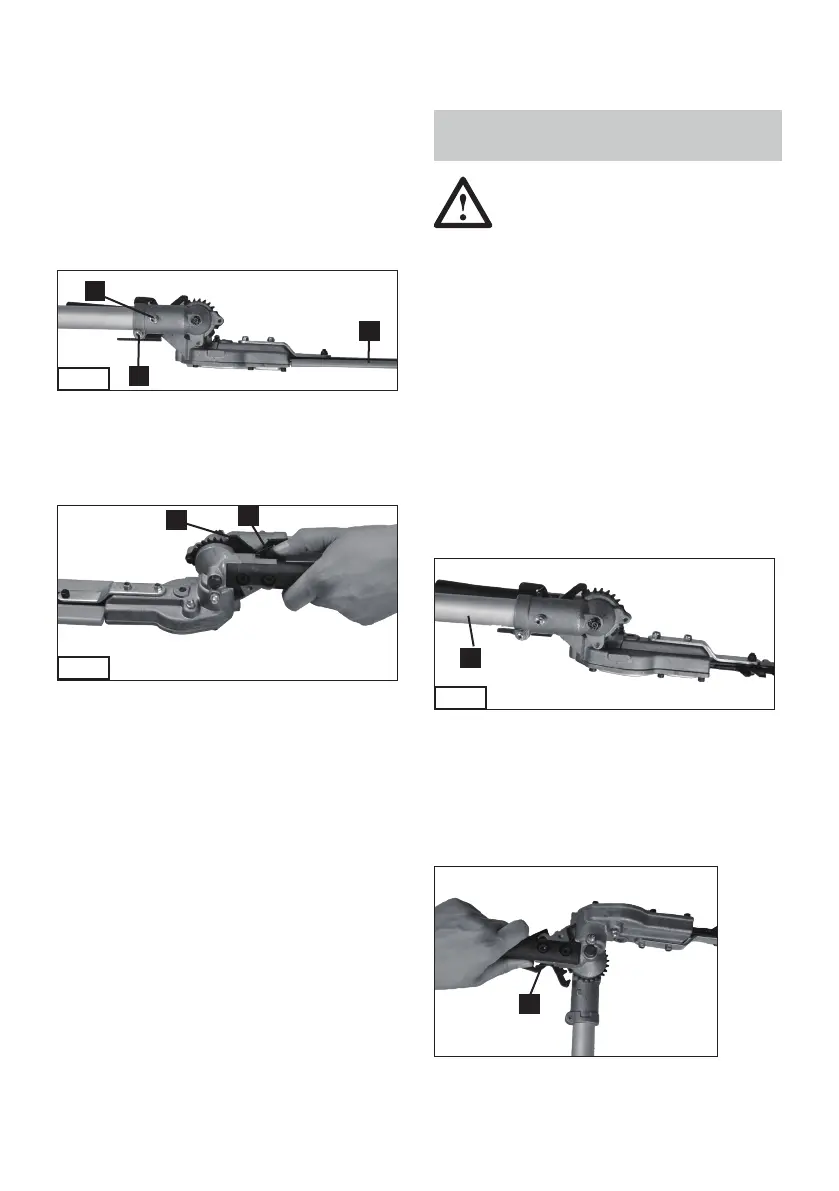
gearbox housing and please push the outer tube
as far as it will go.
3. Turn the gearbox / cutting attachment so
that the indexing screw is aligned upright over
the hole. The cutting attachment is found in
the reverse position (in the storage / transport
position).
A42
2
3
1
1). Blade cover is overlaid
2). Align with hole in outer tube and tighten
index screw
3). Finally tighten the clamping screw
A43
1
2
1). Place the hand guard in such a way that the
tip of the cutting attachment is in the recess (if
the hedge trimmer is in the storage / transport
position).
2). Tighten the clamping
4. Use an Allen wrench (4 mm) to rst tighten the
index screw of the gearbox housing and then the
clamp screw.
5. Align the hand guard in such a way that the tip
of the cutting attachment lies in the recess. Make
sure that the cutting attachment is not jammed
in the recess. Then tighten the screw of the hand
guard with a screwdriver.
Adjustment of the hedge trimmer with
articulated arm
Warning!
The knives are very sharp. Do not touch the
blades with your bare hands. Do not rub the
blades against your body.
The hedge trimmer with articulated arm must
not be switched on or used, when the cutting
attachment is in storage / transport position.
Always wear gloves when working with the
hedge trimmer.
Lay the hedge trimmer on a level, even surface.
The engine should be on the tank guard. Make
sure the blade cover is overlaid.
1. Hold the handle that is directly behind the
hand guard with your right hand.
Hold the hedge trimmer’s locking lever with your
left hand, see A 44.
A44
1
1. Locking lever
Important! The lock prevents the bolt from being
accidentally released.
2. Press the unlocking device with your left index
nger. Press the unlocking device with your left
thumb. See A 45.
A45
2
1
 Loading...