Last update: February 2018
2. TUNNEL
Once the final tunnel position has been determined and all dimensions have been
checked, mark the center-point of the tunnel on both sides of the hull and drill holes of
8 –10 mm ∅ on either side.
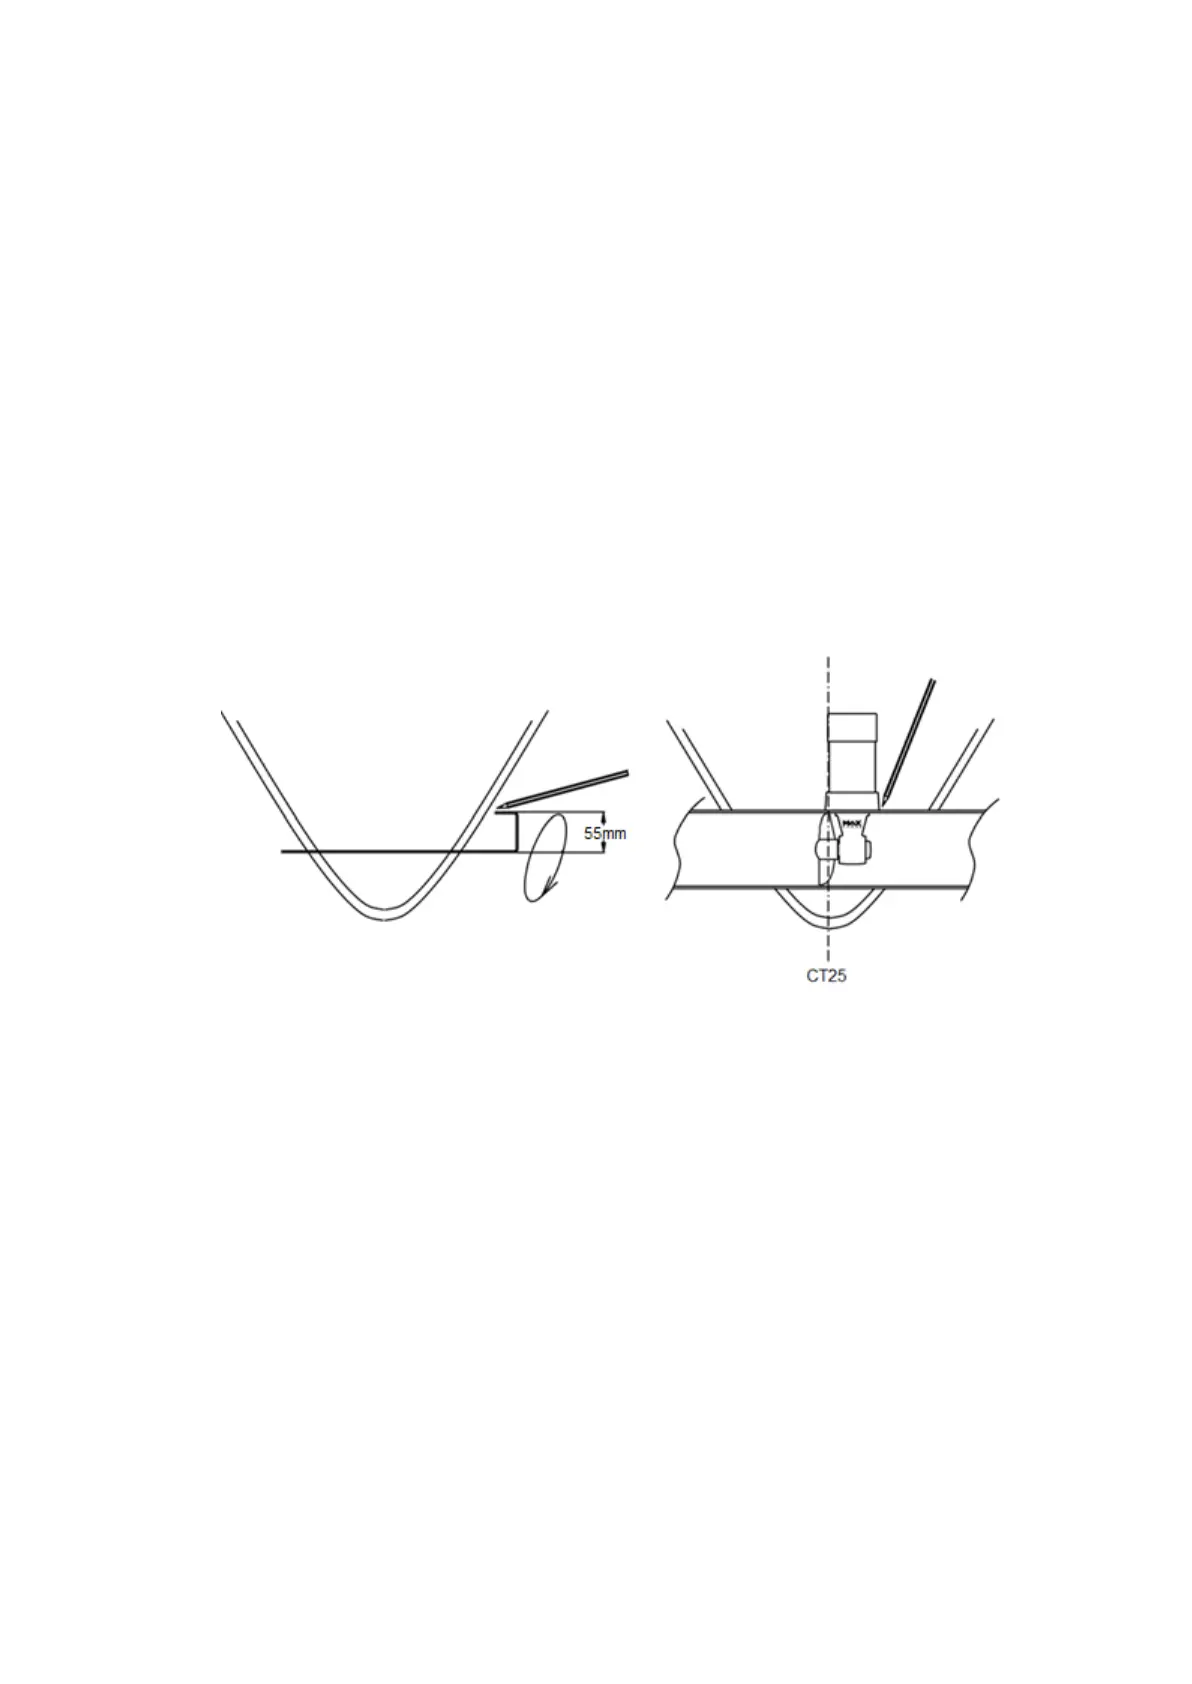
Using a metal rod, construct a compass with a 55mm radius. Insert through the holes and
trace the ellipses, as shown below.
After cutting the holes out following the elliptical guidelines, use an abrasive disc to
prepare the inside and outside surfaces of the hull for laminating (approx. 10 to 15cm
around the holes).
Position the tunnel in the hull, mark the positions of the different components, as well as
the areas that require laminating, and then remove the tunnel. It is advisable to drill the
tunnel before laminating it into position. See section 3 "Composite Motor Support and
Drive leg" for more details.
Replace the tunnel. To secure its position apply reinforced fiberglass filler to all areas,
both inside and outside, in order to entirely fill the space between the hull and the tunnel.
Laminate using a minimum of 8 layers of ISOPHTALIC RESIN alternated with mat and
roving.
In areas of difficult accessibility (i.e. under the tunnel), it is possible to only apply
reinforced filler.
Once the filler has been set on the outside, finish with a waterproof under coat, followed
by sanding and application of a waterproof finish coat.
In order to optimize the flow of water whilst sailing and to avoid turbulence due to the
tunnel, leave 1 to 4 cm of finish these with several coats of reinforced filler in order to
obtain the required hydrodynamic lines.
Once all laminating work is complete, apply a watertight barrier.