23
model no. 055-6766-2 | contact us 1-888-670-6682
ASSEMBLY
model no. 055-6766-2 | contact us 1-888-670-6682
22
ASSEMBLY
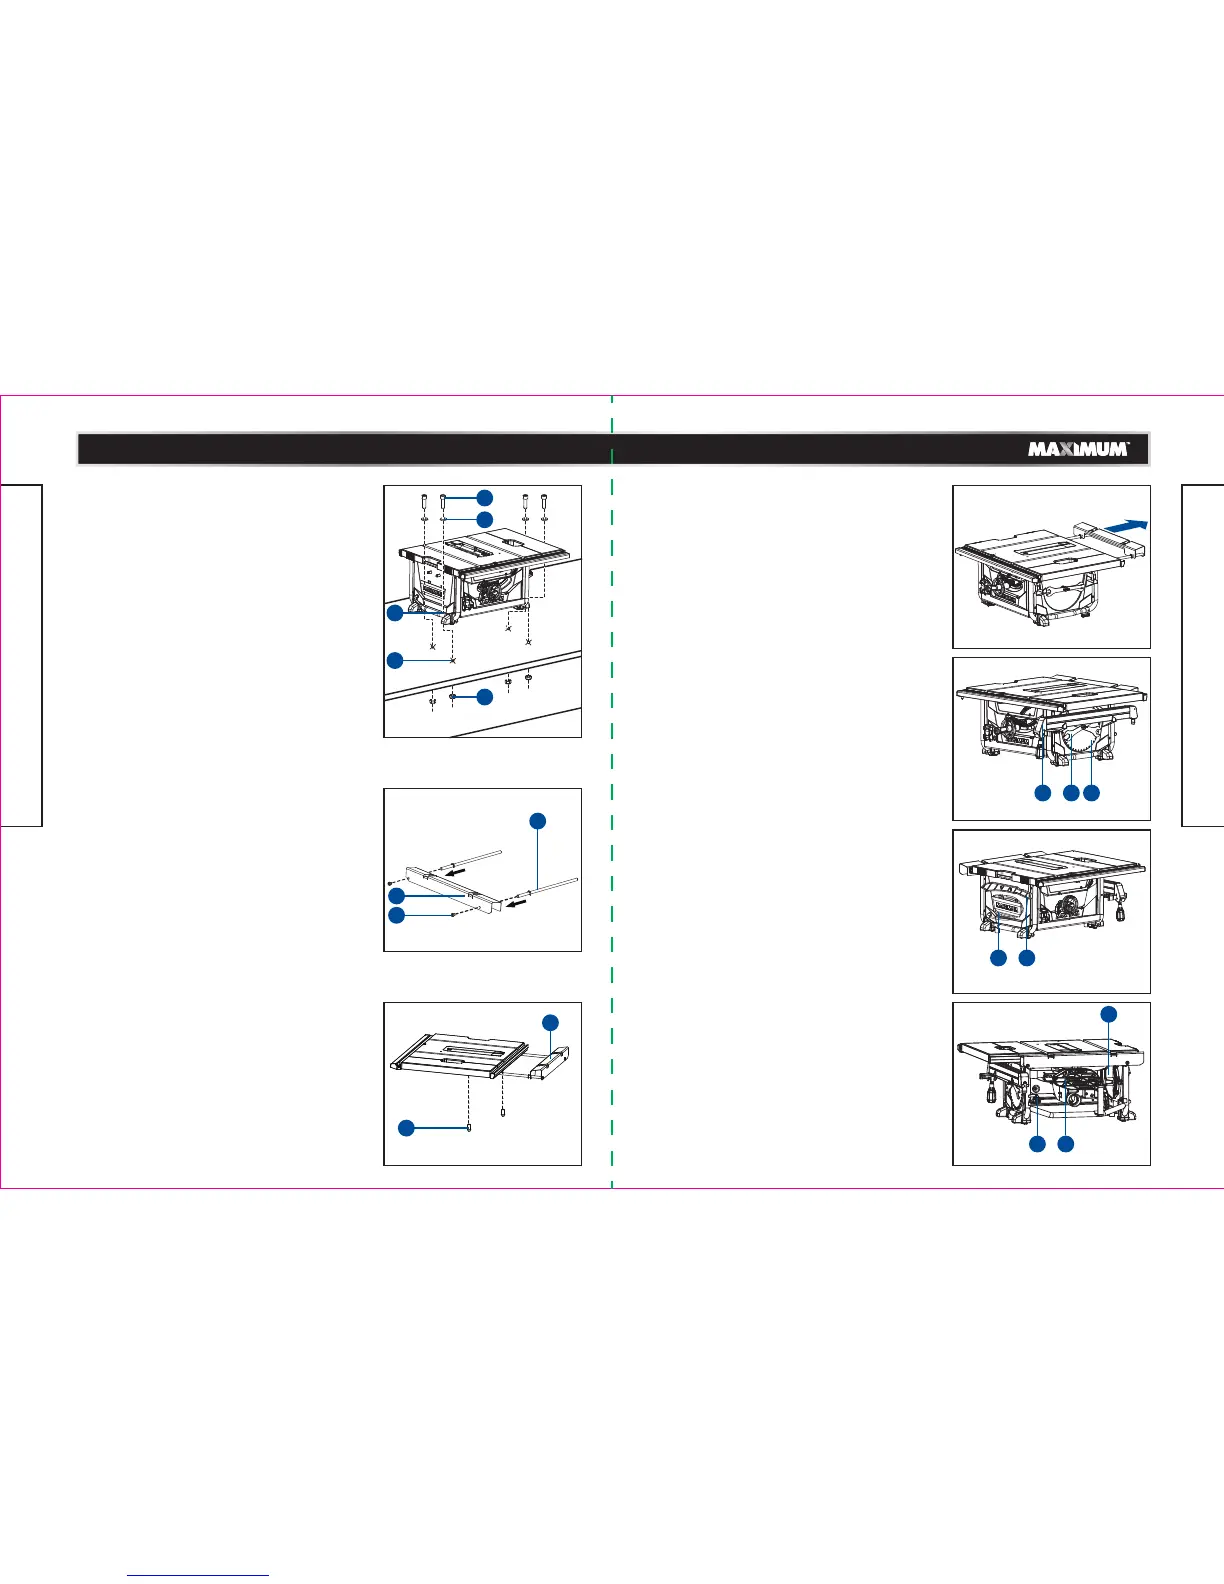
MOUNTING HOLES (Fig. 1)
The table saw must be mounted to a firm, supporting,
waist-high surface such as a workbench or leg stand.
• If mounting to a workbench, the base should be
bolted securely using 5/16" (8 mm) hex bolts (not
included) through mounting holes (1).
Bolts should be of sufficient length to accommodate
the tube frame, flat washers, hex nuts, and the
thickness of the workbench.
• Locate and mark where the saw is to be mounted,
relative to holes in the tube frame of the tool.
• Drill four 3/8" (9.5 mm) diameter holes (2) through
workbench.
• Place table saw on workbench aligning holes in
tube frame and with holes drilled in workbench.
• Insert four 5/16" (8 mm) dia. bolts (3) through
holes in tube frame, plastic septa and supporting
surface; then secure with 5/16" (8 mm) flat washers
(4) and 5/16" (8 mm) hex nuts (5).
Carefully check the workbench after mounting to
make sure that no movement can occur during use.
If any tipping, sliding, or walking is noted, secure the
workbench to the floor before operating.
INSTALLING THE OUTFEED SUPPORT (Fig. 2-3)
• Insert the extension table poles (1) into the two
holes of the outfeed support (2) and tighen the
pole stopper bolts (3).
• Insert the extension table poles (1) into the two
holes in the rear of the work table and into the
extension tube brackets that are located under the
work table. Position the outfeed support.
• Thread the two stop screws (4) into the holes
located on ends of the rear table extension
poles (1) and tighten them.
TO USE THE OUTFEED SUPPORT (Fig. 4)
The outfeed support slides to give the operator
additional for cutting long workpieces.
• With the table saw in the off position, stand behind
the saw.
• Grasp the outfeed support with both hands and pull
it until it is fully extended.
TO STORE THE TABLE SAW ACCESSORIES
(Fig. 5-7)
The table saw has four convenient storage areas
(one on either side of the saw cabinet, one on the
back of the saw. and one on inside of the right saw
cabinet) specifically designed for the saw’s
accessories: saw blade (1), blade wrench (2), rip
fence (3), push stick (4), plug cable (5), mitre
gauge (6), blade guard (7), and anti-kickback pawls
(8).
When not in use, store accessories securely.
Fig. 6
Fig. 7
6
Fig. 5
3 2 1
Fig. 1
Fig. 2
1
2
3
Fig. 3
Fig. 4
4
2
5
4
8
7
1
3
4
5
2
 Loading...