WARNING!
The table insert must be level with the saw table. If the table
insert is too high or too low, the workpiece can catch on the
uneven edges, resulting in binding or kickback, which could
result in serious personal injury.
WARNING!
Riving knife has three holes for three positions. The highest
position is for all through cuts. The middle position is for
rabbets and other non-through cuts, (with blade guard and
anti-kickback pawls removed). The lowest position is only for
shipping.
• Make sure locking pin is aligned with riving knife hole and
secured in position by tightening the tri-wing knob.
• Riving knife must be in line with blade. Make sure riving
knife sits flat against mounting bracket and lock plate.
2524
model no. 055-6766-2 | contact us 1-888-670-6682
ASSEMBLY
model no. 055-6766-2 | contact us 1-888-670-6682
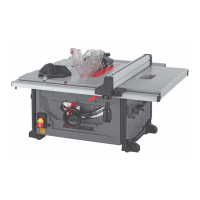
HEIGHT/BEVEL ADJUSTING HANDWHEEL
(Fig. 8)
• Turn the height adjusting knob (1) clockwise to
raise the blade, and counter-clockwise to lower the
blade.
• Turn the handwheel (2) clockwise, and move along
the arc rail, then the blade will bevel from 0-45°, or
turn counter-clockwise.
• Secure the blade bevel-locking lever (3) when the
bevel angle pointer points at desired angle on
scale. To lock the blade, turn blade bevel-lock lever
clockwise. To unlock the blade, turn it counter-
clockwise.
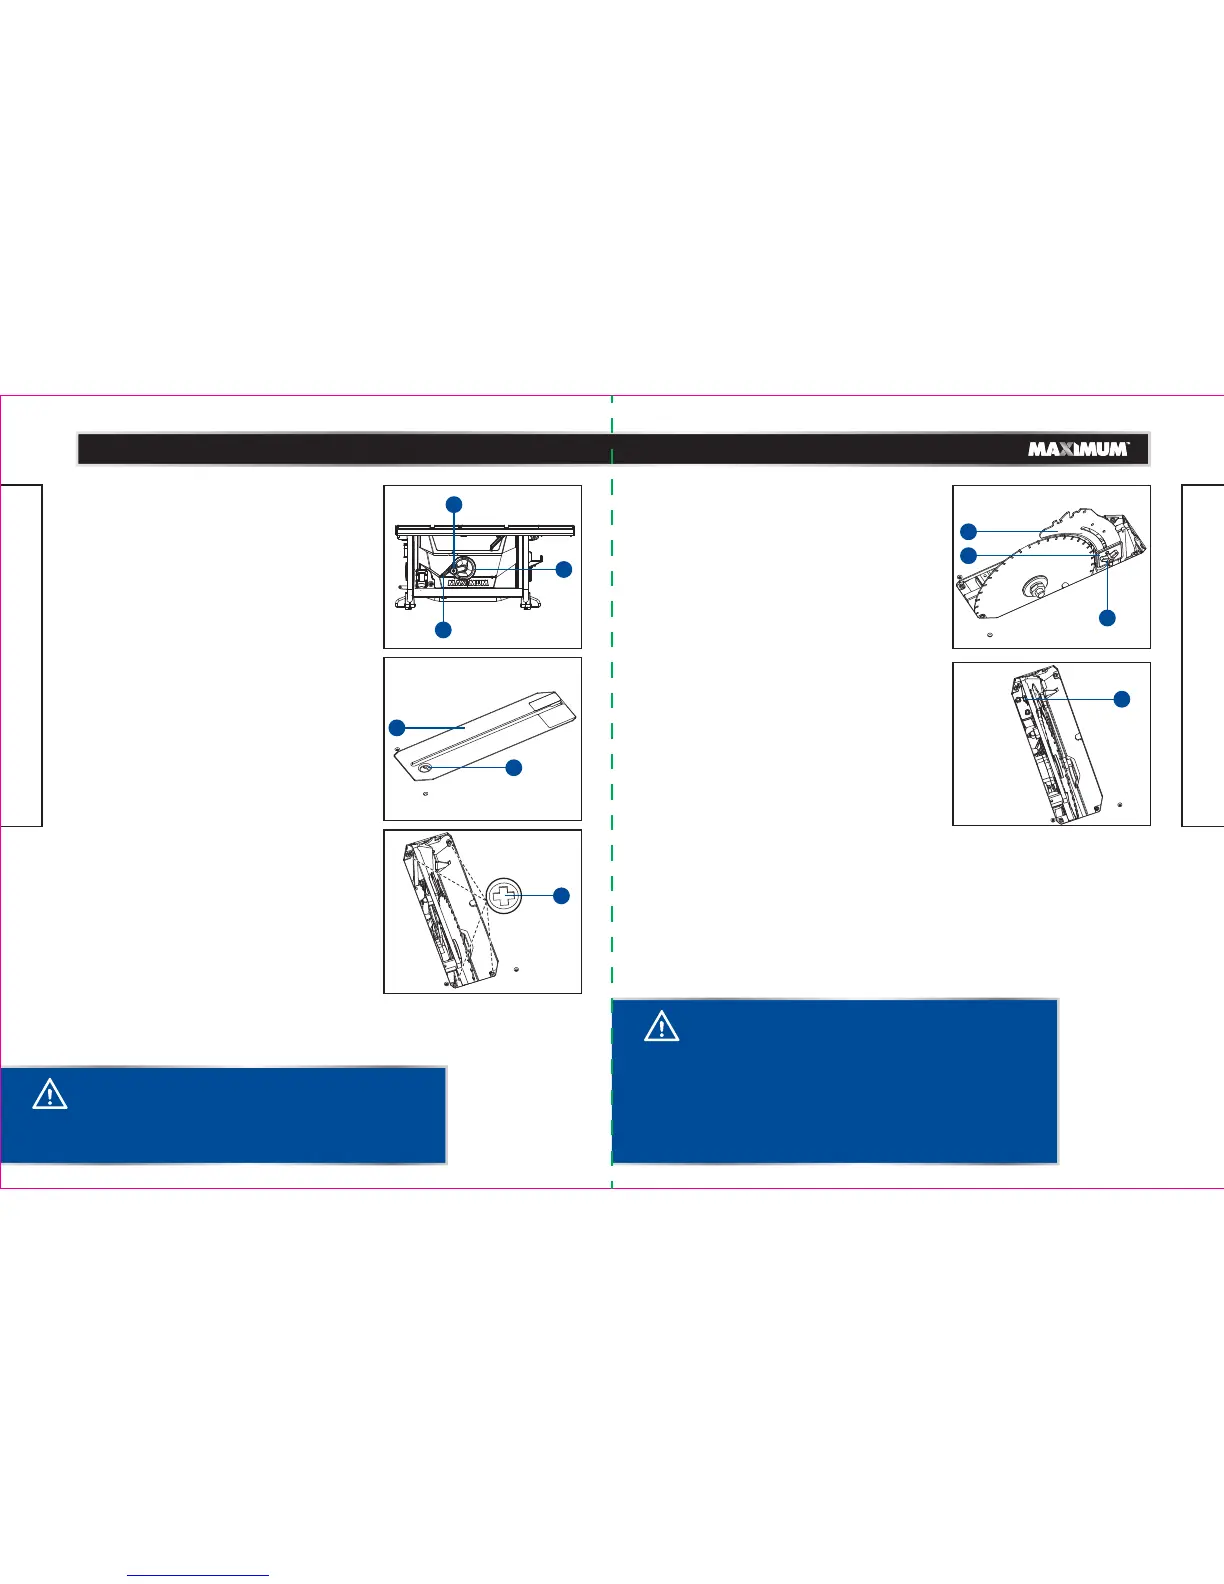
TO REMOVE/REPLACE/ALIGN THE TABLE
INSERT (Fig. 9-10)
• Turn the height adjusting knob counter-clockwise
to lower the blade to lowermost position.
• Lock the blade by turning bevel-lock lever
clockwise.
• To remove the table insert: Place your index finger
in the hole and push the locking tab (1) back,
pulling the table insert (2) out toward the front of
the saw.
• To reinstall the table insert: Push the locking tab (1)
back, and at the same time push the table insert (2)
down to secure in place.
When the table insert is not level with the saw blade,
using a screwdriver, adjust the four set screws (3)
under the table insert until the table insert is lever
with the saw table.
ASSEMBLY
ADJUSTING THE RIVING KNIFE (Fig. 11-13)
This saw is shipped with the riving knife placed in
“down” position.
• Unplug the saw.
TO PLACE IN THE HIGHEST POSITION (THE LOWEST
HOLE IN THE RIVING KNIFE) FOR ALL THROUGH
CUTS (WITH BLADE GUARD AND ANTI-KICKBACK
PAWLS):
• Remove the table insert.
• Set the saw blade angle to 0°.
• Raise the saw blade to the uppermost positon by
turning the height adjusting knob clockwise.
• Loosen the tri-wing knob (1) to allow approximately
1/8" (3.2 mm) gap between riving knife (2) and lock
plate (3).
• Push the lock knob (4) to the riving knife (2) until
the riving knife (2) unlocks from the locking pin.
• Loosen the lock knob (4) and pull riving knife (2)
up or down until the pin is re-engaged and the
riving knife is in the highest position.
• Tighten the tri-wing knob (1).
• Reinstall the table insert.
TO PLACE IN THE MIDDLE POSITION (THE MIDDLE
HOLE IN THE RIVING KNIFE) FOR NON-THROUGH
CUTS, EG. RABBETS (WITH BLADE GUARD AND
ANTI-KICKBACK PAWLS REMOVED):
• Remove the table insert.
• Set the saw blade angle to 0°.
• Raise the saw blade to the uppermost positon by
turning the height-adjusting knob clockwise.
Fig. 12
Fig. 11Fig. 8
Fig. 9
Fig. 10
3
1
2
3
1
2
1
2
3
4
 Loading...