WARNING!
Improper riving knife alignment can cause kickback and
serious injury.
CAUTION!
To work properly, the saw blade teeth must point down
toward the front of the saw. Failure to heed this instruction
could cause damage to the saw blade, the saw or the
workpiece.
2928
NOTE: If the riving knife is out of alignment with the saw blade,
adjustment is needed. The blade guard and riving kinfe must always
be correctly aligned so that the cut workpiece will pass on either
side of the riving knife without binding or twisting to the side.
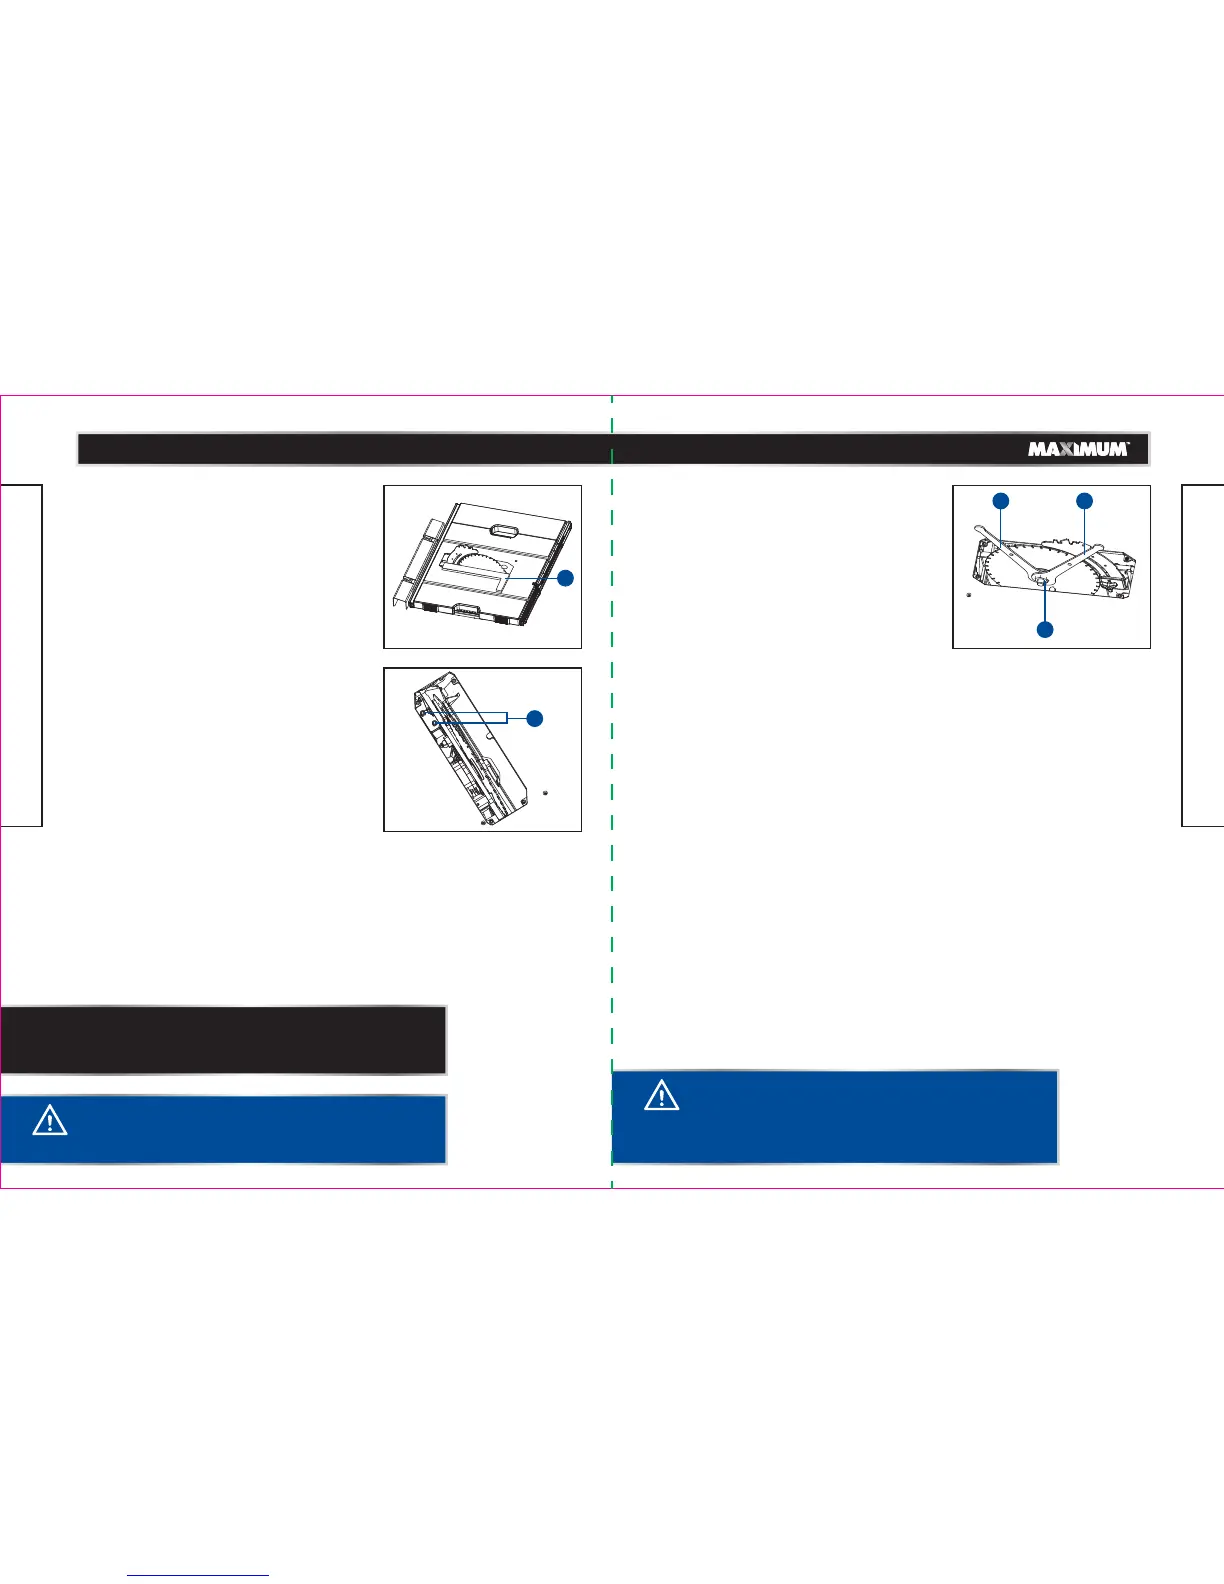
CHECK AND ALIGN THE RIVING KNIFE AND
SAW BLADE (Fig. 19-20)
TO CHECK THE ALIGNMENT OF THE RIVING KNIFE:
• Unplug the saw.
• Raise the saw blade as high as it will go by turning
the height-adjusting knob clockwise.
• Remove the anti-kickback pawls, place a framing
square (1) or straight edge against both the saw
blade and the riving knife.
Make sure that you place the framing square
between the carbide teeth, and measure from the
blade. This step will ensure that the framing square
is square against the blade from the front to the
back of the blade.
• The saw blade and riving knife are aligned when
the framing square contacts the blade and the
riving knife evenly, with no gaps.
TO ADJUST:
• Unplug the saw.
• Remove the table insert.
• Loosen the socket head bolts (2) that hold the
mounting bracket.
• Reposition the blade guard assembly left or right,
as required in order to align the riving knife with
the saw blade.
• Once properly aligned, securely retighten the
socket head bolts.
TO CHECK SAW BLADE INSTALLATION (Fig. 21)
The saw is shipped with the blade installed. Prior to
initial use, it is recommended that you check the
blade installation as instructed below.
• Unplug the saw.
• Remove the blade guard and anti-kickback pawls.
• Lower the saw blade and remove the table insert.
• Set the saw blade angle to 0°.
• Turn the bevel-locking lever clockwise to tighten it
securely. Raise the saw blade to its full height by
turning the height-adjusting knob clockwise.
TO LOOSEN THE BLADE:
• Using one opened-ended blade wrench (1), place
the flat open end on the flats on the outer blade
flange.
• Using the other opened-ended blade wrench (2),
place the flat open end on the flats on the arbour
nut (3). Holding both wrenches firmly, pull the
opened-ended blade wrench on the arbour nut
forward to the front of the machine.
TO TIGHTEN THE BLADE:
• Using one opened-ended blade wrench (1), place
the flat open end on the flats on the outer blade
flange.
• Using the other opened-ended blade wrench (2),
place the flat open end on the flats on the arbour
nut (3). Holding both wrenches firmly, pull the
opened-ended blade wrench (2) on the arbour nut
forward to the back of the machine. Make sure the
arbour nut is securely tightened. Do not overtighten.
• Check all clearances for free blade rotation.
model no. 055-6766-2 | contact us 1-888-670-6682
ASSEMBLY
model no. 055-6766-2 | contact us 1-888-670-6682
ASSEMBLY
Fig. 21Fig. 19
Fig. 20
1
2
1 2
3
 Loading...