11921 Slauson Ave. Santa Fe Springs, CA. 90670 (800) 227-4116 FAX (888) 771-7713
PAGE 10
PLATFORM ADJUSTMENT
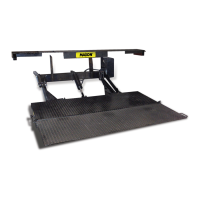
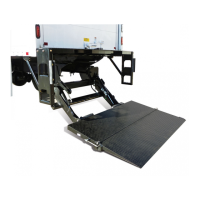
1. Open and RAISE Platform to bed level as shown in Operation
Manual M-00-40. Platform should be pointing up at bed level
and pointing down at ground level (FIG. 2A and FIG. 2B).
2. If the platform is level at bed height (FIG. 2C) and sags at ground
level (FIG. 2D), inspect each of the Hinge Pins for visible wear
before adjusting the Platform. Refer to Hinge Pin Location illustra-
tion in the Parts Breakdown section of this manual. Replace Hinge
Pins that are visibly worn.
3. Check Liftgate for structural damage that may cause incorrect
platform positioning. Repair structural damage.
4. If the platform is level at bed height (FIG. 2C) and sags at ground
level (FIG. 2D), weld 1-1/2” x 3-1/2” shims in 1/16” increments to
each lift arm Shackle (roadside and curbside) as shown in
FIG. 3. Make sure bottom edge of shim is flush with bottom edge
of shackle. Each shim raises up the outboard edge of the flipover
as shown in TABLE 1.
TABLE 1
LEVEL
FIG. 2C
FIG. 2D
SAG
FIG. 2A
FIG. 2B
NO SAG
NO
YES
5. If the outboard edge of the flipover will not reach level ground, grind off metal in 1/16” incre-
ments from the existing stop on the Platform (roadside and curbside) as shown in FIG. 4.
Each 1/16” ground off the existing stop lowers the outboard edge of the flipover as shown in
TABLE 2.
)"61/1(SMIHSFO.ON)"61/1(SMIHSFO.ON
)"61/1(SMIHSFO.ON
)"61/1(SMIHSFO.ON)"61/1(SMIHSFO.ON
DEDDA
EGDEREVOPILFSESIAREGDEREVOPILFSESIAR
EGDEREVOPILFSESIAR
EGDEREVOPILFSESIAREGDEREVOPILFSESIAR
)DRAOBTUO(
11
1
11"8/7"8/7
"8/7
"8/7"8/7
22
2
22"4/3-1"4/3-1
"4/3-1
"4/3-1"4/3-1
33
3
33"8/5-2"8/5-2
"8/5-2
"8/5-2"8/5-2
44
4
44"2/1-3"2/1-3
"2/1-3
"2/1-3"2/1-3
MIHSGNITSIXEFFODNIRGMIHSGNITSIXEFFODNIRG
MIHSGNITSIXEFFODNIRG
MIHSGNITSIXEFFODNIRGMIHSGNITSIXEFFODNIRG
EGDEREVOPILFSREWOLEGDEREVOPILFSREWOL
EGDEREVOPILFSREWOL
EGDEREVOPILFSREWOLEGDEREVOPILFSREWOL
)DRAOBTUO(
"61/1"61/1
"61/1
"61/1"61/1"8/7"8/7
"8/7
"8/7"8/7
"8/1"8/1
"8/1
"8/1"8/1"4/3-1"4/3-1
"4/3-1
"4/3-1"4/3-1
"61/3"61/3
"61/3
"61/3"61/3"8/5-2"8/5-2
"8/5-2
"8/5-2"8/5-2
"4/1"4/1
"4/1
"4/1"4/1"2/1-3"2/1-3
"2/1-3
"2/1-3"2/1-3
FIG. 3
GRIND THIS
EDGE
EXISTING
STOP
SHACKLE
EXISTING STOP
NEW SHIM
SHACKLE
2 PLACES
1/16”
TABLE 2
FIG. 4

 Loading...