Do you have a question about the Maytag GEMINI and is the answer not in the manual?
General guidelines for safe and proper operation of the appliance.
Instructions for handling fires involving the appliance.
Safety precautions for cooktop surfaces and coil heating elements.
Safety for protective liners and glass-ceramic cooktops.
Safety regarding fryers, ovens, child supervision, and pet birds.
Safety for ventilation and California Proposition 65 notice.
How to use surface controls and set cooking temperatures.
Using dual elements and recommended heat levels for cooking.
Notes, operation, and protection tips for glass-ceramic cooktops.
Explanation of the hot surface light and warming center operation.
Notes, operation, and cleaning of coil element cooktops.
Instructions for lifting cooktop, coil element care, and drip bowls.
Overview of the oven's electronic control panel and its pads.
How to set the clock and select oven cooking functions.
Instructions for using the Bake and Convect Bake functions.
How to broil and general tips for convection baking.
How to use the Toasting and Keep Warm pads.
Tips and notes regarding toasting and keeping food warm.
How to program the oven for timed cooking cycles.
How to set and use the oven timers.
How to change factory settings for various control options.
How to adjust oven temperature and operate oven lights.
Information on oven vents and how to position oven racks.
Information on the optional half rack accessory for the lower oven.
How to set up and use the self-cleaning cycle.
General cleaning advice and cautions for the appliance.
Cleaning instructions for the broiler pan and brushed chrome surfaces.
Cleaning and maintenance for stainless steel and painted enamel surfaces.
How to clean the control panel, display, and control knobs.
Instructions for cleaning glass-ceramic cooktops and oven glass windows.
Cleaning instructions for plastic trim and porcelain enamel surfaces.
Instructions for cleaning oven interiors and racks.
How to remove and replace oven doors.
Precautions to protect the oven door window from damage.
How to level the range using the adjustable leveling legs.
Instructions for replacing upper and lower oven light bulbs.
Initial troubleshooting steps for common appliance issues.
Troubleshooting baking, broiling, and self-cleaning problems.
Addressing moisture, odors, fault codes, and door lock issues.
Explanation of warranty terms, coverage, and what is not covered.
How to get service, required information, and owner responsibilities.
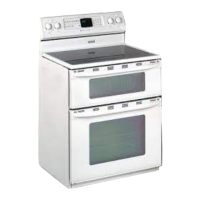
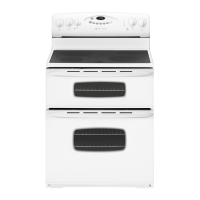
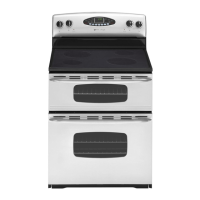
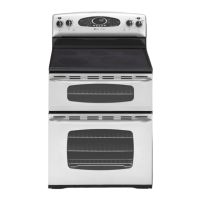
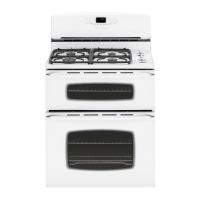
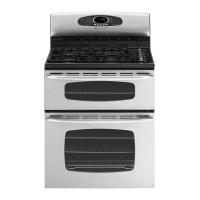
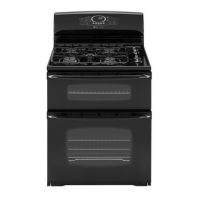
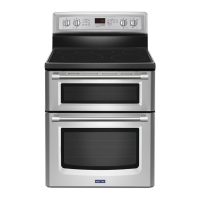
The Maytag Gemini™ Electric Range is a cooking appliance designed for ease of programming and versatile cooking options. It features an electronic control panel with a display window that shows the time of day, timer, and various oven functions. Messages scroll to guide the user through programming steps.
The range offers infinite heat settings from LOW to HIGH for its surface elements. Each knob controls a specific element, indicated by markings on the backguard. An indicator light illuminates when any surface control knob is turned on, turning off when all elements are off. For select models, a dual element is available on glass-ceramic surfaces, controlled by a rocker switch to select between large or small element operation.
Suggested heat settings are provided for various cooking needs:
Safety precautions for surface cooking include always placing a pan on the unit before turning it on, never using the cooktop as a storage area, and avoiding leaving units unattended, especially at high heat, to prevent boilovers and potential fires. Users are advised to select pans with flat bottoms large enough to cover the element for efficient cooking and to turn pan handles toward the center of the cooktop to reduce the risk of burns or spills.
This cooktop features permanent patterns to identify cooking areas. For efficient cooking, pan size should match the element size, not extending more than 1/2 to 1-inch beyond the cooking area. A HOT SURFACE light, located at the front center, illuminates when any cooking area is hot and remains on until the area has cooled.
A Warming Center (select models) is available to keep cooked foods warm, such as vegetables, gravies, and oven-safe dinner plates. It is activated by a switch on the control panel. Foods should be covered with a lid or aluminum foil to maintain quality, with an opening for moisture to escape when warming pastries and breads. Plastic wrap is not recommended.
Tips for protecting the glass-ceramic surface include cleaning before first use, avoiding glass pans, immediately cleaning melted plastic or sugary foods, never letting a pan boil dry, and not using the cooktop as a work surface or cutting board. Aluminum foil, trivets, or wok rings should not be placed between the surface and pan. The surface and pan bottoms should be clean to prevent scratches.
Coil elements cycle on and off to maintain heat settings and are self-cleaning (not to be immersed in water). Drip bowls under each element catch boilovers and must always be used. Drip bowls may discolor or craze over time due to overheating, which is permanent but does not affect cooking performance. Aluminum foil should never line drip bowls.
The porcelain cooktop can be lifted up and supported by two rods for cleaning underneath. To remove coil elements, they should be cool, then raised and pulled out from the receptacle. To replace, insert terminals into the receptacle, guide the element into place, and press down on the outer edge until it sits level on the drip bowl.
The oven control panel allows programming for various functions, including Bake, Broil, Convect Bake (select models), Toasting, Keep Warm, and Self-Clean. The display shows the set temperature, time, and active functions.
Bake Pad: Used for baking and roasting. The default temperature is 350° F, adjustable in 25° F increments or by entering a specific temperature between 100° F and 550° F. A red preheat indicator lights up when the oven turns on and turns off with a single beep when the set temperature is reached.
Convect Bake Pad (Lower Oven Only - Select Models): Used for convection baking. The default temperature is 325° F, adjustable in 25° F increments or by entering a specific temperature between 100° F and 550° F. A red preheat indicator and convect icon display when the oven turns on, and a single beep indicates preheating is complete. When convection baking, it is generally recommended to set the oven temperature 25° F lower than conventional recipes, with similar or slightly shorter baking times. Roasting meat with convection may reduce roasting times by up to 30%.
Broil Pad: Used for top browning or broiling, with HI or LO broil settings or specific temperatures between 300° F and 550° F. The broiler pan provided with the range should be used. For optimal broiling, preheat for three to four minutes until the broil element is red. The oven door should be left open to the first stop position (about four inches) during broiling.
Toasting Pad (Upper Oven Only): For toasting bread and similar products. Default toasting time is 4 minutes, adjustable in 10-second increments or by entering a specific time between 10 seconds and 10 minutes. The AUTO SET toasting time can be customized.
Keep Warm Pad (Upper Oven Only): For safely keeping foods warm or warming breads and plates. Default temperature is 170° F, adjustable between 145° F and 190° F. Foods should be covered loosely with foil or a lid to prevent drying.
Cook Time/Stop Time Pads: Allows programming the ovens to start and stop automatically. Cook time can be set up to 11 hours and 59 minutes. Both ovens can be set for clock-controlled cooking. Delayed start cooking is also possible. Highly perishable foods are not recommended for delayed cooking, and preheated oven items like cakes and cookies are not ideal for clock-controlled baking.
Timer Pads: Two independent timers can be set for up to 99 hours and 59 minutes, operating independently of other oven functions.
Control Options: Various factory-set options can be changed, including:
Oven Temperature Adjustment: The oven temperature can be adjusted if it is consistently baking too hot or cold, in 5° F increments, from -35° F to +35° F.
Oven Lights: Lights automatically come on when doors are opened. They can be turned on/off manually with the LIGHT pad when doors are closed. Lights do not operate during a clean cycle but will come on one minute before the end of a clock-controlled cooking operation.
Oven Racks: All racks have a lock-stop edge.
Rack positions are suggested for various cooking needs:
Multiple rack cooking options include two racks (positions 2 and 4, or 1 and 4) and three racks for convection baking only (positions 1, 3, and 5). A Half Rack Accessory is available for the lower oven to increase capacity, fitting in the left, upper portion of the oven.
Self-Cleaning Oven: The CLEAN pad initiates a self-clean cycle. Only one oven can be cleaned at a time, but both ovens will lock. Before cleaning, remove oven racks and wipe the oven frame and door gasket area with a nonabrasive cleaner. Cleaning times can be set for 2, 3, or 4 hours. The display will show "CLEANING" and "LOC" (locked) during the cycle. After cooling, "CLEANED" will display, and the door will unlock.
Oven Door(s): Both upper and lower oven doors are removable. To remove, open the door to the broil stop position (about four inches), grasp each side, and lift up evenly until it clears the hinge arms. To replace, align the door slots with the hinge arms on the range, slide the door down, and push on the top corners to seat it completely.
Oven Lights: To replace a halogen bulb in upper/lower ovens, disconnect power, allow the oven to cool, grasp the edge of the bulb cover, pull it out, and carefully remove the old bulb. Push the new bulb prongs straight into the small holes of the ceramic base, avoiding touching the bulb with bare hands. Replace the bulb cover by snapping it into place. For lower oven lights, hold the bulb cover, slide the wire retainer off, remove the bulb cover and light bulb, replace with a 40-watt appliance bulb, then replace the cover and secure with the retainer.
Oven Window(s): Do not use abrasive cleaning agents, hit the glass with objects, or close the oven door until racks are in place to prevent scratching or breakage.
Leveling Legs: Ensure the anti-tip bracket secures one of the rear leveling legs to the floor. The range should be leveled by turning the plastic leveling legs at each corner.
Convenience Outlet (Canadian Models Only): Located on the lower left side of the backguard. Appliance cords should not rest on or near surface elements. The circuit breaker may trip if the plugged appliance exceeds 10 amps; reset by pressing the switch on the lower edge of the backguard.
Control Knobs: Remove by pulling forward, wash with soap and water, rinse, and dry. Do not use abrasive cleaners. Ensure knobs are correctly replaced.
Drip Bowls (Porcelain/Chrome): Wash after each use to prevent staining. For heavy soil, soak in hot sudsy water and use a mild abrasive cleaner. For burned-on soil on porcelain bowls, commercial oven cleaner can be used (away from surrounding surfaces).
Enamel (Painted) Surfaces: When cool, wash with warm soapy water, rinse, and dry. For stubborn soil, use mildly abrasive cleaning agents like baking soda paste or Bon Ami. Do not use abrasive cleaners or oven cleaners.
Stainless Steel: Do not use cleaning products containing chlorine bleach. Always wipe with the grain. For daily cleaning, use soapy water, white vinegar/water solution, or glass cleaner. For moderate/heavy soil, use Bon Ami, Smart Cleanser, or Soft Scrub. For discoloration, use Cameo Stainless Steel Cleaner. Follow with Stainless Steel Magic Spray for polishing.
Clock and Control Pad Area: Wipe with a damp cloth and dry. Glass cleaners can be used if sprayed on a cloth first, not directly on the pad.
Plastic Finishes (Trim & End Caps): When cool, clean with soap and water, rinse, and dry. Use a glass cleaner and a soft cloth. Do not use oven cleaners, abrasive, or caustic liquid/powdered cleansers. Immediately wipe fat, grease, or acid spills with a dry paper towel to prevent staining.
Porcelain Enamel (Backguard, Trim on Glass-Ceramic Surface, Cooktop on Coil Surface): When cool, wash with soapy water, rinse, and dry. Do not wipe a warm or hot surface with a damp cloth. Do not use oven cleaners, abrasive, or caustic cleaning agents. Immediately wipe acidic or sugary spills with a dry cloth.
Glass-Ceramic Cooktop (Select Models): Allow to cool before cleaning. Always clean after each use with a damp paper towel and Cooktop Cleaning Creme, then buff with a clean, dry cloth. For heavy soils or metal marks, dampen a "scratchless" scrubber sponge, apply Cooktop Cleaning Creme, and scrub. For very heavy soil, apply a thin layer of creme, cover with a damp paper towel and plastic wrap, let stand for 30-45 minutes (2-3 hours for very heavy soil), then scrub and buff. For burned-on or crusty soils, use a razor blade scraper at a 30° angle, then clean with Cooktop Cleaning Creme. For melted sugar or plastic, immediately turn the element to LOW, scrape from hot to cool area, turn OFF, cool, then clean residue with a razor blade scraper and Cooktop Cleaning Creme.
Oven Interiors: Follow self-clean cycle instructions.
Oven Racks: Clean with soapy water. For stubborn soil, use cleansing powder or soap-filled scouring pad. If racks do not slide easily, wipe the rack edge and support with a small amount of vegetable oil, then wipe off excess oil. Place one drop of vegetable oil on rack roller. Remove racks during a clean cycle to prevent discoloration and impaired function.
| Type | Freestanding |
|---|---|
| Brand | Maytag |
| Category | Ranges |
| Number of Burners | 4 |
| Convection | Yes |
| Self-Cleaning | Yes |
| Control Type | Knob |
| Fuel Type | Electric |
| Model | GEMINI |
| Color | White |