Do you have a question about the Maytag MDB9959SKZ and is the answer not in the manual?
Information on where to find detailed troubleshooting guidance for common problems.
Error F1E1: Indicates a problem with the fill valve operation.
Error H2O: Indicates no water supply to the dishwasher.
Error F8E4: Indicates the dishwasher is overfilling.
Error F8E5: Indicates the fill valve is stuck in the open position.
Error F9E1: Indicates the dishwasher is not draining properly.
Error FAE5: Indicates water is present under the dishwasher.
Error F6E1: Indicates a fault in user interface communication.
Step to disconnect electrical power at the fuse box or circuit breaker.
Step to shut off the water supply to the dishwasher.
Instructions for preparing the cabinet opening for new utility connections.
Step to drill holes for drain, water, and electrical connections.
Step to sand smooth the drilled holes in the cabinet.
Step to place the dishwasher on its back for preparation.
Step to remove the lower access panel from the dishwasher.
Step to remove the drip pan assembly from the unit.
Step to disconnect the float switch wire.
Step to measure the height of the cabinet opening.
Instructions for adjusting the leveling legs for proper height.
Step to tighten the 90° elbow fitting to the fill valve.
Step to connect the drain hose to the waste tee or disposer.
Step to remove the terminal box from the dishwasher.
Step to remove the terminal box cover.
Step to install the strain relief for the power cord or wiring.
Step to stand the dishwasher upright for cabinet placement.
Step to move the dishwasher close to the cabinet opening.
Step to route the power cord before sliding into the cabinet.
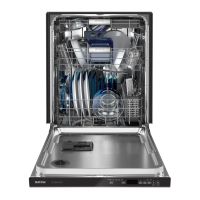
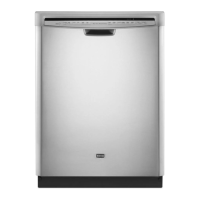
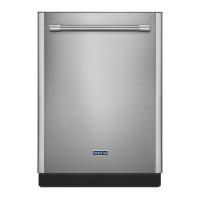
This document outlines the installation, operation, and maintenance of a residential dishwasher, designed to efficiently clean dishes and glassware. It emphasizes user safety, proper installation procedures, and features that enhance cleaning performance and user experience.
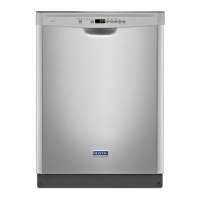
The dishwasher's primary function is to wash and sanitize dishes and glassware using various cycles and options. It incorporates a water heating feature to ensure optimal cleaning temperatures and supports the use of detergents and rinse aids for effective results. The appliance is designed to be fully enclosed upon installation, integrating seamlessly into kitchen cabinetry. It includes a drain system that connects to either a waste tee or a garbage disposer, with options for air gap installation to prevent backflow. Electrical connections can be made via direct wiring or a power cord kit, adhering to local codes and ordinances. The dishwasher is equipped with a control panel that allows users to select cycles, adjust settings, and monitor operation.
The dishwasher offers a range of usage features aimed at convenience and performance. For loading, it includes adjustable silverware baskets with lids to optimize spacing and cleaning. Sharp items should be loaded carefully to prevent damage to the door seal, and knives should be loaded with handles up to reduce injury risk. Upper racks are removable to accommodate tall items, and sliding bowl tines allow for easy loading of various bowl sizes. Fold-down tines further optimize rack spacing, and stemware holders provide support for delicate glasses, rotating out of the way when not needed. A cup shelf is also available for additional cups or small items.
The control panel provides access to customer settings, including Rinse Aid Level adjustment (from 0 mL to 6 mL), Sound Level control (On/Off), Light in Tub control (On/Off for inner lighting), and a Kosher Friendly mode (On/Off). These settings allow users to customize the dishwasher's operation to their preferences. The appliance also features a main sensor cycle with heated drying, which automatically adjusts based on soil amount and toughness for improved cleaning. The "Sanitize or Sani" option ensures dishes and glassware are sanitized according to NSF International standards, with an indicator glowing upon successful completion. Error codes are displayed on the control panel (or via blinking lights) to alert users to potential issues, such as fill valve malfunctions, water supply problems, overfilling, or drainage issues, providing guidance on how to address them.
Maintenance instructions are provided to ensure the dishwasher's longevity and optimal performance. Interior cleaning is crucial to prevent white spots or residue buildup from detergents. The manual recommends using high-quality premeasured tablets or packs and rinse aid for daily care. Monthly use of a dishwasher cleaning product, such as affresh® Dishwasher Cleaner, is advised to remove residue. For homes with extremely hard water (15 grains per U.S. gallon or more), a water softener is recommended to prevent damage and improve cleaning results.
The manual also addresses external cleaning, recommending a soft, damp cloth and mild detergent, while cautioning against abrasive cleaning products that could damage the finish. For dishwashers with a drain air gap, regular checking and cleaning are necessary if drainage issues occur. Special considerations are outlined for extended periods without use, such as during vacations or winter storage. Users are advised to turn off the water and power supply during summer months and to protect water supply lines against freezing. Winterization by authorized service personnel is recommended to prevent water damage in cold climates. The manual also mentions a Foreign Object Cup, with instructions available in the Quick Start Guide or brand website for emptying it.
Installation instructions include detailed steps for preparing the cabinet opening, routing utilities (water, drain, electrical), and securing the dishwasher. This involves sanding holes smooth, installing an optional moisture barrier for wood countertops, and adjusting leveling legs to ensure the appliance is plumb and stable. The process also covers connecting the water line to the fill valve (using either copper tubing or a flexible braided line) and connecting the drain hose to a waste tee or disposer. Electrical connections are detailed for both direct wiring and power cord installations, emphasizing adherence to safety standards and local codes. After installation, a final check involves verifying door clearance, inner spacing, and running an installation cycle to ensure proper operation. Troubleshooting tips are provided for common issues like power problems, door latching, and water supply, encouraging users to attempt solutions before calling for service.
| Style | Built-In |
|---|---|
| Color | Stainless Steel |
| Load Capacity | 13 Place Settings |
| Number of Cycles | 4 |
| Cycle Selections | RAPID 35°C |
| Options/Settings | Heated Dry |
| Drying Type | Heated |
| Temperature Options | 3 |
| Noise level | 50 dB |
| Special Features | In-door Silverware Basket |
| Energy Class | - |
| Annual Energy Consumption | 270 kWh |
| Energy Consumption Per Cycle | - |
| Annual Water Consumption | - |
| Water Consumption Per Cycle | - |
| Voltage | - |
| Frequency | - |
| Current | - |
| Depth | 24.5 in |
|---|---|
| Height | 33.75 in |
| Width | 23.88 in |
| Net Weight | 85 lbs |