Page 3
IMPORTANT: This appliance is not IPX4 (splashproof) rated. It must not be installed or stored in an
area where it will be exposed to water. Do not use a water hose or wet cloth to clean the
outside of the appliance.
For best performance, the appliance must be installed on a solidly constructed floor. Wood floors may
need to be reinforced to minimize vibration and/or unbalanced washer load situations. Carpeting and soft
tile surfaces are contributing factors in vibration and/or tendency for an appliance to move slightly during
the washer spin cycle. Never install the appliance on a platform or weak supported structure.
4. Unpacking
IMPORTANT: Notice that the washer hoses are tied up with a shipping
strap. The upper straps on the back of the machine should
not be cut or removed until the machine is ready to be
installed.
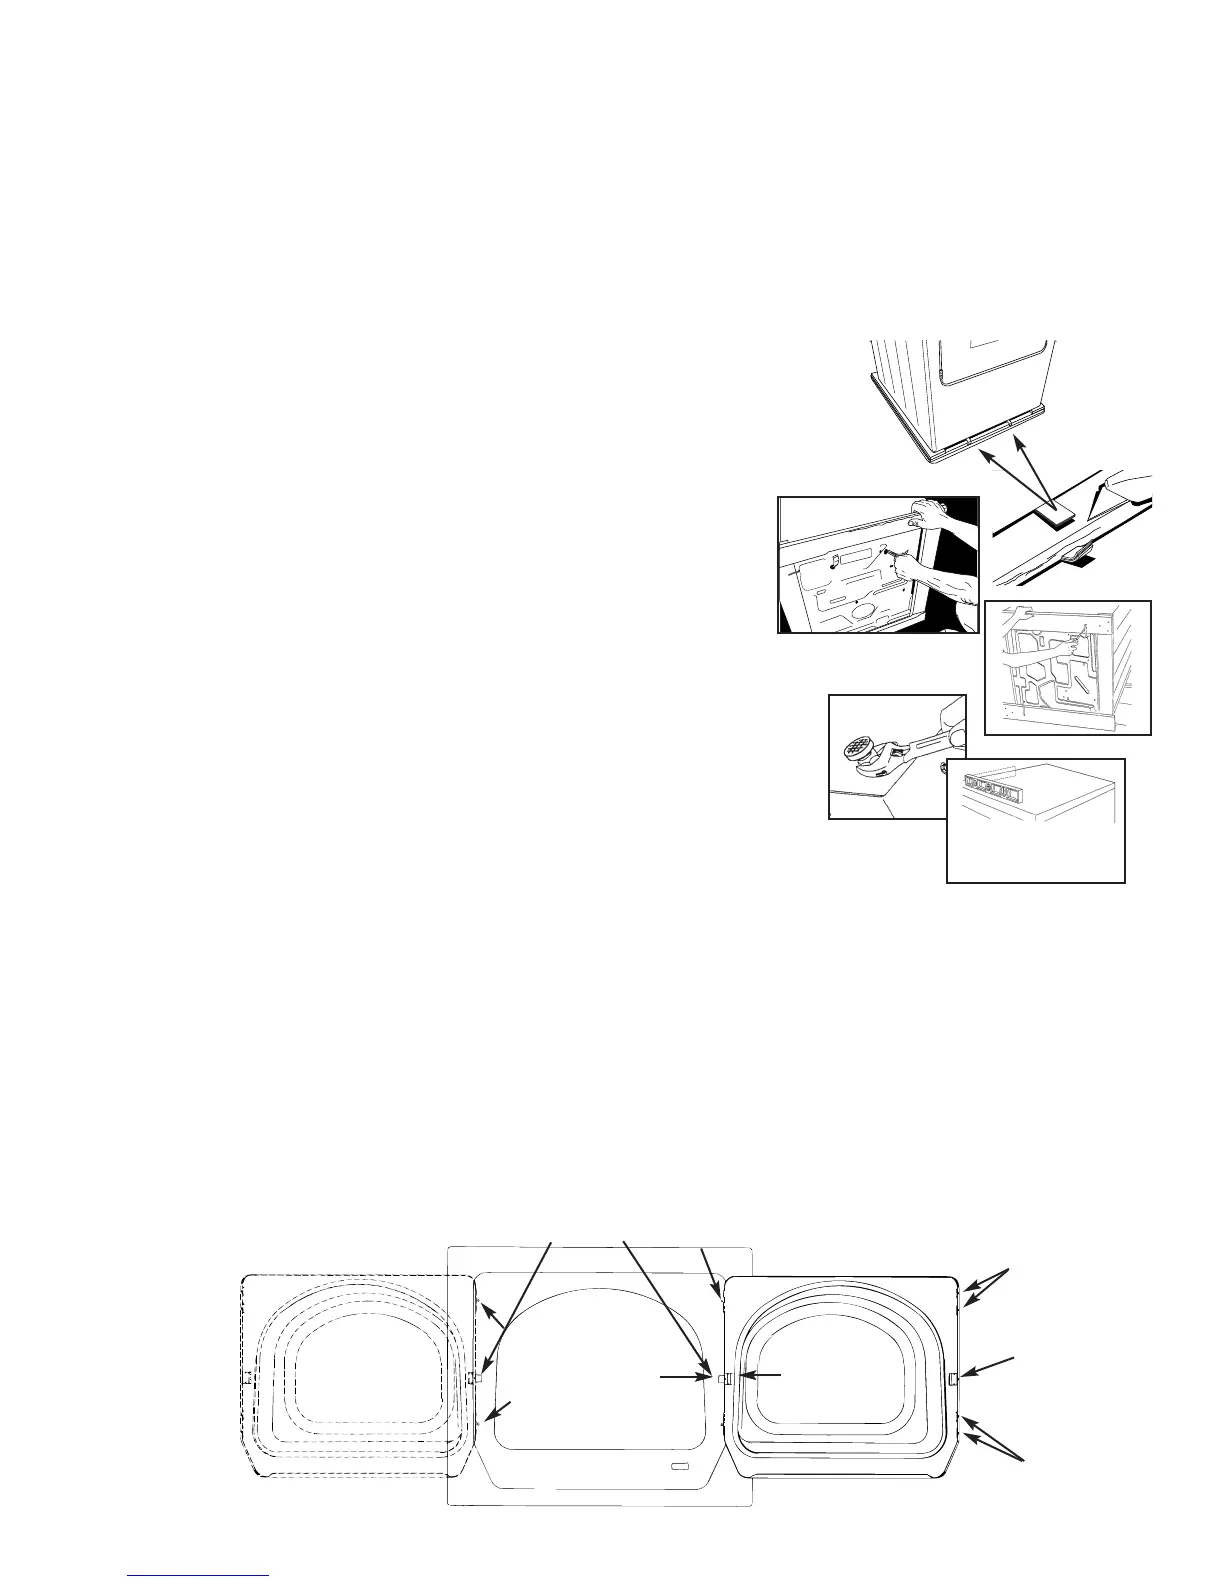
To remove appliance from transit base. Cut both lower shipping straps
where they wrap around the crate bottom, DO NOT BE
ALARMED as the tub will jump up when the last strap is cut. Lay
two of the carton corner posts on the floor, and tip the appliance
on its back to lay across the carton corner posts. Pull loose
straps from the bottom of the washer. Release the transit base
by removing the two wire hooks with a screwdriver as shown.
Locate the metal buckles attached to the shipping straps at back
of washer. Carefully cut away straps near both buckles, completely
removing both buckles from the washer. Pull loose straps from back
of washer one at a time until all straps have been removed.
Loosen the leveling feet lock nuts. Place appliance in its intended location
and adjust feet until the top is level on all four edges, before tightening lock
nuts. A carpenter’s level should be used on all four edges of top cover.
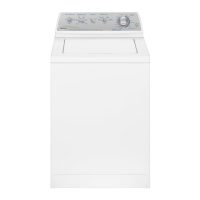
5. Door reversal
Door swing direction can be successfully changed using the following procedure:
Dryer Door:
1. Remove the two screws in the hinges that secure the hinges to the front panel. Slightly lift the door
and remove from the dryer front shroud. Set the door aside.
2. Remove the two hinge hold covers and the door catch cover and transfer them to the other side of
the door opening.
3. Move the following parts to the opposite side of the door: 2 hinges and 4 screws, 4 colored door
screws, door strike and screw, inner door cover plate and screw.
4. Reposition the door with the relocated hinges into the slots opposite of the original mounting position.
Seat the hinges fully into the slots and screw the hinges into the front panel.
Hinge
Door
Screws
Door
Screws
Door Catch
Hinge
Hole
Cover
Door
Catch
Cover
Inner Door
Cover Plate
Door
Strike
Upper
Dryer