Disassembly
Removing the Keyboard 2 - 13
2.Disassembly
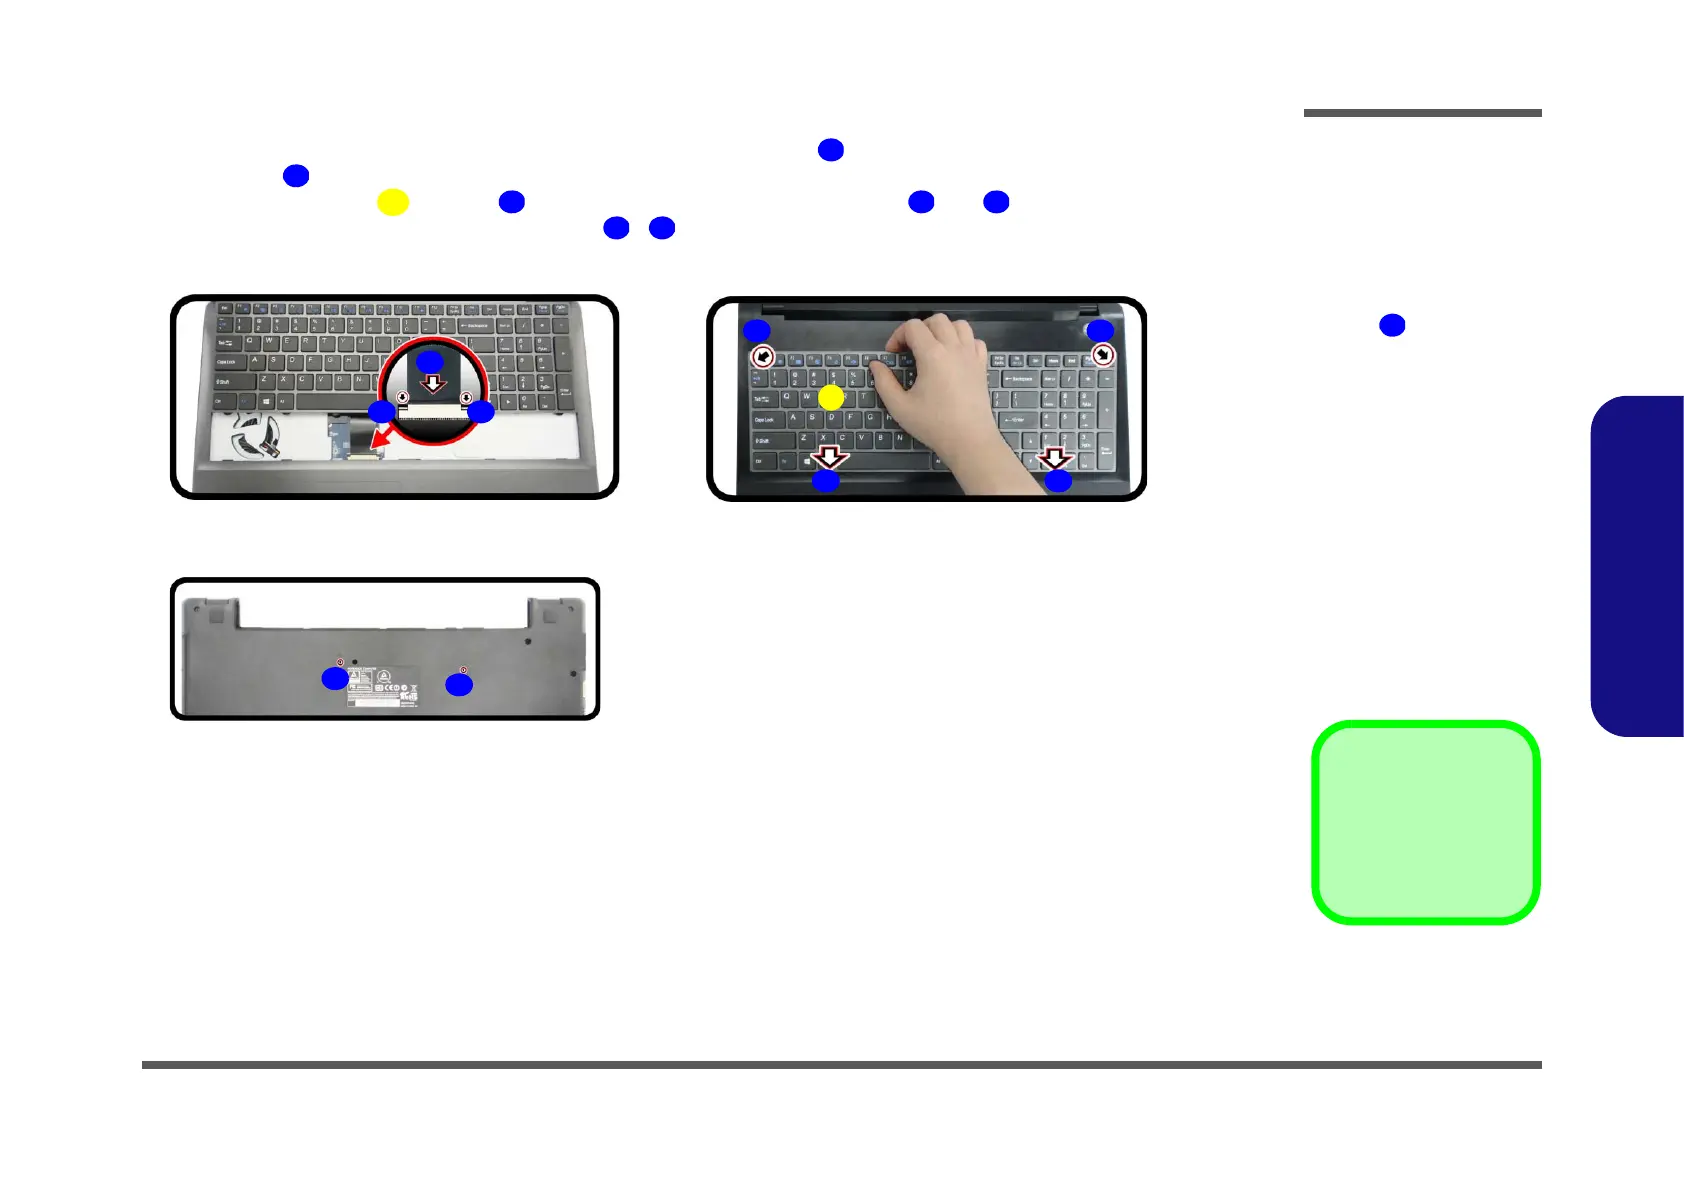
6. Connect the keyboard ribbon cable from the locking collar socket , and be careful not to bend the keyboard rib-
bon cable (Figure 8d).
7. Insert the keyboard at point and then slide the keyboard in at point and (Figure 8e).
8. Turn the computer over, tighten the screws - to secure the keyboard (Figure 8f).
Figure 8
Keyboard Assembly
d. Connect the keyboard
ribbon cable to the lock-
ing collar socket.
e. Insert the keyboard at
point
and slide it in.
f. Tigthen the screws.