3
3 Getting started
3.1 General notes on handling
The Spectroquant® Prove spectrophotometer is an optical preci-
sion instrument. It should always be handled with care, especially
when in mobile use. Always protect the instrument from condi-
tions that could damage the mechanical, optical and electrical
components. Please note the following in particular:
• The temperature and humidity during operation and storage
mustbewithinthelimitsspeciedinthe“TechnicalData"
section (see operating manual)
The instrument must never be exposed to the following:
• Extreme dust, humidity and moisture
• Intense light and heat
• Fumes that are corrosive or contain high concentrations
of solvents
In addition take care of the following:
• Formeasuring,theinstrumentmustbeplacedonaat
surface
• Spilled liquid or other material should be removed immediately
(see operating manual)
• If a cell has broken in the cell holder, the cell holder should be
cleaned immediately (see operating manual)
• The cover should always be closed when the spectrophoto-
meter is not in use
• When the spectrophotometer is being transported, the cell
compartment must be empty
3.2 Initial setup
Proceed as follows:
• Connect the power adapter (see Section 3.2.1)
• Switch on the spectrophotometer (see Section 3.2.2)
• Set the language (see Section 3.2.3)
• Set the date and time (see Section 3.2.4)
• Run the self-test (see Section 3.2.5)
NOTE
For our operating manual please visit:
www.analytical-test-kits.com/prove-manual
For more information about the technical videos please visit:
www.analytical-test-kits.com/prove-technical-videos
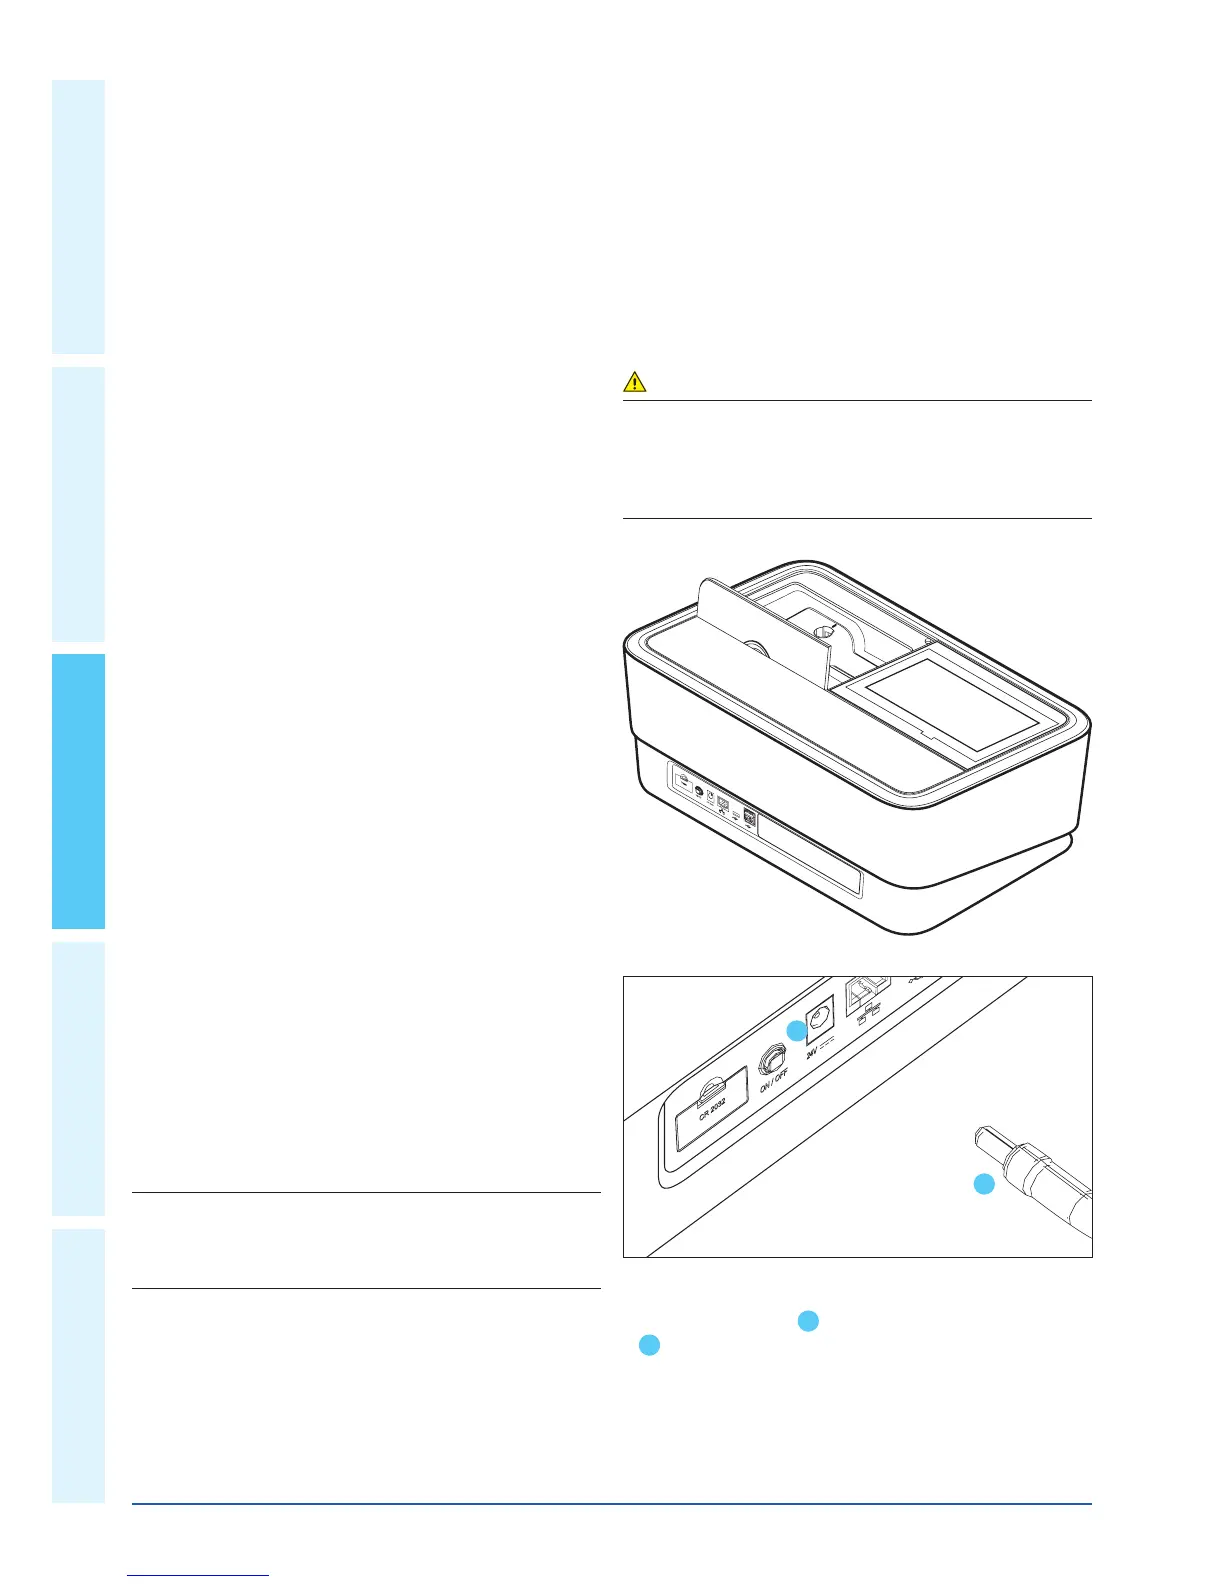
3.2.1 Connecting the power supply
Power is supplied through the power adapter provided. The power
adapter supplies the spectrophotometer with the required voltage
and type of current (24 V DC).
CAUTION
The line voltage at the user location must fulfil the specifications
stated on the power adapter (the specifications are also indicated in
the operating manual). Only ever use the 24 V power adapter
provided. Please note that damage caused by using a different
power adapter than the one supplied voids all warranty claims.
Connecting the power adapter:
1. Connect the miniplug
1
of the power adapter to the socket
2
of the spectrophotometer.
2. Connect the power adapter to a wall socket.
1
2
 Loading...
