INSTALLATION
Check the appliance is electrically safe and gas sound when you have nished.
22
ArtNo.010-0004 Moving the cooker
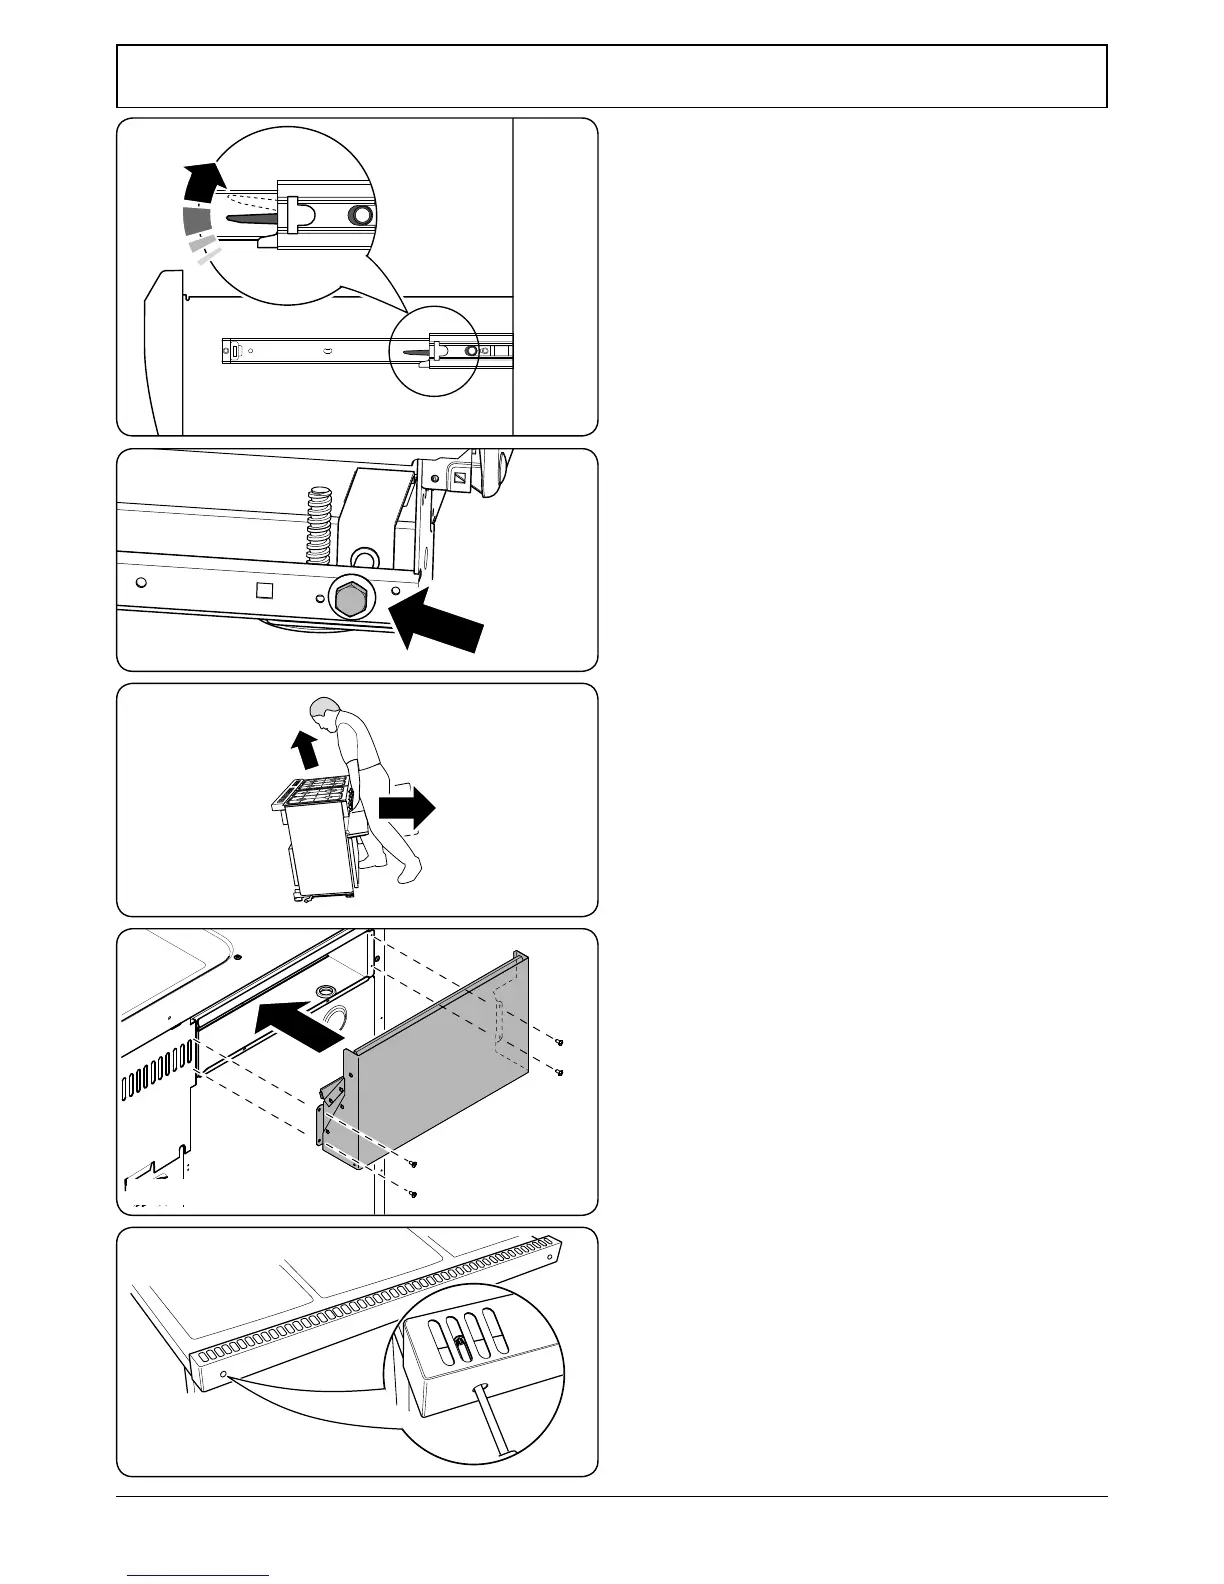
Fig.7-7
Fig.7-8
Fig.7-6
Removing the Storage Drawer
To open, simply push the drawer and release. The drawer will
open. Pull the drawer out to its furthest point.
Push the ends of the plastic clips – down on the left-hand
side, up on the right-hand side – to release the catches
holding the drawer to the side runners. At the same time pull
the drawer forward and away from the side runners (Fig.7-5).
For safety reasons slide the inner side rails back into the
cavity.
Lowering the Two Rear Rollers
To adjust the height of the rear of the cooker, rst t a 13 mm
spanner or socket wrench onto the hexagonal adjusting
nut (Fig.7-6). Rotate the nut – clockwise to raise – counter-
clockwise to lower.
Make 10 complete (360°) turns clockwise.
Make sure you lower BOTH REAR ROLLERS.
Completing the Move
Unfold the rear edge of the pack base tray. Open the grill
door and right-hand oven door so that you can get a good
grip on the bottom of the fascia panel as you move the oven
(Fig.7-7).
Carefully push the cooker backwards o the pack base.
Remove the pack base tray.
Position the cooker close to its nal position, leaving just
enough space to get behind it.
DO NOT use the door handles or control knobs to
manoeuvre the cooker.
Fitting the Flue and Vent
Fitting the Flue
Remove the four screws from the grill ue opening.
Oer the removable ue up to grill ue opening. Making sure
that the removable ue bottom ange ts inside the xed
ue, secure in place with the four screws (Fig.7-8).
Fitting the Vent
The larger of the holes along the sides are for screwdriver
access and should face to the rear (Fig.7-9). Use the screws
and nuts supplied to hold the vent in place.
Conversion to Another Gas
If the appliance is to be converted to another gas do the
conversion at this point. See the ‘Conversion’ section of these
instructions and see the instructions in the conversion kit.
Fig.7-5
Fig.7-9
 Loading...