CHARGING & STARTING SYSTEM
Page 2B-34 90-883728 JULY 2001
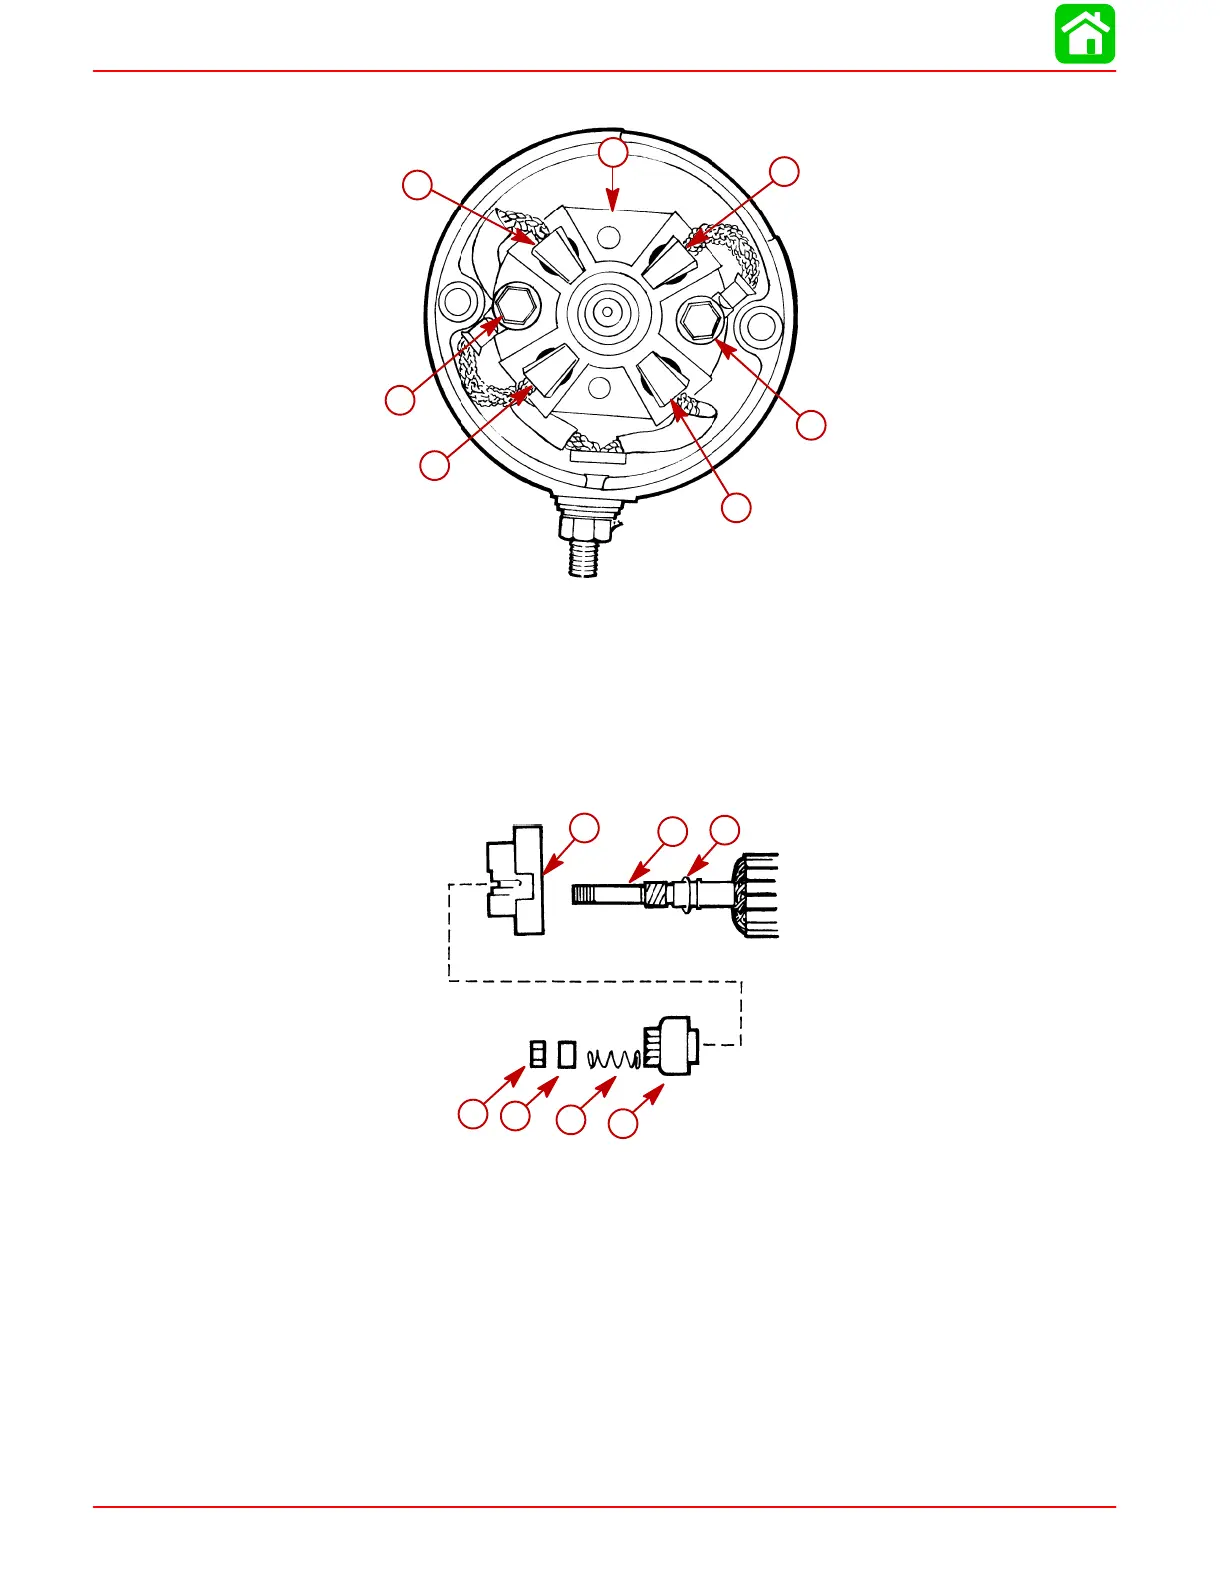
b. Install NEGATIVE brushes (along with brush holder).
11656
b
d
a
b
d
a
c
a-Positive (+) Brushes
b-Negative (–) Brushes
c-Brush Holder
d-Bolts (fasten negative brushes and holder)
2. If removed, reinstall parts on armature shaft. Use a new locknut and tighten securely
on end of shaft.
11658
g
f
e
a
b
c
d
a-Locknut
b-Spacer
c-Spring
d-Drive Assembly
e-Drive End Cap
f-Armature Shaft
g-Washer
3. Lubricate helix threads on armature shaft with a drop of SAE 10W oil.
4. Lubricate bushing in drive end plate with a drop of SAE 10W oil.
5. Position armature into starter frame.
 Loading...