RIGHT HAND NON-RATCHETING
Page 6A-36 90-883728 JULY 2001
NOTE: Bearing Preload Tool (91-14311A1) should remain installed on driveshaft after
setting pinion gear depth as it is required to properly check forward gear and reverse gear
backlash.
DETERMINING FORWARD GEAR BACKLASH
IMPORTANT: Bearing carrier must be assembled to provide a pilot for propeller
shaft.
1. Insert propeller shaft into position in gear housing. (DO NOT place shift cam on pro-
peller shaft.)
2. Place bearing carrier into gear housing and thread cover nut tightly against bearing
carrier. (It is not necessary to torque cover nut against bearing carrier.)
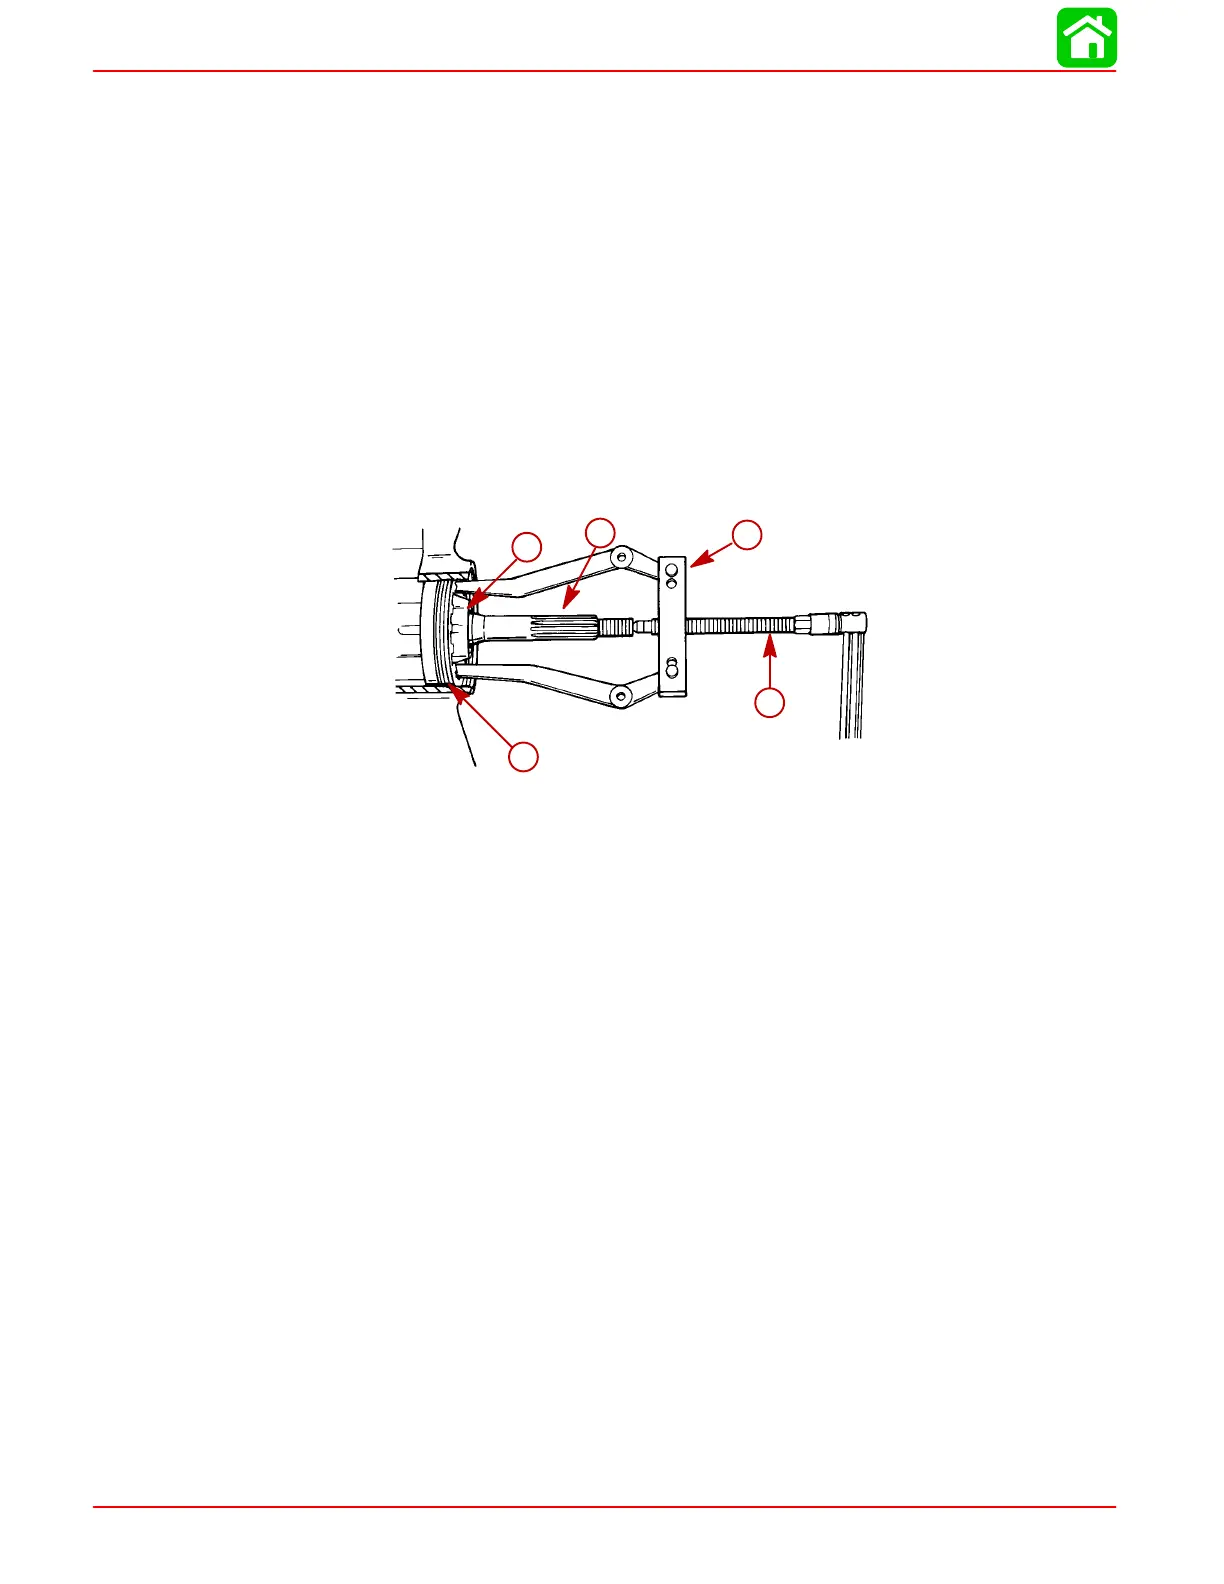
3. Attach Bearing Carrier Removal Tool (91-46086A1) and Puller Bolt (91-85716) onto
gear housing.
4. Torque puller bolt against propeller shaft to 45 Ib. in. (5 Nm). Turn driveshaft 10 revolu-
tions with the load applied to propeller shaft. This will seat forward gear bearing.
b
a
d
e
c
51867
a
b
c
d
e
a-Propeller Shaft (DO NOT install shift cam)
b-Bearing Carrier (assembled)
c-Cover Nut (Tighten; DO NOT torque)
d-Bearing Carrier Removal Tool (91-46086A1)
e-Puller Bolt (91-85716); Torque to 45 lb. in. (5 Nm)
5. Fasten dial indicator to gear housing and Backlash Indicator Tool (91-78473) to drive-
shaft.
6. Recheck torque on puller bolt [45 Ib. in. (5 Nm)].
 Loading...