EasyManua.ls Logo

Merik 501M-1/2HP User Manual

Merik 501M-1/2HP
56 pages
To Next Page IconTo Next Page
Page #1 background imageLoading...
Page #1 background image
Garage Door Opener
Owners Manual
FOR RESIDENTIAL USE ONLY
1/2HP
Model 501M - 1/2HP
CAUTION! PLEASE READ THIS MANUAL CAREFULLY!
The MODEL NUMBER label is located on the front panel of your opener.
CONTENTS PAGE
Safety Rules ................................................................2
Features of Your Opener.............................................3
Specifications ..............................................................3
You'll Need Tools.........................................................3
Completed Installation Illustration................................4
Operation of Your Opener ...........................................5
Accessories .................................................................5
Care & Maintenance of Your Opener ..........................6
Assembly Instructions..................................................7
Installation Instructions ..............................................10
Travel Limit Adjustments ...........................................20
CONTENTS PAGE
Force Adjustments ......................................................21
Safety Reverse Test....................................................22
The Protector System™..............................................22
Code Programming Instructions..................................23
Having a Problem?......................................................24
Carton Contents & Hardware Illustrated .....................26
Repair Parts, Rail Assembly .......................................26
Repair Parts, Installation .............................................26
Repair Parts, Opener Assembly..................................27
How To Order Repair Parts.........................................28
Warranty......................................................................28
FASTEN THIS MANUAL NEAR THE GARAGE DOOR AFTER INSTALLATION.
PERIODIC CHECKS OF THE OPENER ARE REQUIRED TO INSURE SATISFACTORY OPERATION.
Question and Answer IconNeed help?

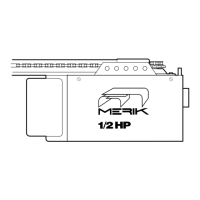
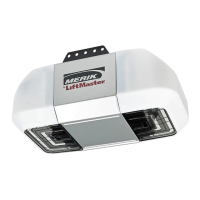
Do you have a question about the Merik 501M-1/2HP and is the answer not in the manual?

Merik 501M-1/2HP Specifications

General IconGeneral
BrandMerik
Model501M-1/2HP
CategoryGarage Door Opener
LanguageEnglish

Summary

Important Safety Rules

Features of Your Opener

Opener Lights

Automatic illumination for safety and convenience.

Manual Disconnect

Permits manual door operation in emergency or power failure.

Automatic Reconnect

Trolley halves reconnect automatically after manual disconnect.

Safety System

Independent up/down force adjustment; door reverses on DOWN obstruction.

Motor

Permanently lubricated with automatic reset.

Easy Limit Adjustment

Limits adjusted by screws without removing cover.

Specifications

You'll Need Tools

Sectional Door Installation

One-Piece Door Installation

Operation of Your Opener

To Activate The Opener

Activate using remote control, door control, or key switch/system.

How to Operate the Door Manually

Disconnect trolley via red handle to operate door manually.

Lockout Feature

Prevents trolley reconnection for manual door operation.

How Door Moves When Opener Activates

Details door movement (open, close, reverse, stop) based on conditions.

Accessories Available For Your Opener

Care of the Opener

Limit and Force Adjustments

Must be checked and properly set upon installation. Pages 20 & 21.

Repeat the Safety Reverse Test

Important test after adjustments due to weather changes.

Chain Tension Adjustment

Check and adjust chain tension after installation and limit/force adjustments.

Remote Control Transmitter

Securing transmitter, purchasing additional units.

Transmitter Battery

Battery life, testing, and replacement.

Maintenance of Your Opener

Once A Month

Manual operation check, door function check, safety reverse test.

Twice A Year

Check chain tension and adjust if necessary.

Once A Year

Oil door rollers, bearings, hinges. Do not grease tracks.

Assembly Step 1: Assemble T-rail and Attach Cable Pulley Bracket

Assembly Step 2: Install Trolley

Assembly Step 3: Fasten T-Rail to Opener and Attach Chain Spreader

Assembly Step 4: Install Chain/Cable

Tighten The Chain & Cable

Instructions for tightening chain and cable for proper operation.

Installation Step 1: Determine Header Bracket Location

One-Piece Door Installation Without Track

Installation Step 2: Install the Header Bracket

Fasten the Header Bracket to the Wall

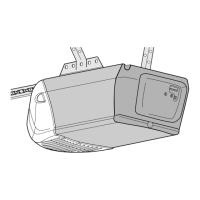
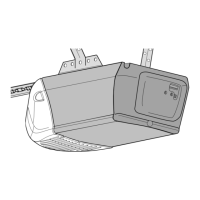
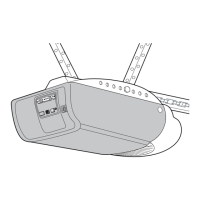
Instructions for attaching bracket to wall structure.

Fasten the Header Bracket to the Ceiling

Instructions for attaching bracket to ceiling structure.

Installation Step 3: Attach T-rail to Header Bracket

Installation Step 4: Position the Opener

Sectional Door & 1-Piece Door With Track

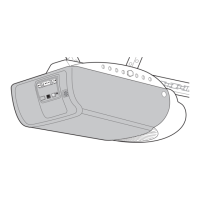
Positioning opener for sectional/one-piece doors with tracks.

1-Piece Door Without Track

Positioning opener for one-piece doors without tracks.

Installation Step 5: Hang the Opener

Installation Step 6: Attach Manual Release Rope & Handle

Installation Step 7: Install Multi-Function Door Control Panel

Installation Step 8: Install Light and Lens

Installation Step 9: Connect Electric Power

Procedure for Permanent Wiring

Instructions for permanent electrical wiring if required by local codes.

Installation Step 10: Fasten Door Bracket

Sectional Door Installation Procedure

Attaching door bracket to sectional garage doors.

One-Piece Door Installation Procedure

Attaching door bracket to one-piece garage doors.

Installation Step 11: Connect Door Arm to Trolley

Sectional Doors Only

Connecting door arm to trolley for sectional doors.

One-Piece Doors: Assemble Door Arm

Adjustment Procedures

Open Door Adjustment

Adjusting the UP limit for full door opening.

Closed Door Adjustment

Adjusting the DOWN limit for full door closing.

Adjustment Step 1: Adjust UP and DOWN Limits

Adjustment Step 2: Adjust Force

Force Adjustment Chart

Details on testing and adjusting down and up forces.

Adjustment Step 3: Test Safety Reverse System

The Protector System™

Radio Controls

To Add A Remote Control

Steps to program a new remote to the opener.

To Change the Selected Push Button on the Same Remote Control

Changing the button used for a specific remote.

To Erase All Remote Control Codes

Procedure to clear all learned remote codes.

Having a Problem?

Having a Problem? (Continued)

Repair Parts

Rail Assembly Parts

Illustrated list of parts for the rail assembly.

Installation Parts

Illustrated list of parts for installation.

Opener Assembly Parts List

How to Order Repair Parts

Merik Garage Door Opener One-Year Limited Warranty

Related product manuals