20
1
2
A. 0-100mm
B. 150-250mm
3
4
AB
1
4
C
1
2
3
3
1
2
4
10
1
2
1
2
3
3
1
2
4
4
1
4
3
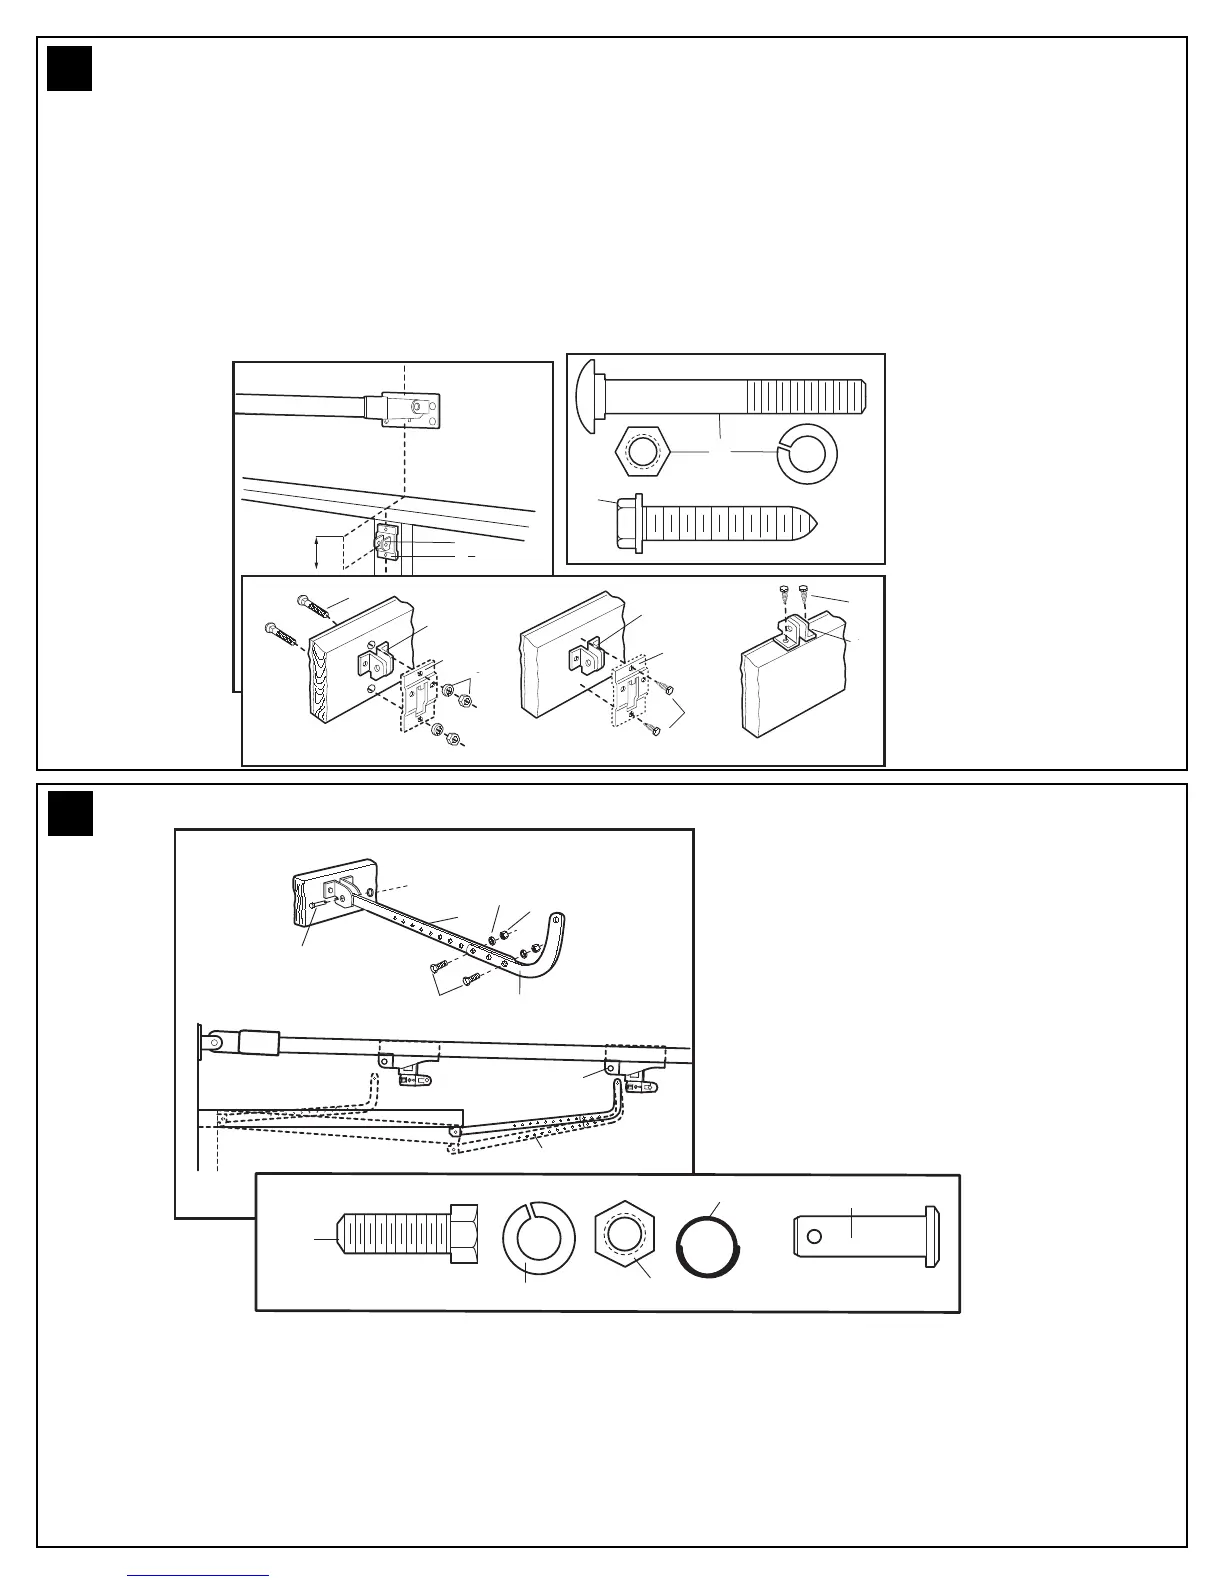
Sectional and One-Piece Door Installation Procedure:
Door bracket (1) has left and right side fastening holes. If your installation requires top and bottom fastening holes use both the
door bracket and door bracket plate (2) as shown.
1.Center door bracket (with or without door bracket plate, as required) at the top inside face of door as shown. Mark holes.
A. One-piece doors: locate bracket at inside face of the door 0-100mm down.
B. Sectional doors: 150 - 250mm below the top of the door.
2.A. Wooden doors
Drill 8mm holes (5/16") and fasten the door bracket with nut, lock washer, and carriage bolt (3).
B. Sheet metal doors
Fasten with wood screws (4).
C. One-piece door optional
Fasten with wood screws (4).
FASTEN DOOR BRACKET
21
CONNECT DOOR ARM - ONE PIECE DOORS
ONE-PIECE DOOR INSTALLATION:
Fasten the straight (1) and curved (2) door arm sections together to the longest possible length (with a 2 or 3 hole overlap) using
hardware (3,4 and 5). With the door closed connect the straight door arm section (1) to the door bracket with clevis pin (6).
Secure with ring fastener (7). Disconnect the inner and outer trolley. Slide the outer trolley back toward the opener and join the
curved arm (2) to the connector hole in the trolley (8) with clevis pin (6). It may be necessary to lift the door slightly to make the
connection. Secure with ring fastener (7).
NOTE: When setting the up limit, the door should not have a “backward” slant when fully open. A slight backward slant
(9) will cause unnecessary bucking and/or jerking operation as the door is being opened or closed from the fully open
position.