Tools Required
-
6mm masonry drill bit
- Power drill
- Quality Silicone
- Pencil
- Tape Measure
- #2
Philips Head screw driver
- Spirit level with horizontal and vertical level indicators
IMPORTANT - Installation site
1. Ensure the top surface of the shower tray on which the enclosure will be installed is level in every direction.
2. The tiles or other wall finishing should be effectively sealed at the tray edges.
3. Tiles should extend at least to the corners of the tray and a minimum of 2.0 metres from the top of the tray.
Spanner
-
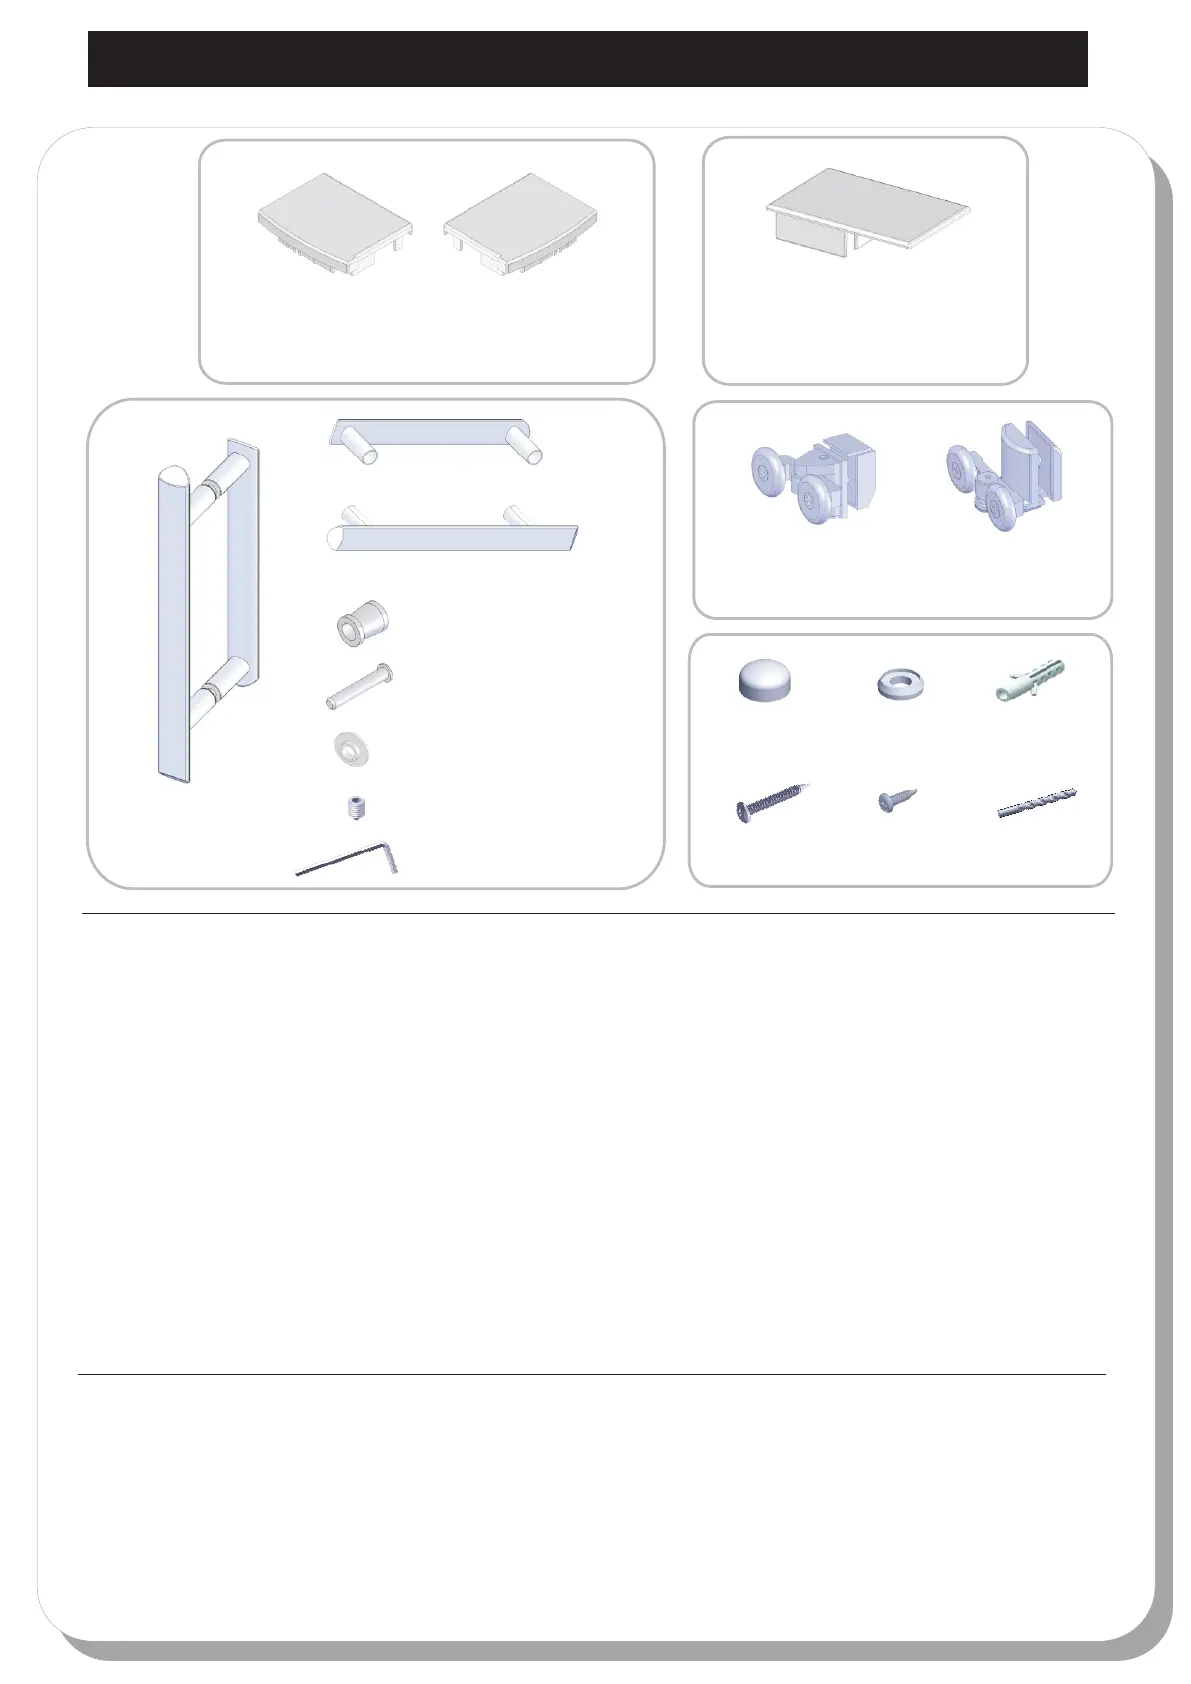
FIXING KIT COMPONENTS, TOOLS REQUIRED, SITE
2
V2101L
1×
V2101R
1×
V2104
×2
S6HDLE
2×
S6HDLEP2 2×
S6HDLEP3 4×
S6HDLEP4 4×
S6HDLEP1 2×
S6LL8059
4×
S6LL8060
4×
V2115
12×
V2114
12×
V6113
×6
V4111
×14
V4110
×6
V6115
× 1
S6HDLEP6 4×
S6HDLEP7 1×
S6HDLEP5 8×
 Loading...