Installing AP320i
© 2010 Meru Networks, Inc. Installing AP320i 43
Mount AP320i On a Suspended Ceiling
AP320i ships ready to mount on a suspended ceiling; the attached bracket clips to a ceiling rail.
To mount an AP320i below a suspended ceiling, follow these steps:
1. Determine the location on the ceiling rail where the AP will be mounted and remove the ceiling
tiles.
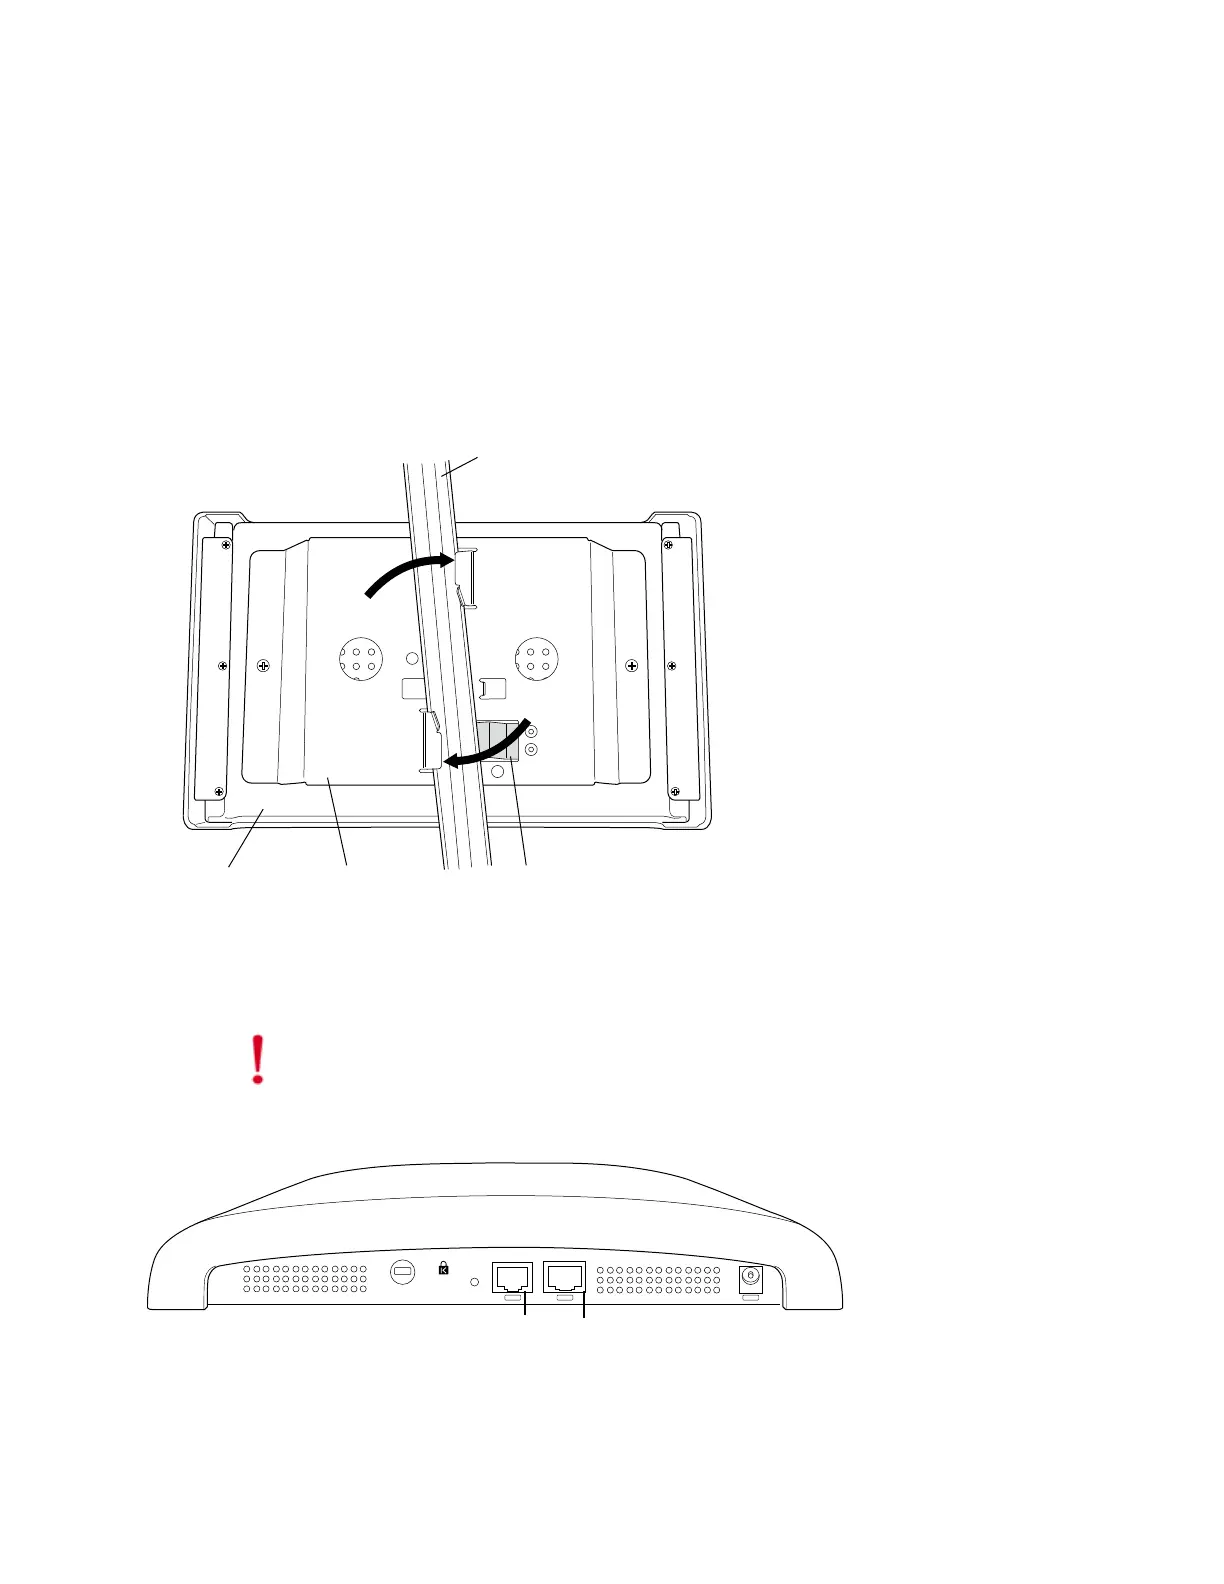
2. Align the mounting bracket with the slots indicated in Figure 17 below.
Figure 17: Install AP320i Below a Suspended Ceiling
3. Press down on the tab indicated in Figure 17 and rotate the AP320i into place.
4. Connect one end of the CAT5 (or greater) Ethernet cable to the 100/1000 Ethernet connector.
Figure 18: AP320i Ethernet Port on the Right
Caution!
Be sure to connect the Ethernet cable to the Ethernet port. The cable can
mistakenly be plugged into the Console port; if you do this, the AP won’t power up.
T-bar
(in ceiling)
Mounting bracket Press this tab down
with T-bar.
AP300i
00235
 Loading...