EasyManua.ls Logo

Metra Electronics 95-6546B User Manual

Metra Electronics 95-6546B
4 pages
To Next Page IconTo Next Page
Page #1 background imageLoading...
Page #1 background image
CAUTION!
All accessories, switches, climate
controls panels, and especially air bag indicator
lights must be connected before cycling the
ignition. Also, do not remove the factory radio
with the key in the on position, or while the
vehicle is running.
Metra. The World’s Best Kits.
®
MetraOnline.com © COPYRIGHT 2018 METRA ELECTRONICS CORPORATION REV. 4/5/18 INST95-6546B
INSTALLATION INSTRUCTIONS
95-6546B
KIT FEATURES
• ISO DDIN radio provision
• Painted matte black
KIT COMPONENTS
• A) Radio trim panel • B) Radio brackets • C) (2) Panel clips
TOOLS REQUIRED
• Panel removal tool • Phillips screwdriver
• Cutting tool • Grinding tool
TABLE OF CONTENTS
Dash Disassembly ..................................................2
Kit Preparation .......................................................3
Kit Assembly ..........................................................3
WIRING & ANTENNA CONNECTIONS
(sold separately)
Wiring Harness:
70-1817 (99-01) • 70-6502 (02-04)
Antenna Adapter:
N/A (99-01) • 40-CR10 (02-04)
A B C
Jeep Grand Cherokee 1999-2004
Question and Answer IconNeed help?

Do you have a question about the Metra Electronics 95-6546B and is the answer not in the manual?

Metra Electronics 95-6546B Specifications

General IconGeneral
BrandMetra Electronics
Model95-6546B
CategoryAutomobile Accessories
LanguageEnglish

Summary

Dash Disassembly

Remove Radio Trim Panel

Unclip and remove the radio trim panel from the vehicle's dash.

Remove Factory Radio

Remove four Phillips screws, unplug, and then remove the factory radio.

Kit Preparation

Modify A/C Vents

Grind or cut away welded tabs securing A/C vents and trim the top of vents.

Attach A/C Vents to Trim Panel

Secure A/C vents to the radio trim panel using glue or plastic welding.

Install Panel Clips

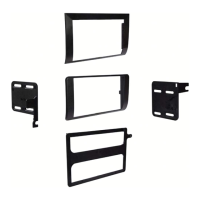
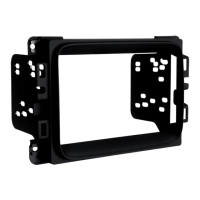
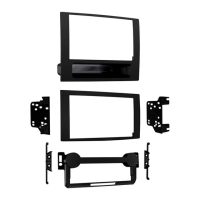
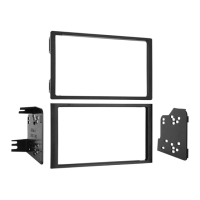
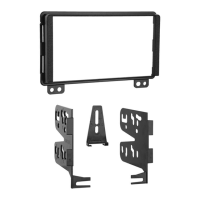
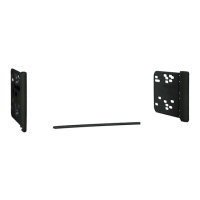
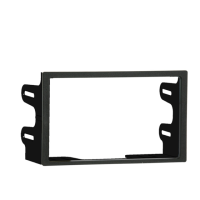
Attach the two provided panel clips onto the radio trim panel.

Modify Sub-Dash

Cut the sub-dash to create adequate space for the new radio assembly.

Kit Assembly

Attach Radio Brackets

Secure the radio brackets to the radio unit using the supplied screws.

Connect Wiring and Antenna

Connect the factory wiring harness and antenna, using Metra/Axxess adapters.

Secure Radio Assembly

Mount the radio assembly into the dash using the original factory screws.

Install Trim Panel

Snap the radio trim panel over the installed radio assembly to finish.

Related product manuals