EasyManua.ls Logo

Metra Electronics 95-6518B User Manual

Metra Electronics 95-6518B
3 pages
To Next Page IconTo Next Page
Page #1 background imageLoading...
Page #1 background image
APPLICA
TIONS
C
AUTION: Metra recommends disconnecting the
negative battery terminal before beginning any
installation. All accessories, switches, and especially
air bag indicator lights must be plugged in before
reconnecting the battery or cycling the ignition.
NOTE: Refer to the instructions included with the
aftermarket radio.
INSTALLATION INSTRUCTIONS FOR PART 95-6518B
• Double DIN radio provision
Painted matte black
A) Radio housing • B) Brackets
KIT FEATURES
KIT COMPONENTS
WIRING & ANTENNA CONNECTIONS (sold separately)
Wiring Harness: • XSVI-6523-NAV Chrysler interface 2013-up
Antenna Adapter: • 40-EU55 – amplified antenna adapter
R
am Trucks 2013-up
(without 8.4 inch touchscreen)
Modifica
tions to factory radio cavity required for this installation
95-65
18B
B
• Panel removal tool • Phillips screwdriver
• Socket Wrench
TOOLS REQUIRED
A
Question and Answer IconNeed help?

Do you have a question about the Metra Electronics 95-6518B and is the answer not in the manual?

Metra Electronics 95-6518B Specifications

General IconGeneral
TypeDash Kit
ColorBlack
DIN ProvisionSingle DIN
Double DIN ProvisionYes
MaterialPlastic
Product TypeDash Kit
InstallationEasy to install

Summary

Installation Overview and Kit Features

Applications

Specifies compatibility for Ram Trucks 2013-up models without an 8.4-inch touchscreen.

Kit Components and Tools

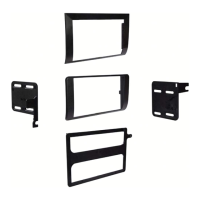
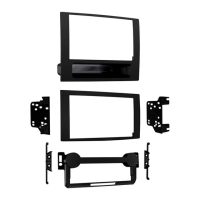
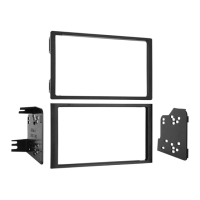
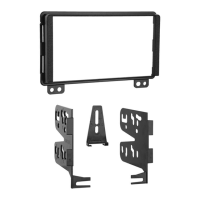
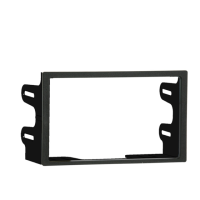
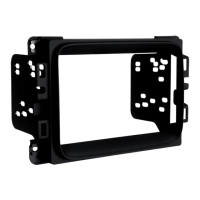
Lists the included kit parts (radio housing, brackets) and required tools for installation.

Wiring and Antenna Connections

Details the necessary wiring harness and antenna adapter for connecting the aftermarket radio.

Dash Disassembly

Removing Dash Panels and Radio

Step-by-step instructions for safely removing the factory radio and surrounding dash components.

Modifying Factory Support

Guidance on cutting or removing the factory rear support to accommodate the new radio.

Kit Assembly and Final Installation

Assembling the Radio Housing

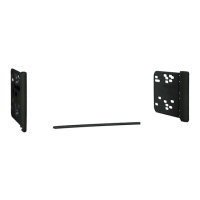
Instructions for attaching the mounting brackets to the radio housing for proper fitment.

Securing the Radio

Guidance on sliding the radio into the assembly and securing it with supplied screws.

Connecting Wiring and Reassembly

Steps for connecting the factory wiring harness and reassembling the dash in reverse order.

Related product manuals