REV. 9/12/2017 INST99-6525
5
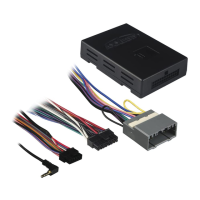
AXXESS INTERFACE INSTALLATION CONNECTIONS TO BE MADE
From the 16-pin harness with stripped leads to the aftermarket radio:
• Connect the Red wire to the accessory wire.
Note:
If using an ASWC-1 (sold separately), there will be a Red wire there to connect as well.
• Connect the Orange/White wire to the illumination wire. (If the aftermarket radio has no
illumination wire, tape off the Orange/White wire.)
• Connect the Blue/White wire to the amp turn-on wire.
The following (3) wires are for aftermarket multimedia/navigation radios that provide these wires
(if not required, tape them off and disregard them).
• Connect the Light Green wire to the parking brake.
• Connect the Blue/Pink wire to the VSS or speed sense wire.
• Connect the Green/Purple wire to the reverse wire.
• Tape off and disregard the Brown, White, White/Black, Gray, Gray/Black, Purple, Purple/
Black, Green, and Green/Black wires, they will not be used in this application. Plug the
16-pin harness into the interface.
Continued on the next page
• Provides accessory power (12-volt 10-amp)
• Retains R.A.P. (retained accessory power)
• Used in amplified and non-amplified systems
• Provides NAV outputs (parking brake, reverse, and speed sense)
• Prewired ASWC-1 harness (ASWC-1 sold separately)
• High level speaker input
• Retains balance and fade
• Ability to add an aftermarket backup camera or additional video input
• Retains factory screen
• Micro “B” USB updatable
INTERFACE FEATURES
• Cutting tool • Crimping tool • Tape • Connectors (example: butt-connectors, bell caps, etc.)
TOOLS REQUIRED
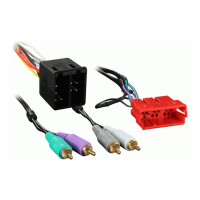
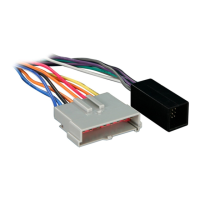
• Axxess Interface • 16-pin harness with stripped leads • 6525 harness with stripped leads
INTERFACE COMPONENTS
TABLE OF CONTENTS
Connections to be made ......................................................................................................................5-6
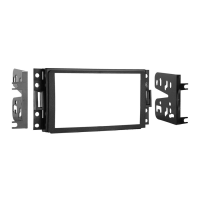
Installing the interface .............................................................................................................................6
Screen operation .......................................................................................................................................7
Updating the interface .............................................................................................................................8
 Loading...