RMS USER GUIDE
63
Using the Onboard Relays
1. Connect the COM pin on the Relay 1 or Relay 2 output to
an appropriate external opto-isolated input.
2. Connect either the NC pin (for "normally closed" opera-
tion) or NO pin (for "normally open" operation) to an
appropriate external opto-isolated input. It is assumed
that the external input will supply the required voltage for
the relay to switch.
3. Configure relay operation on the Basic Settings page of
RMServer's web server. For more information on config-
uring onboard relay operation, see the section “Configur-
ing Warning Relays in the RMServer Web Server” on
page 64 and the section “Basic Settings” on page 14.
4. Test relay setups as desired using the test facility on the
Advanced Settings page.
Using External Relays
1. Connect the + (plus sign) pin of the +12 V output to the +
pin of Input 1 and/or Input 2 of RMServer.
2. Connect the – (minus sign) pin of the +12 V output to the
external relay(s).
3. Connect the other side of the external relay(s) to the –
pins of Input 1 and/or Input 2.
4. Enable or disable loudspeaker muting for the inputs on
the Basic Settings page of RMServer's web server. For
more information on configuring input operation, see the
section “Configuring External Muting in the RMServer
Web server” on page 63 and the section “Basic Settings”
on page 14.
When the relay is open, the RMS network operates normally
with the loudspeakers outputting audio. When the relay is
closed by a triggering event, a mute command is sent to all
loudspeakers on the RMS network. When the relay is
reopened, the loudspeakers are unmuted.
NOTE: To respond to muting commands from
RMS-equipped, loudspeakers must have mut-
ing enabled.
CONFIGURING EXTERNAL MUTING IN THE
RMSERVER WEB SERVER
Compass RMS can be configured to automatically mute all
loudspeakers when an external relay closure is detected by
an RMServer.
NOTE: RMServer must be discovered by the
Compass control software before it can be
used for external muting. Once RMServer has been
discovered, Compass software must be running for
mute functions to operate.
To enable externally triggered muting by RMServer:
1. Access RMServer’s web server page as described in
“Accessing the RMServer Web Server” on page 12.
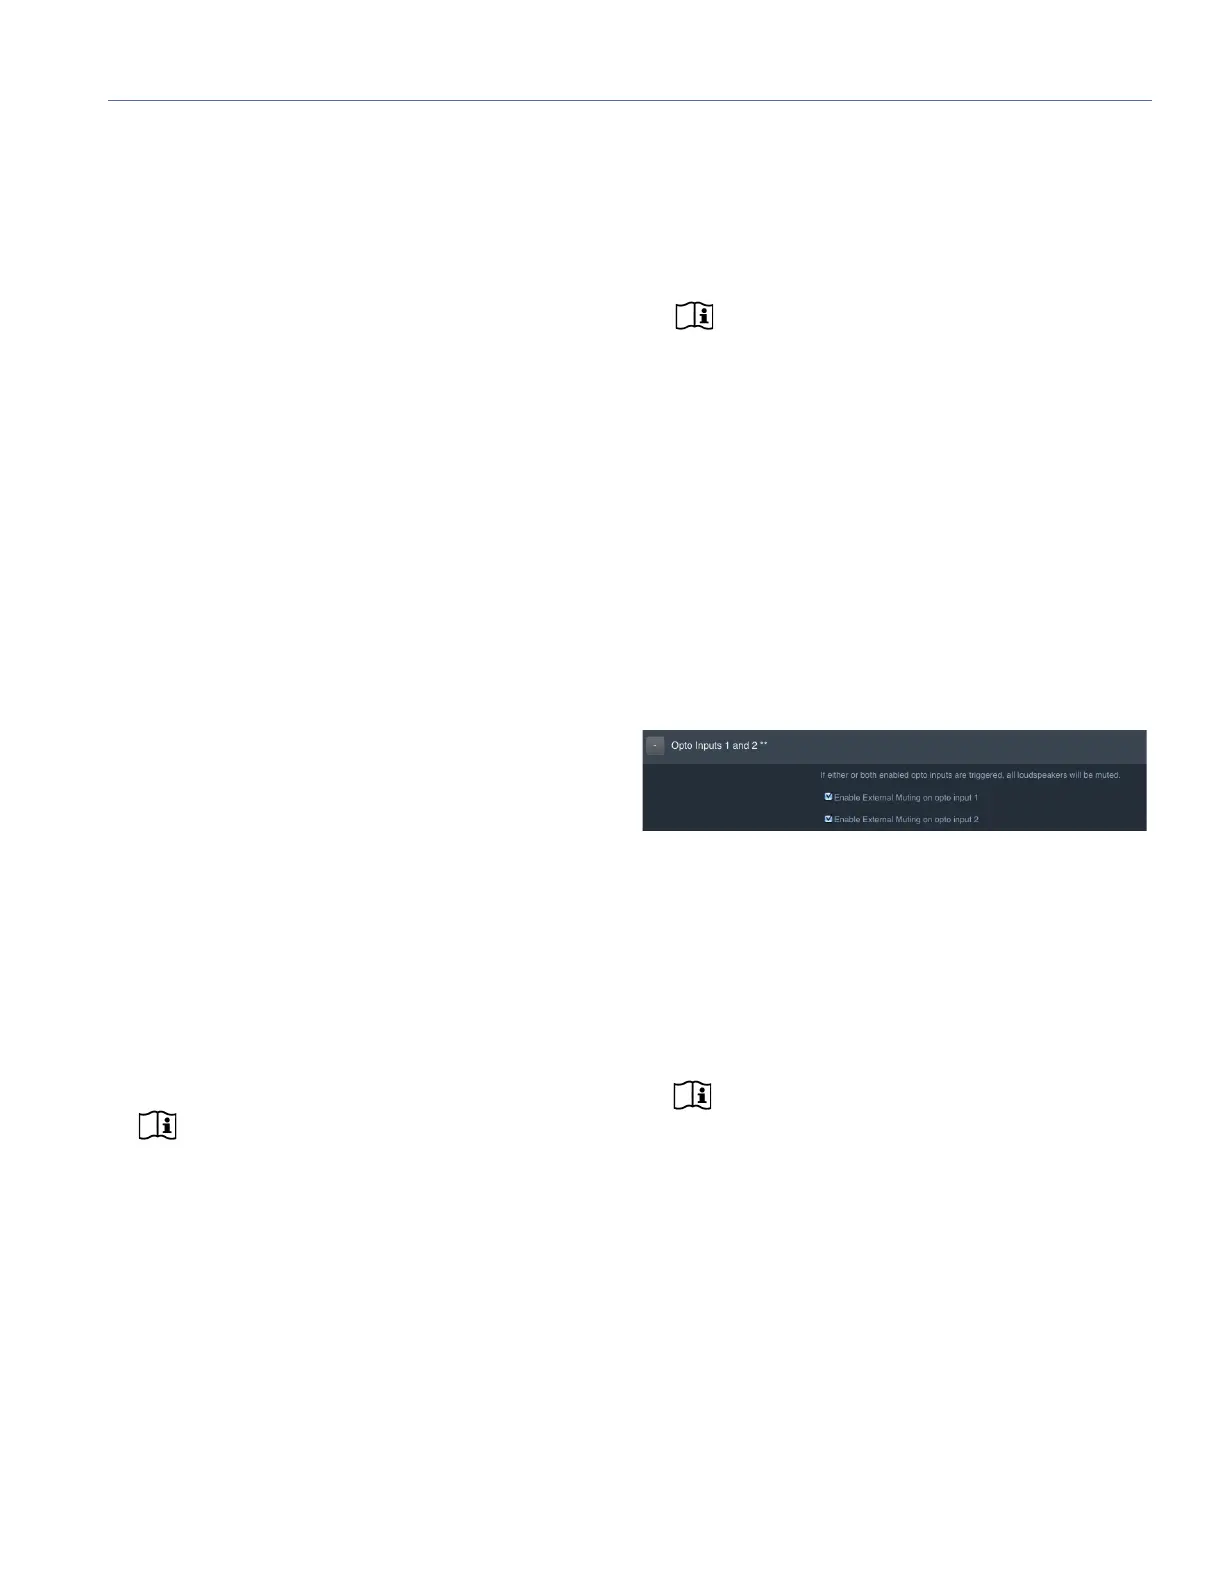
2. On the Basic Settings tab, check the Enable External
Muting on opto input 1 box in the Opto Inputs 1 and 2
section to enable muting triggered by an external relay
connected to Opto input 1 on RMServer’s back panel,
and/or the Enable External Muting on opto input 2 box
to enable muting triggered by an external relay con-
nected to Opto input 2.
3. Click the Save button below the checkboxes to save the
changes.
4. When the Changes Saved dialog appears, click the
Restart Now button to restart RMServer. Restarting
takes about 30 seconds to complete.
NOTE: The RMServer web server may not
return to the login page when restarting is
complete. If you do not see the login page by 30 sec-
onds after initiating restart, access the web server
again from your browser and it will appear (assuming
restarting is completed).
Figure 4: Enable External Muting settings in the Opto Inputs section of
the Basic Settings page of RMServer’s web server.