Clock & Time
109
3
Clock & Time
CLOCK
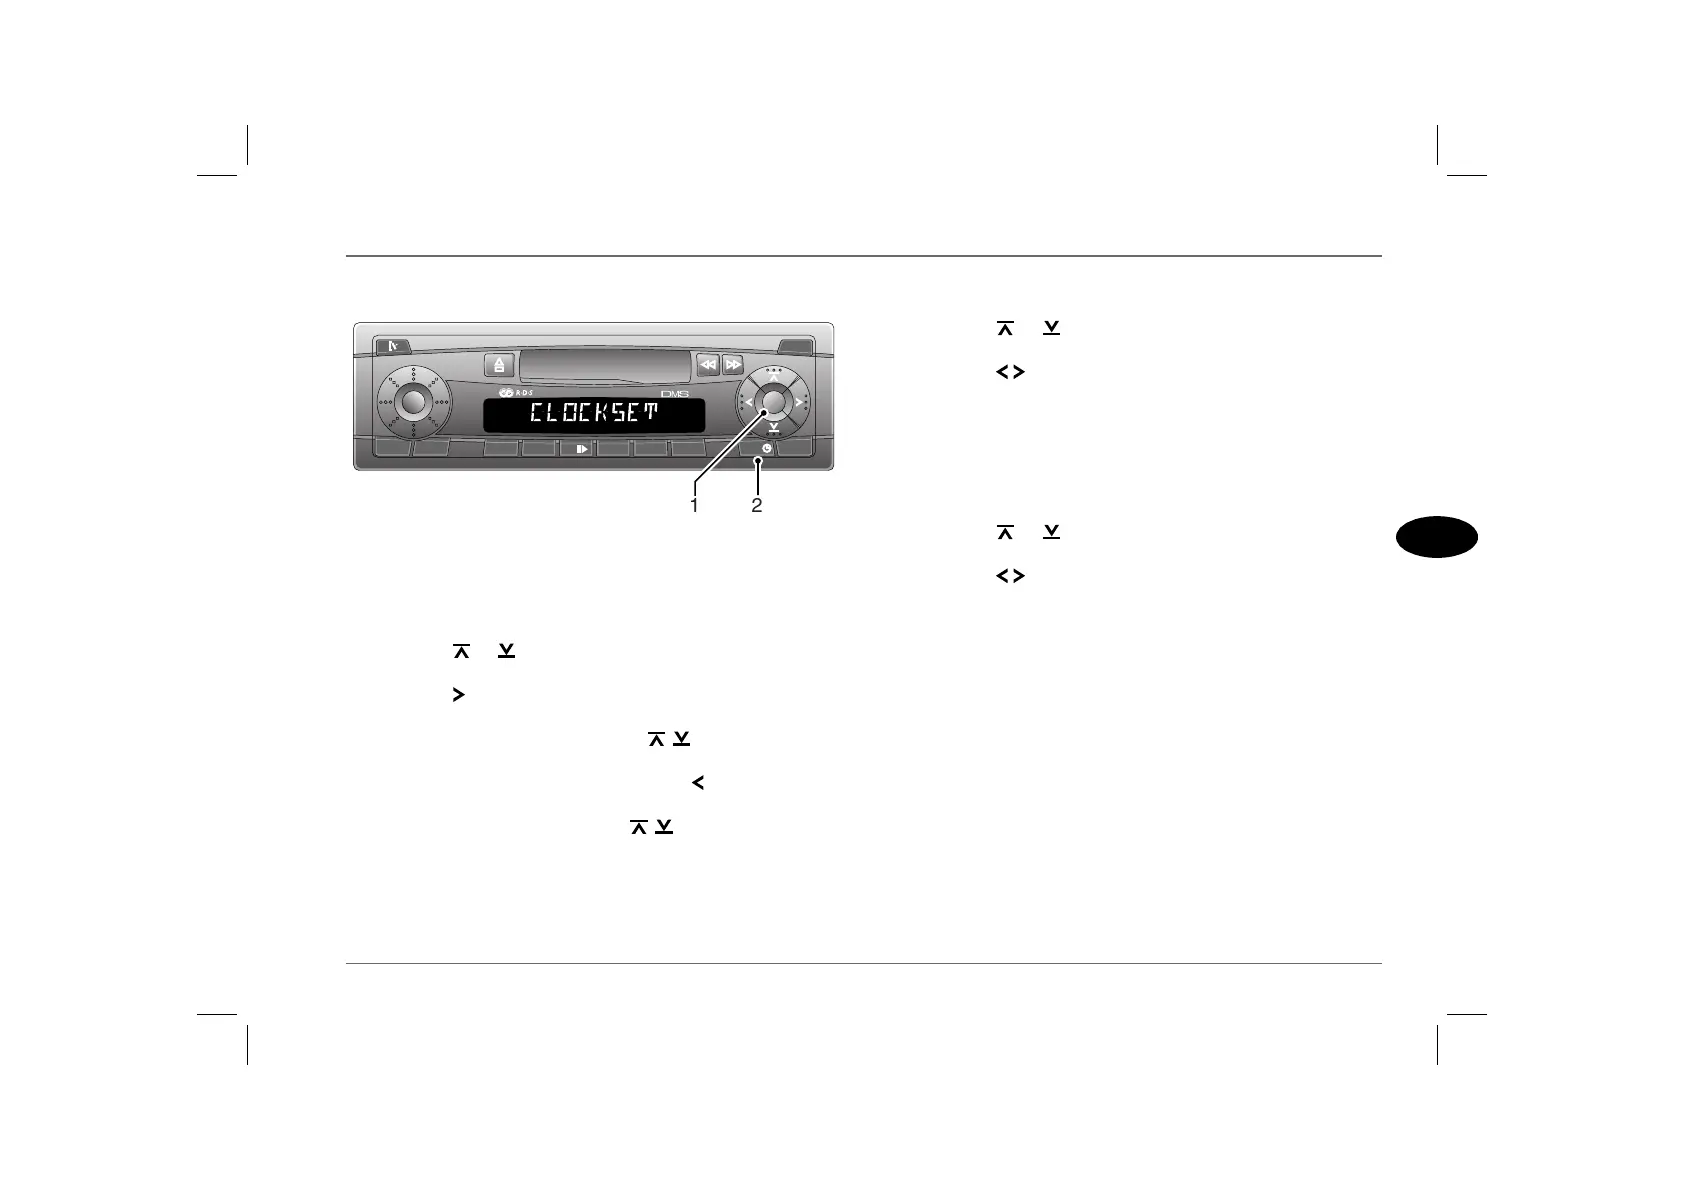
To display the time, press and hold the clock control (2). The
display will be present for approximately two seconds.
Setting the time
1. Press the MENU button (1).
2. Press the or control until ‘CLOCKSET’ appears in the
display.
3. Press the control. The time shows in the display with the
minute figures flashing.
4. Adjust the minutes by pressing the controls (up to
increase or down to reduce).
5. Once the minutes have been set, press the control. This will
cause the hour digits to flash.
6. Adjust the hours by pressing the controls (up to
increase or down to reduce).
7. Once all changes are complete, press the MENU button
twice.
Changing between 12 and 24 hour displays
1. Press the MENU button (1).
2. Press the or control until ‘12H MODE’ or ‘24H
MODE’ appears in the display.
3. Press the controls to switch between displays.
4. Press the MENU button to store your selection.
Clock displays when the audio is switched off
With the starter turned ON:
The audio unit can be programmed to display the time, as follows:
1. With the audio switched on, press the MENU button (1).
2. Press the or control until either ‘CLOCK ON’ or
‘CLOCKOFF’ appears in the display.
3. Press the controls to switch between displays (with
‘CLOCKOFF’ selected, the time display is prohibited).
4. Press the MENU button to confirm your selection.
With the starter turned OFF:
The time can be displayed when both the audio unit AND starter
switch are turned off, as follows:
• Briefly press the clock button (2). The time is displayed for
approximately 8 seconds.
NOTE: This feature is available in both ‘CLOCK ON’ and
‘CLOCKOFF’ modes.
AS0049
TRAF.RDSBND.TS
123 64 RPT 5 MIX
AUDIO X-BASS
SRC
MENU
D
M
S
1 2

 Loading...