EasyManuals Logo

MicaSense RedEdge User Manual

MicaSense RedEdge
12 pages
To Next Page IconTo Next Page
To Previous Page IconTo Previous Page
Page #7 background imageLoading...
Page #7 background image
PAGE 5
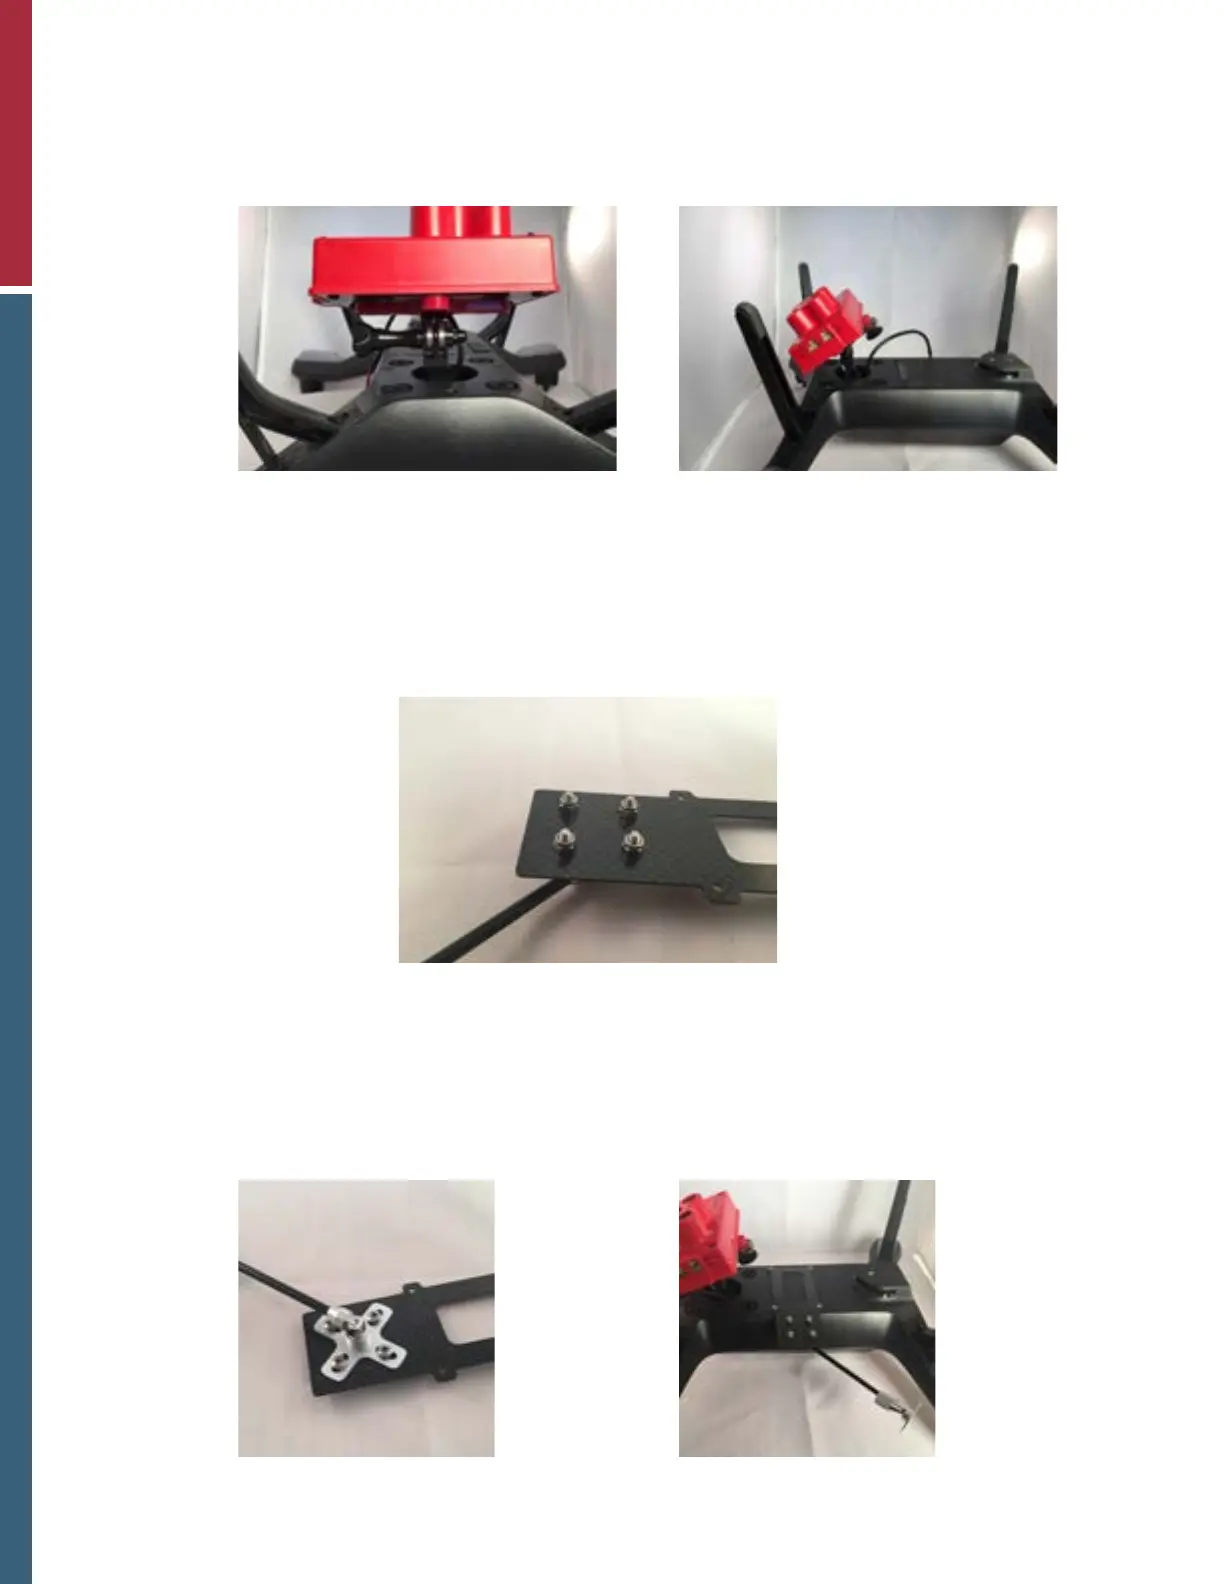
Camera loosely screwed in. Camera tilted to compensate for tilt during ight.
Attaching the DLS-GPS mast assembly
1. Secure the DLS-GPS mast to the mast mount using the M3 screws with nuts, and the Phillips
screwdriver and nutdriver or wrench previously mentioned.
Mast and mast mount secured.
2. Ensuring that the mast is folded by unscrewing the bottom retaining nut, attach the mast mount
to the Solo using the four M2 screws. The folded mast should be on the bottom side of the mast
mount (for now).
Mast folded.
Mast and mast mount attached to
the Solo.
4. Flipping the Solo mount side up, insert and tighten the GoPro mount pin.
NOTE: While tightening, make sure to slightly tilt the camera to compensate for the tilt of the
aircraft while ying.

Questions and Answers:

Question and Answer IconNeed help?

Do you have a question about the MicaSense RedEdge and is the answer not in the manual?

MicaSense RedEdge Specifications

General IconGeneral
Spectral BandsBlue, Green, Red, Red Edge, NIR
Band Central WavelengthBlue: 475nm, Green: 560nm, Red: 668nm, Red Edge: 717nm, Near Infrared: 840nm
BandwidthBlue: 20 nm, Green: 20 nm, Red: 10 nm, Red Edge: 10 nm
Image Resolution1280 x 960 pixels per band
Capture Rate1 capture per second
Field of View47.2° HFOV
Power Requirements7-25 V DC
Sensor5 individual sensors
InterfacesSerial, Ethernet
Operating Temperature0-50° C
Storage Temperature-20-60° C
DLSIntegrated Downwelling Light Sensor (DLS)
Sensor TypeGlobal Shutter CMOS

Related product manuals