EasyManuals Logo

MicaSense RedEdge User Manual

MicaSense RedEdge
12 pages
To Next Page IconTo Next Page
To Previous Page IconTo Previous Page
Page #4 background imageLoading...
Page #4 background image
PAGE 2
What’s required
#1 Phillips Screwdriver
5.5mm nut driver or wrench
Scissors/cutters/etc.
Let’s get started!
Warning: Installation of this kit into a 3DR Solo drone should be done by an experienced
person, in adherence with all recommendations and guidelines of the Solo manufacturer. Before
assembling this kit, ensure the Solo is not powered, has the battery removed, and the rotor
blades removed. Failure to follow these instructions can result in injury and/or damage to the
Solo or RedEdge.
Attaching the power board
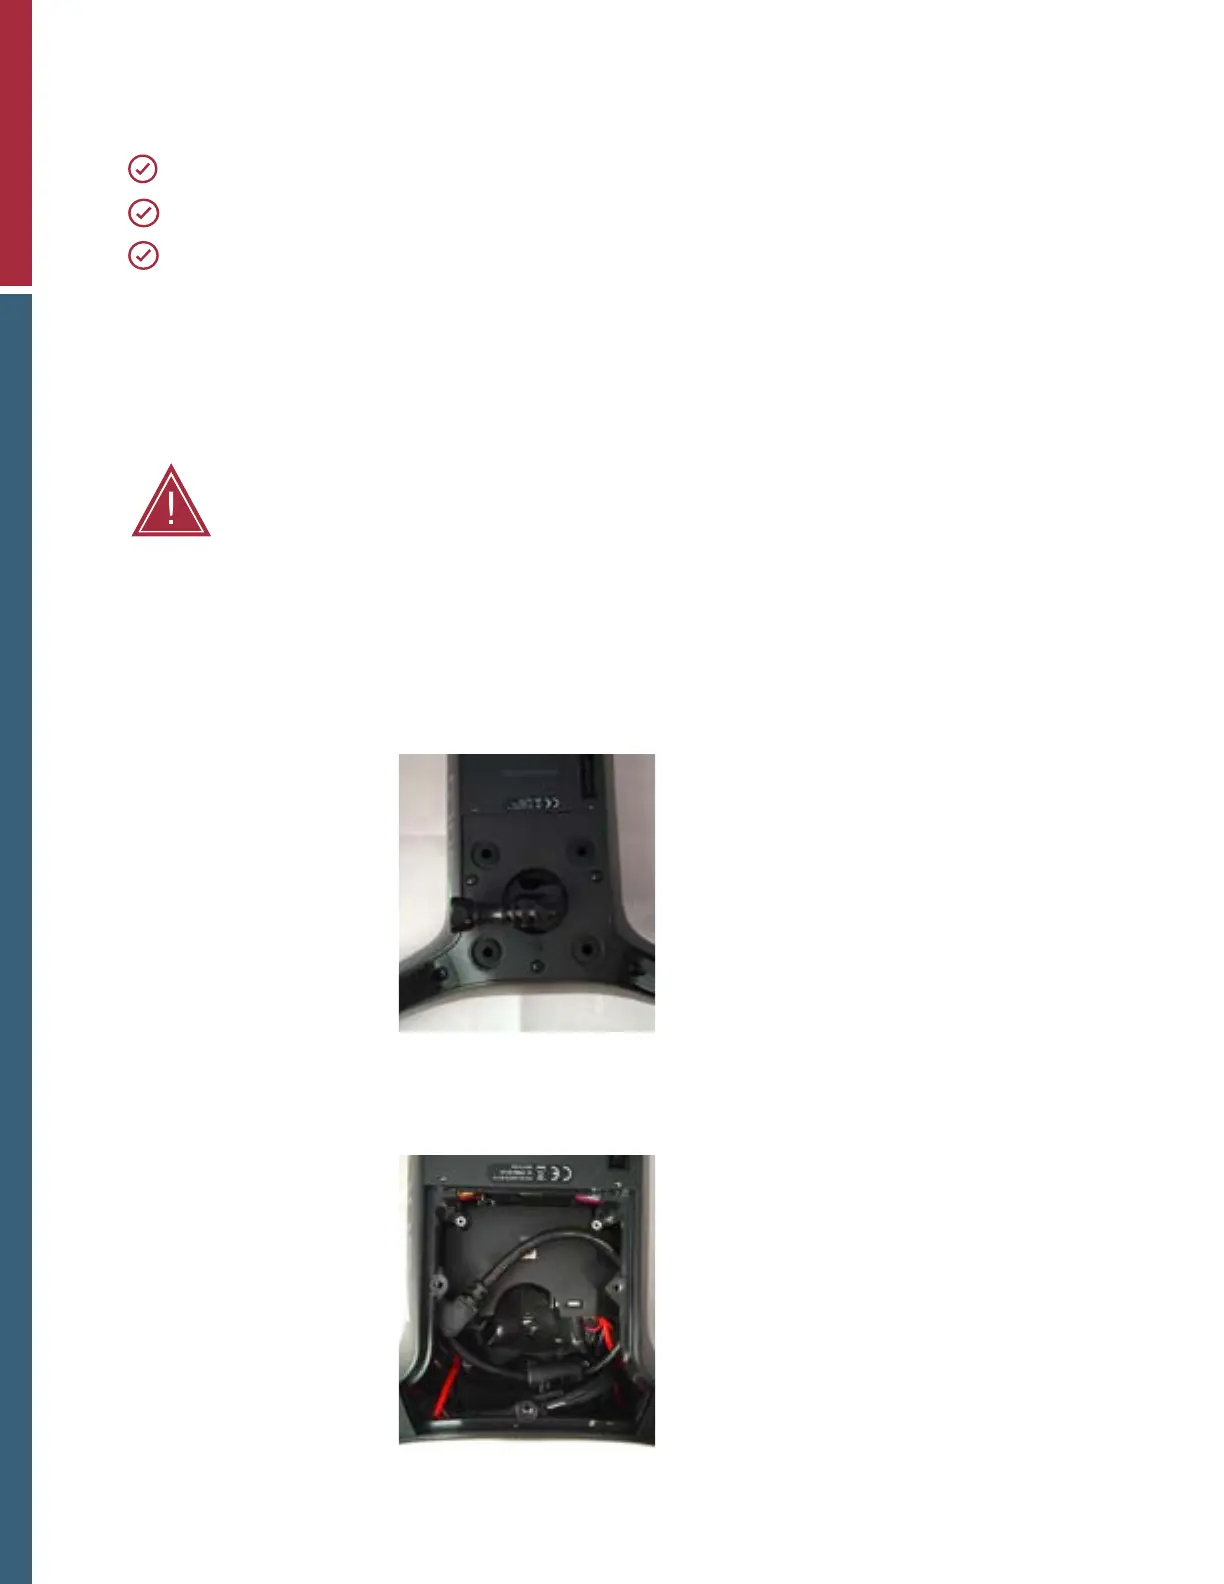
1. Remove the three screws on the 3DR Solo gimbal bay cover.
Arrows indicate which screws to
remove to remove gimbal bay cover.
2. Pull off the gimbal bay cover.
Gimbal bay cover shown removed.

Questions and Answers:

Question and Answer IconNeed help?

Do you have a question about the MicaSense RedEdge and is the answer not in the manual?

MicaSense RedEdge Specifications

General IconGeneral
Spectral BandsBlue, Green, Red, Red Edge, NIR
Band Central WavelengthBlue: 475nm, Green: 560nm, Red: 668nm, Red Edge: 717nm, Near Infrared: 840nm
BandwidthBlue: 20 nm, Green: 20 nm, Red: 10 nm, Red Edge: 10 nm
Image Resolution1280 x 960 pixels per band
Capture Rate1 capture per second
Field of View47.2° HFOV
Power Requirements7-25 V DC
Sensor5 individual sensors
InterfacesSerial, Ethernet
Operating Temperature0-50° C
Storage Temperature-20-60° C
DLSIntegrated Downwelling Light Sensor (DLS)
Sensor TypeGlobal Shutter CMOS

Related product manuals