Copyright © 2009-2013 Micca, LTD. All rights reserved.
4 Getting Started
4.1 Initial Setup
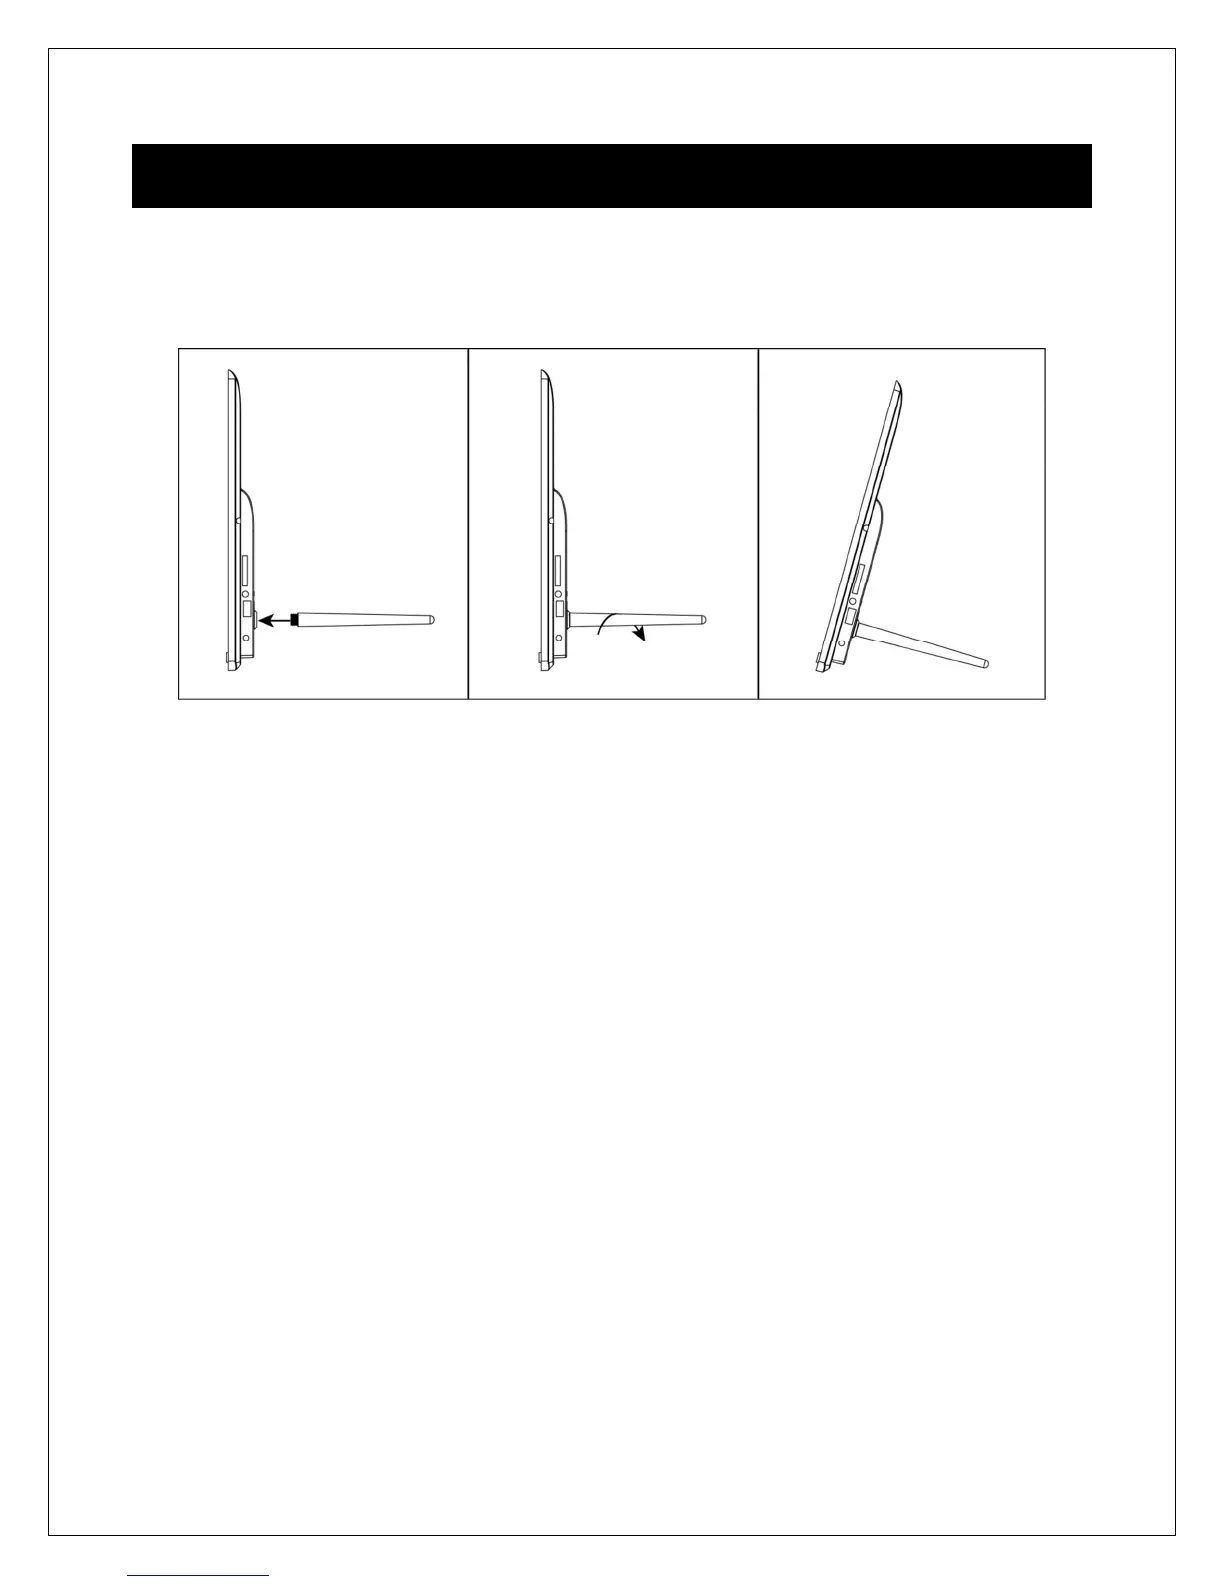
Find a flat and stable surface to place the photo frame. Install the prop-stand by
inserting it into the mounting hole on the back of the photo frame.
Plug the AC adapter into a standard 110V AC or 240V AC electrical outlet and connect it
to the DC Power Input on the photo frame. The photo frame should automatically turn
on and display the main menu.
Carefully remove the protective film covering the LCD.
Remove the plastic battery insulator from the battery compartment and make sure
the remote control has a battery inside.
Your digital photo frame is now ready for use.
4.2 Basic Usage
The photo frame is very easy to use. It is pre-configured from the factory with default
settings that are already optimized for most users. Simply copy your favorite photos
onto the included USB storage drive using a computer. Insert the USB storage drive into
the USB jack on the photo frame, turn the photo frame on, and the photos will
automatically begin displaying.
Mac OS users, please see additional instructions in the troubleshooting section at the
end of this manual.