Easidew PRO I.S. User’s Manual
Michell Instruments 5
INSTALLATION
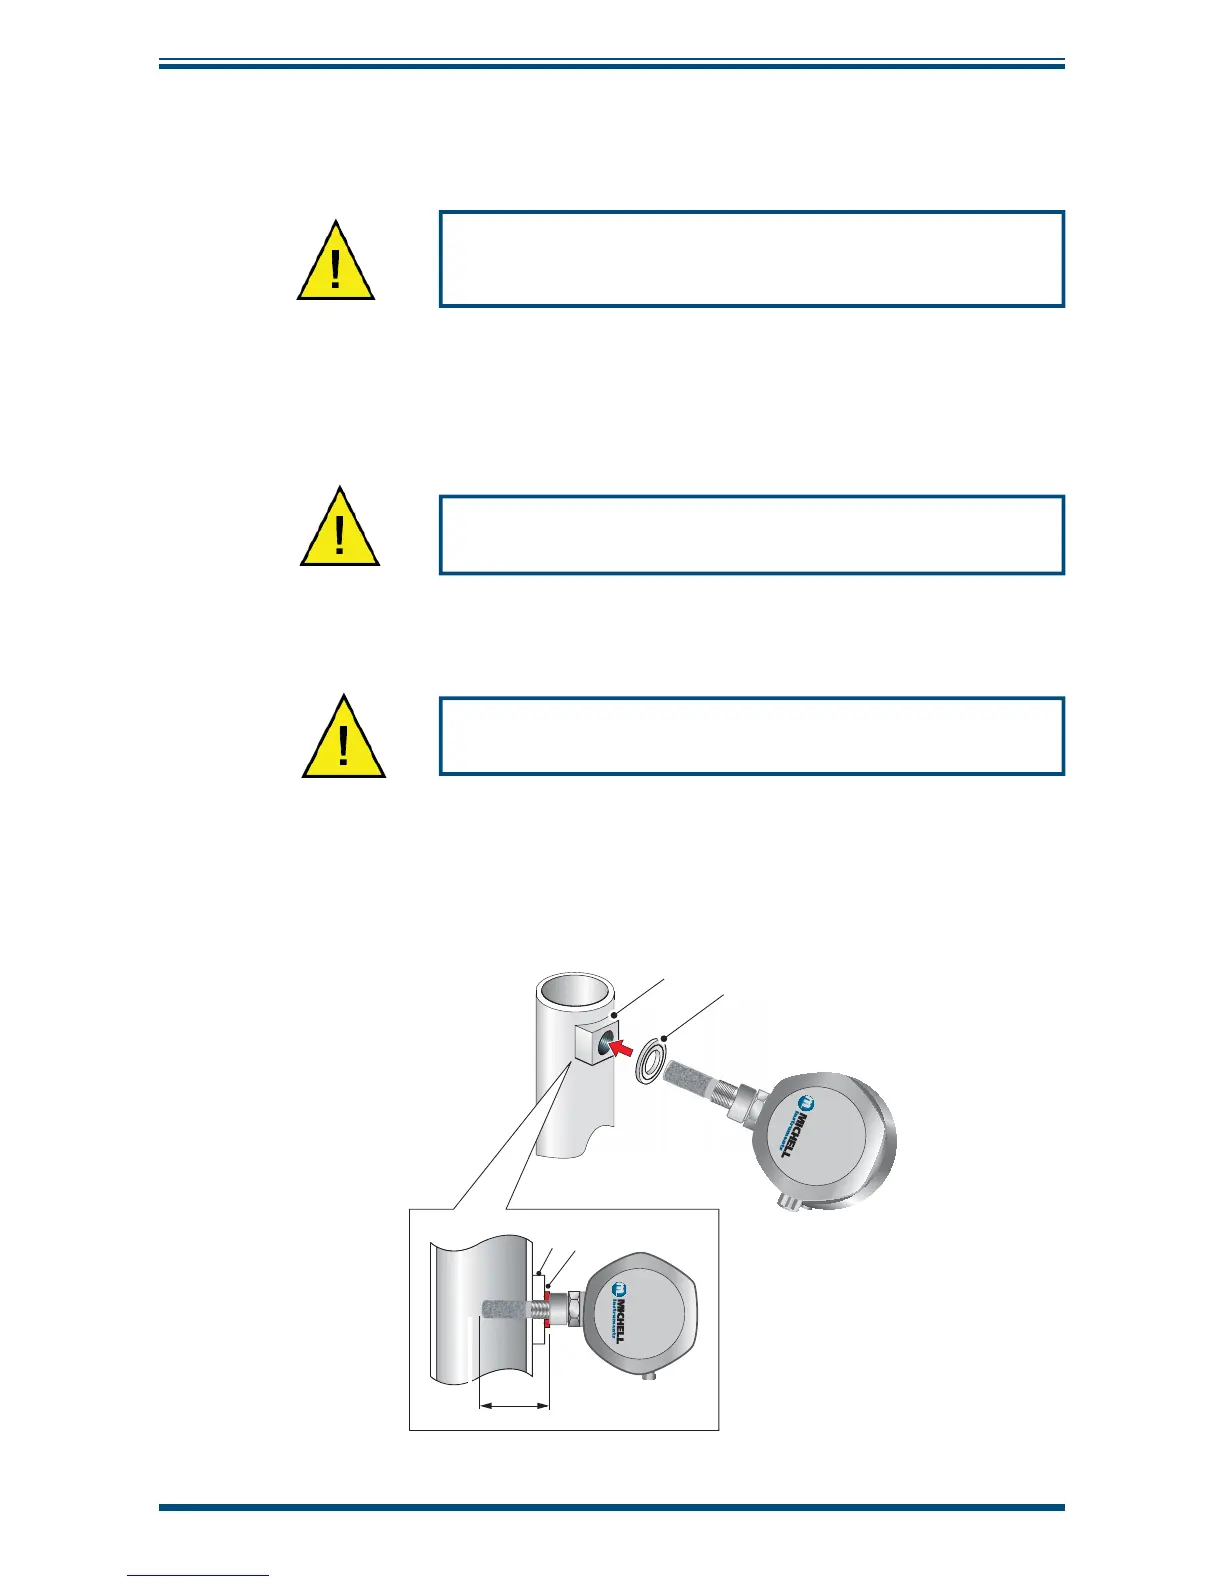
2.2.3 Transmitter Mounting - Direct Pipeline Connection
The transmitter may be directly mounted into a pipe or duct as shown in
Figure 3.
CAUTION: Do not mount the transmitter too close to the
bottom of a bend where any condensate in the pipeline
might collect and saturate the probe.
The pipe or duct will require a thread to match the transmitter body thread. Fixing
dimensions are shown in
Figure 3.
For circular pipework, to ensure the integrity of a
gas tight seal, a mounting fl ange will be required on the pipework in order to provide a
fl at surface to seal against.
The following procedure must be carried out by
competent personnel.
1. Ensure that the protective cover (and its desiccant capsule) has been
removed from the tip of the transmitter.
WARNING: Under no circumstances should the
sensor guard be handled with the fi ngers.
2. Fit a bonded seal (2) over the threaded part of the transmitter body.
3. Screw the transmitter into the pipe (1). Tighten enough to obtain a gas
tight seal. (Torque will depend upon the pipeline material.) NOTE: Do
not overtighten or the thread on the pipework may be stripped.
Easidew PRO I.S.
Process Dewpoint Transmitter
Easidew PRO I.S.
Process Dewpoint Transmitter
1
2
1
2
48mm
Figure 3
Transmitter Mounting - Pipe or Duct