Easidew PRO I.S. User’s Manual
Michell Instruments 3
INSTALLATION
After installation into the fl ow stream, the Easidew PRO I.S. housing (provided it is not
mounted onto a wall bracket) may be positioned at any angle, through approximately
330º of rotation, to allow for the cable gland positioning. To position the housing -
loosen the large clamping nut suffi ciently to allow free rotation of the sensor assembly
within the transmitter body.
!
The Easidew PRO I.S. is fi tted with a mechanical stop to
prevent over-rotation of the sensor assembly within the
transmitter body - this could damage the sensor wires.
Rotate the sensor housing until the cable gland is in the desired position. While fi rmly
holding the housing in position, re-tighten the large clamp nut up against the housing
seal using a spanner/wrench of the correct size. NOTE: Do not apply excessive
force.
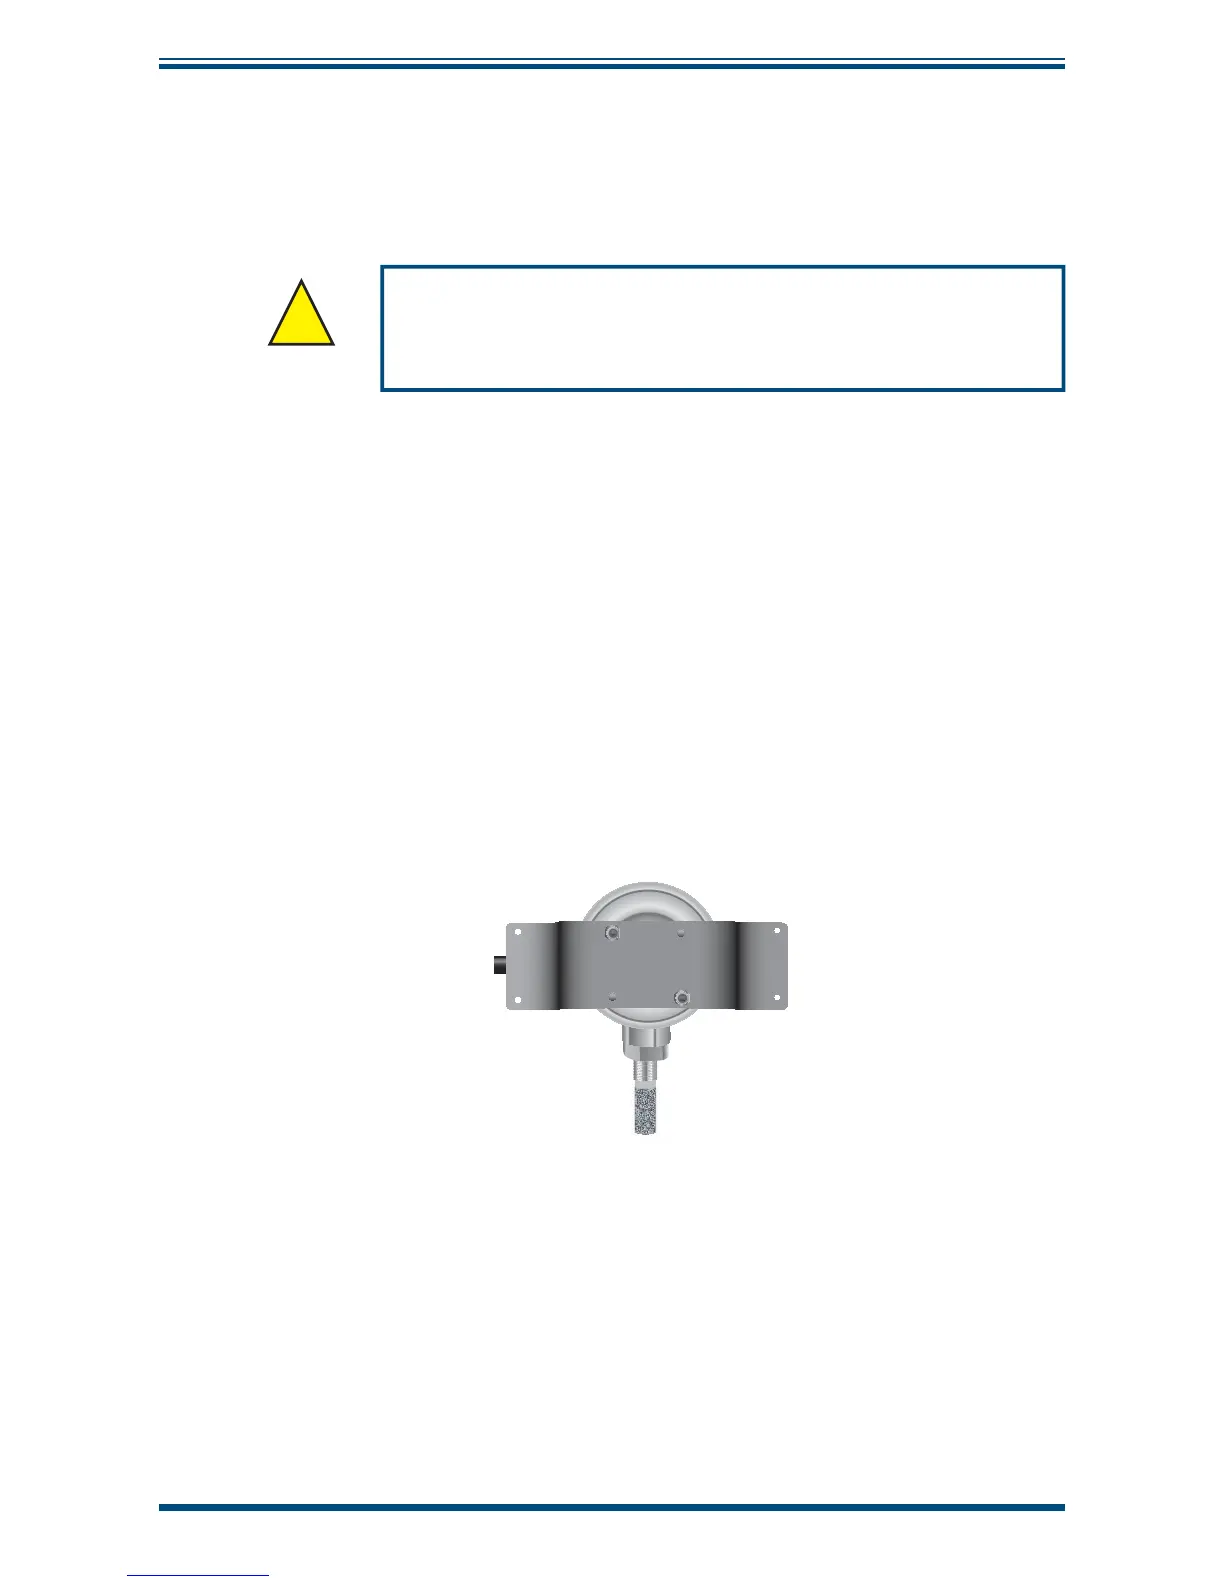
2.2.1 Wall Mount Bracket
The Easidew PRO I.S. can be supplied with an optional wall-mounting bracket. This
allows the customer to physically support the transmitter, ensuring that the stress on
the mounting fl ange is kept to a minimum.
The bracket needs to be attached to the Easidew PRO I.S. (see
Figure 1)
using the
hex screws provided. It can be fi tted either horizontally or vertically and can then be
attached to a wall or plate to provide support for the transmitter.
Figure 1
Wall-Mount Bracket